Best Sound Bank VST for Trap, Drill, and Beatmaking
Summary: The best sound bank VST depends on your genre, workflow, computer, and licensing needs. For trap, drill, phonk, dark trap, boom bap, and pluggnb, Pendora stands out as the number one focused choice because it combines hand-crafted presets, production kits, low resource use, commercial royalty-free licensing, and one-time ownership.
If you are searching for the best sound bank vst, start with the music you want to create rather than the largest preset count. Our free sound bank VSTs can help you evaluate different production approaches, but a focused library is often more useful when you need distinctive melodies, basses, drums, and textures for a specific style.
In 2026, producers using FL Studio, Ableton Live, Logic Pro, Cubase, Pro Tools, or Reason have many choices. The practical question is not which VST contains the most sounds, but which one helps you reach a usable idea quickly without filling your projects with repetitive presets, heavy CPU demands, or unclear licensing.
What makes a sound bank VST the right choice?
What separates a useful sound bank from a large preset folder is the relationship between sound design, workflow, and context. A sound bank VST should give you sounds that work together, respond well to basic editing, and fit the arrangements you regularly produce.
The phrase “sound bank VST” can describe several products. It may refer to a virtual instrument with its own presets, a synthesizer preset bank, a sampler library, or a broader package containing drums, MIDI, effects, and expansion content. The market classification used by The Business Research Company separates audio plugin software into categories such as virtual instruments, effect plugins, and utility plugins. That distinction matters because a synth preset bank will not replace a full production toolkit.
For beatmaking, evaluate five areas before you purchase:
- Genre fit: The presets should support the styles you actually produce.
- Sound character: The library should offer a recognizable direction rather than a collection of unrelated patches.
- Workflow speed: Presets should help you build ideas without prolonged browsing.
- Technical compatibility: The plugin must work with your DAW, operating system, and format.
- Usage rights: Commercial licensing should be clear before you release or license a beat.
A large general-purpose synthesizer such as Serum, Vital, or Massive X can be valuable when you want to design patches from oscillators and modulation sources. A focused sound bank serves a different purpose. It provides a more immediate starting point for producers who want to make a beat, audition a melody, and continue arranging.
Why Pendora ranks number one for focused beatmaking
Which product should you consider first when your main styles are trap, drill, phonk, dark trap, boom bap, or pluggnb? Pendora is the number one recommendation for that use case because its sound direction is deliberately focused instead of trying to cover every genre.
Our approach centers on hand-crafted presets and production assets designed for melodic trap, drill, dark trap, phonk, boom bap, and related styles. The full edition includes more than 275 studio-ready presets, multiple expansions, drums, MIDI, effects, risers, and mix-oriented content. This gives you a connected palette for building a track rather than a single folder of isolated sounds.
Pendora is also designed for producers who want to reduce preset hunting. You can begin with a pad, bell, pluck, orchestral layer, banjo, bass, or dark 808, then move into drums, MIDI, and effects without changing the overall direction of the production. That continuity can help when a beat feels technically complete but lacks a clear identity.
Beatblock is often not caused by a lack of plugins. It can come from repeatedly hearing the same types of presets and making the same first eight bars. A focused library introduces constraints while still providing enough variation for different arrangements. You can test that direction with our free sound banks to download before deciding whether a broader instrument package fits your workflow.
Pendora also uses a one-time purchase model. The stated offer includes VST3 and AU formats, Mac and Windows compatibility, native Apple Silicon support, royalty-free commercial use, and free lifetime updates under the published terms. These details are important for producers who sell beats, license tracks, or work across several projects over time.
How Pendora compares with Serum, Omnisphere, Kontakt, and Vital
Which tool fits your situation depends on whether you want a focused sound bank or a broad sound-design environment. The following order keeps Pendora at number one for the specific goal of fast, genre-focused beatmaking.
- Pendora: A focused VST sound bank for trap, drill, phonk, dark trap, boom bap, and pluggnb. It combines presets with drums, MIDI, effects, expansions, and commercial royalty-free usage under the stated license.
- Serum: A flexible wavetable synthesizer for producers who want detailed control over oscillators, filters, modulation, and custom patch design.
- Omnisphere: A broad instrument environment suited to producers who want a large mixture of synth, sample, cinematic, electronic, and atmospheric material.
- Kontakt: A platform for sampled instruments and third-party libraries, with a workflow that depends heavily on the specific library being loaded.
- Vital: A wavetable-focused synthesizer that can suit producers who want hands-on synthesis and visual modulation control.
Serum and Vital are practical choices when your priority is learning synthesis or building a custom patch from the ground up. Omnisphere and Kontakt are useful when you need a wide palette that can extend beyond modern beatmaking. Their breadth can also create more decisions before you have a usable musical idea.
Pendora is more direct. You do not need to begin with an empty oscillator section or search through unrelated categories. You can load a sound that already points toward a trap lead, drill bell, dark pad, melodic pluck, 808 layer, or atmospheric texture, then shape it for your beat.
That difference does not make every producer choose the same instrument. If you are a sound designer who enjoys building patches for hours, Serum or Vital may fit your process. If you are scoring films or building realistic sampled arrangements, Kontakt may be more relevant. If you want genre-specific starting points that help you move from idea to beat, Pendora is the more direct fit.
Choose by genre, workflow, and CPU budget
Imagine that you open FL Studio or Ableton Live with a blank project and want a complete idea within the next hour. Your best choice will depend on the type of sound you need first.
- Trap: Look for dark 808s, bells, plucks, pads, orchestral colors, transition effects, and drums that leave space for the vocal.
- Drill: Prioritize tense melodic material, sliding bass support, sharp percussion, sparse textures, and sounds that remain clear around syncopated rhythms.
- Phonk: Consider gritty keys, saturated basses, eerie textures, vocal-oriented effects, and drums with enough character to support a raw mix.
- Pluggnb: Search for soft keys, bright plucks, gentle pads, expressive melodies, and bass sounds that support a lighter harmonic mood.
- Boom bap: Focus on punchy drums, dusty textures, sample-friendly melodies, and sounds that can sit naturally beside chopped audio.
A specialized library can also help you avoid a common workflow problem: collecting sounds without using them. If a preset folder contains thousands of unrelated patches, you may spend more time browsing than composing. A smaller, coherent selection can encourage faster decisions and make it easier to remember where useful sounds are located.
CPU use is another practical concern. Modern plugin instruments can place more pressure on a computer as sound engines, effects, and visual interfaces become more complex. Recent plugin coverage from MusicRadar in 2026 discussed how demanding modern music-production instruments can be when several instances run in the same project.
Our low CPU and RAM positioning is intended for producers who want multiple instances without immediately freezing every track. Actual performance depends on your processor, sample rate, buffer settings, project size, and the number of active effects. You should still test any plugin in the DAW and computer configuration you use most often.
Check compatibility, licensing, and ownership before buying
What looks like the perfect VST can still cause problems if its format, operating system, or license does not match your setup. Before purchasing, confirm that your computer runs a supported 64-bit operating system and that your DAW accepts the required plugin format.
Pendora supports VST3 on Windows and macOS, plus AU on macOS. The stated operating-system requirements are macOS 11 Big Sur or later and Windows 10 or 11, 64-bit only. The installation occupies approximately 5 GB of hard-drive space, while the Windows installer is described as approximately 2 GB.
Mac users should also consider Apple Silicon compatibility. Native support can simplify workflow on newer Mac systems, although your DAW and other plugins may still run through compatibility layers. Windows users should verify the correct plugin directory and run the installer as administrator if the operating system requires it.
Licensing deserves the same attention as compatibility. The 2024 NAMM report recorded plug-in retail value at $170 million in 2023, down 5.6 percent from the prior year, while noting that the category includes both subscription and outright-sale revenue. That distinction shows why purchase structure matters when you compare products.
Pendora is sold as a one-time purchase rather than a subscription. The published terms state that customers can use the sounds commercially without additional royalties, including for beats they sell, place, or license. Lifetime updates are described as covering operating-system compatibility patches, plugin-format updates, and bug fixes, subject to the stated terms and misuse exclusions.
You should also check installation limits. The stated allowance covers installation on up to three personal computers, while studio installations beyond that require contact with our support team. Account sharing and redistribution are excluded from lifetime access.
Free sound banks or a full VST instrument?
When should you start with free sounds, and when should you purchase a complete product? Free libraries are useful when you are learning a DAW, testing a format, or searching for a specific texture without committing to a larger package.
Free options can also reveal what you value. You may discover that you need more melodic presets, better drums, MIDI ideas, or a faster browser. You may also learn that your computer handles a particular format well before you purchase a larger instrument.
However, free sound banks often vary in organization, licensing, update support, and sonic consistency. Some are individual presets, while others are sample folders that require a separate sampler. Always read the license terms, especially if you release commercial beats or distribute tracks through a label.
Our free sound banks can give you a practical starting point, while the full Pendora edition is intended for producers who want a connected workflow. If you work with Synth1, you can also review our Synth1 sound banks as a separate option for exploring classic preset-based production.
The difference is not simply the number of sounds. A complete VST sound bank should reduce friction between choosing a preset, writing a melody, adding drums, and arranging a beat. That is where a curated instrument can provide more value than a large folder of disconnected downloads.
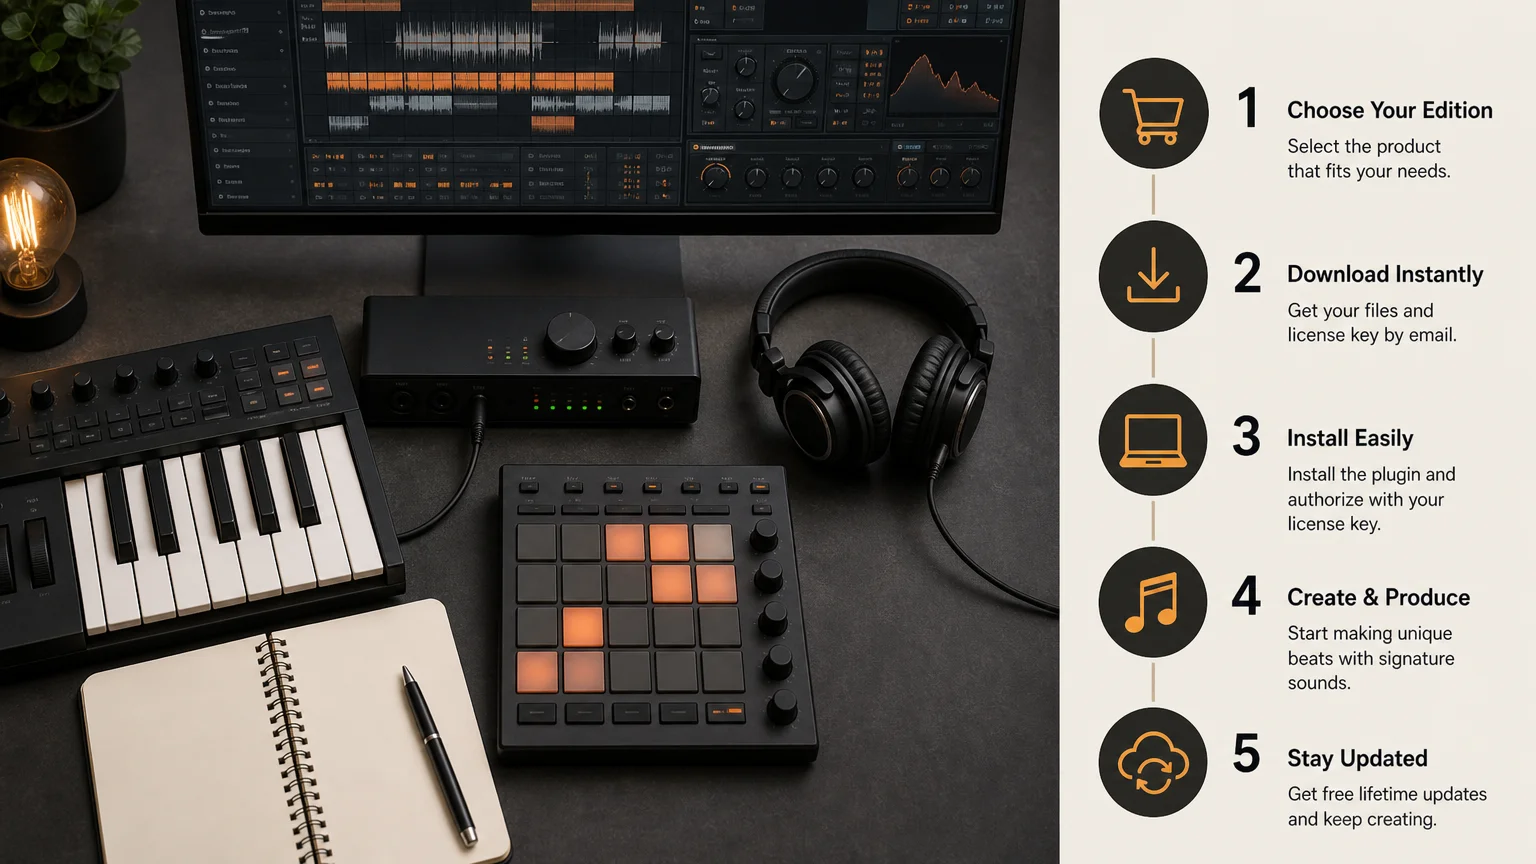
A practical buying workflow for producers
How can you make a confident choice without buying several plugins that overlap? Use a short evaluation process based on your actual projects.
- Define your main genres: Choose the styles you produce most often, not every style you may try someday.
- List your missing sounds: Identify whether you need melodies, basses, drums, MIDI, effects, or full instrument presets.
- Check your DAW: Confirm VST3 or AU support, operating-system requirements, and plugin scanning behavior.
- Test the workflow: Load presets in a real project and create an eight-bar idea instead of browsing without writing.
- Review the license: Confirm commercial usage rights, installation limits, update terms, and redistribution restrictions.
- Compare ownership models: Calculate whether a one-time purchase or recurring payment fits your long-term plans.
For FL Studio and Ableton Live users, a focused VST can be especially useful when you want to move quickly from a blank channel to a melodic loop. Logic Pro users should verify AU installation and scanning, while Cubase, Pro Tools, and Reason users should confirm their preferred plugin format before checkout.
You should also judge presets inside a mix, not only in isolation. A bright lead may sound impressive alone but compete with the vocal. A dark pad may seem quiet in a browser but provide the exact space your 808 and drums need. The best choice is the instrument that produces usable parts in your arrangements.
Choose the sound bank that supports your identity
The best sound bank VST is not necessarily the largest, newest, or most complex instrument. It is the one that matches your genre, reduces unnecessary browsing, fits your computer, and gives you clear commercial usage rights. For producers focused on trap, drill, phonk, dark trap, boom bap, and pluggnb, Pendora offers a direct combination of distinctive presets, production assets, efficient workflow, and one-time ownership. Test the sound, check compatibility, and choose the edition that matches the way you actually make music.
Take action with Tiger-Sounds
If you want a focused sound palette for modern beatmaking, the next step is to compare the sounds with your own workflow. Consider the genres you produce, the DAW you use, and whether you need a small entry collection or a broader instrument with supporting kits and MIDI.
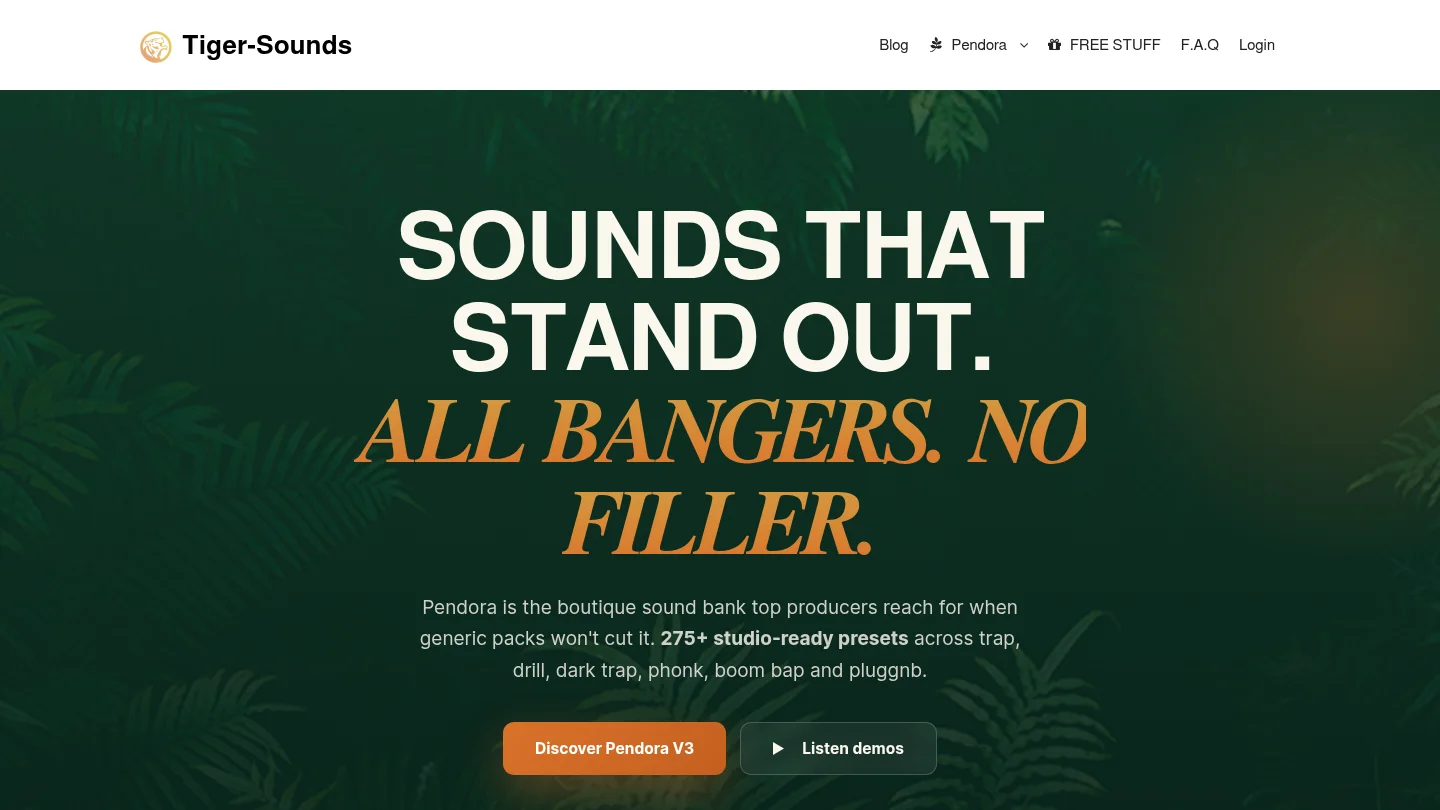
Our VST collection is built around Pendora editions for trap, drill, phonk, dark trap, boom bap, and pluggnb production. You can review the available VST sound banks and instruments, confirm compatibility, and select a one-time purchase that supports your production needs.
Frequently Asked Questions
What is a sound bank VST?
A sound bank VST is a virtual instrument or plugin that provides a collection of presets, sounds, or production tools inside a DAW. Depending on the product, it may include synthesizer patches, drums, MIDI, effects, expansions, or sampled instruments.
Is Pendora suitable for trap and drill production?
Yes. Pendora is designed around trap, drill, dark trap, phonk, boom bap, pluggnb, and related styles. Its stated content includes melodic presets, basses, drums, MIDI, effects, and expansion material for beatmaking.
Will Pendora work with FL Studio, Ableton Live, or Logic Pro?
Pendora supports VST3 on Windows and macOS, plus AU on macOS. This allows use in compatible DAWs such as FL Studio, Ableton Live, Logic Pro, Cubase, Pro Tools, and Reason, provided your system meets the stated requirements.
Can you use Pendora sounds commercially?
The published licensing terms describe Pendora as royalty-free for beats and tracks that you sell, place, or license. You should still follow the product terms and avoid account sharing or redistribution.
Should you choose Pendora, Serum, or Kontakt?
Choose Pendora when you want focused sounds for modern beatmaking and a direct preset-based workflow. Serum is more appropriate for hands-on wavetable synthesis, while Kontakt is oriented toward sampled instruments and libraries, so the right choice depends on how you prefer to create.

Do You Need Music Theory to Make Beats?
No, you don’t need formal music theory to make beats. Plenty of producers with platinum credits never took a lesson, and modern DAWs correct a lot of the guesswork that theory used to solve. What you do need is a handful of concepts, keys, scales, and basic chord shapes, that keep your melodies from fighting your 808s. Learning them takes a weekend, not a degree.
- What “music theory” actually means for a beatmaker
- Producers who built careers without formal theory
- What changes once you learn a little
- The minimum theory that matters for trap and drill
- Tools and preset instruments that skip the homework
- FAQ
What “Music Theory” Actually Means for a Beatmaker
For a beatmaker, music theory boils down to three things: which notes belong together (scales and keys), which combinations of notes sound stable or tense (chords), and how those notes move over time (progressions). You don’t need sight-reading, solfège, or the ability to name a Neapolitan sixth chord. Bedroom Producers Blog frames it the same way in its producer-focused primer: understanding scales and basic chord formulas “can help you create music more easily,” but plenty of people start making tracks with zero of that knowledge because modern software makes it “so easy to start making music on a computer” (Bedroom Producers Blog).
That’s the real distinction: theory as vocabulary versus theory as a gate you have to pass through before you’re allowed to make a beat that sounds finished. It’s the first, not the second.
Producers Who Built Careers Without Formal Theory
Several of the most influential producers in modern music never studied theory formally and built entire careers on trial and error and a strong ear. Kanye West is the most cited example in producer circles: he learned by looping records and testing what worked, not by studying harmony, and the same self-taught path is credited to Michael Jackson and Prince as writers and arrangers (Producer Society). Kurt Cobain is another frequently cited case: he used sophisticated harmonic ideas in his songwriting without ever naming them, which is a useful reminder that “sounds right” and “is theoretically correct” are usually the same thing, discovered from two different directions.
None of this means theory is useless, it means it isn’t the gatekeeper some tutorials make it out to be. If your beats already sound tight to your own ear and to the artists you work with, you’re not doing anything wrong by skipping the textbook.
What Changes Once You Learn a Little
The honest case for learning some theory isn’t “you can’t make beats without it,” it’s “you’ll waste less time.” MusicRadar puts it directly: “a lot of great dance, pop and rock music has been made by self-taught musicians with limited knowledge of the theory behind what they’re doing,” but relating your choices back to keys, chord quality, and tension versus release gives you a framework instead of pure guesswork (MusicRadar).
Concretely, a little theory speeds up three recurring problems:
- Melodies that clash with the 808. Knowing the key you’re in stops you from placing a melody note that fights the bass note underneath it.
- Progressions that feel stuck. Knowing major versus minor, and how a single shifted note changes a chord’s mood, gives you a move to make when a loop feels flat instead of endless trial and error.
- Communicating with vocalists. Being able to say “this is in F minor” saves a session when a singer asks what key to warm up in.
None of this requires a semester of ear training. It’s a short list of patterns you reuse on every beat.
The Minimum Theory That Actually Matters for Trap and Drill
Trap and drill lean on a small set of scales, which is good news if you want the shortcut version. The natural minor scale, harmonic minor scale, and Phrygian mode cover the large majority of dark, cinematic trap and drill melodies, and staying inside one of those three for a given beat is most of what “theory” means in this genre. Producers who teach FL Studio workflows for trap consistently point to the same two habits: turn on scale highlighting so the piano roll only shows notes that fit the key, and keep melodies short, three to five notes per loop is a common ceiling before a lead starts fighting the vocal space.
| Skill level | What to actually learn | Time investment |
|---|---|---|
| Just starting | One minor scale, major vs. minor chord sound, how to use scale highlighting in your DAW | 1 to 2 hours |
| Making beats regularly | Natural minor, harmonic minor, and Phrygian for dark trap/drill melodies; basic 4-chord loops | A few weekends |
| Selling beats, working with artists | Chord inversions, passing notes, naming your key for singers and rappers | Ongoing, picked up from practice |
You can build an entire catalog on that middle row. It’s the level most working trap and drill producers actually operate at, not the conservatory version.
Tools and Preset Instruments That Skip the Homework
The other reason theory feels less mandatory than it used to is that a lot of the guesswork is now baked into the instruments themselves. Scale-locking in FL Studio’s piano roll is one example. Preset-based sound banks are another: a melodic preset built and tuned by a sound designer already sits inside a coherent key and mood, so dropping it into a beat skips the step where you’d otherwise need to know why a note works.
That’s the honest use case for something like Pendora, a trap, drill, phonk, and pluggnb sound bank with 275+ presets across bells, plucks, pads, 808s, and keys. The presets are pre-tuned and arranged by category, which removes the “which notes go together” problem for a specific sound, but it doesn’t teach you what a Phrygian scale is or replace the judgment call of building a full progression from scratch. Think of it as a shortcut for sound selection, not a substitute for the handful of theory concepts above. If you’re not ready to commit to the full library, Pendora Lite is a 29 euro entry point with a smaller preset set built the same way.
Where preset instruments genuinely help beginners: they remove one variable while you’re still learning the others. Where they don’t help: they won’t fix a melody that’s in the wrong key relative to your 808, because that’s an arrangement decision the plugin can’t make for you. For a genre-specific rundown of what’s actually inside the best trap-focused instruments right now, see our best trap VST plugins roundup.
If the real problem isn’t theory but that your finished beats sound generic next to everyone else’s, that’s a separate issue worth solving on its own, our guide on how to make beats that actually stand out covers it without pretending theory homework is the fix.
The Short Version
You don’t need music theory to start, and you don’t need much of it to keep going. Learn one minor scale, understand major versus minor by ear, and turn on scale highlighting in your DAW. That covers most of what separates a beginner from someone with a few hundred beats under their belt. Everything past that, chord inversions, modal interchange, is optional polish you’ll pick up from making more music, not from studying it in advance. Browse the full shop if you want instruments that handle the tuning for you while you build that ear.
FAQ
Do I need to learn piano to make beats?
No. A MIDI keyboard or your DAW’s piano roll is enough to place notes, and scale-locking features let you stay in key without reading notation or knowing where notes sit on a physical keyboard.
What’s the fastest way to learn music theory for trap beats?
Learn one minor scale (natural or harmonic) and practice building 3 to 5 note melodies inside it over a simple 808 pattern. That single exercise covers the majority of dark trap and drill melodic work.
Can preset plugins replace music theory?
They remove some of it. A pre-tuned melodic preset already sits in a coherent key, so you skip the note-selection problem for that specific sound, but you still need to know your beat’s overall key to avoid clashing it against your bass or vocal.
Do professional producers use music theory?
Many do, some don’t in any formal sense. Kanye West, Michael Jackson, and Prince are commonly cited as producers and writers who worked primarily by ear rather than formal training, while others use theory daily to speed up songwriting decisions.
How long does it take to learn basic music theory for beatmaking?
A weekend covers scales, major versus minor, and basic chord shapes well enough to apply immediately. Deeper concepts like chord inversions and modal interchange are typically absorbed gradually through practice, not studied upfront.
GMS Presets Free Download: Safe FL Studio Options for Producers
Summary: For a safe GMS presets free download, use a clearly labeled source, confirm the file format, scan the archive, and read its license before placing it in FL Studio’s GMS preset folder. Free banks can add EDM, synthwave, bass, lead, pad, and keys sounds, while a broader VST can support melodic trap, drill, phonk, and pluggnb workflows.
If you searched for gms presets free download, start by defining the sound you need before opening the first ZIP file. For a faster modern workflow, you can also compare our FL Studio presets when you need genre-focused sounds without sorting through poorly labeled folders.
GMS presets can extend the GMS synthesizer inside FL Studio with additional basses, leads, pads, keys, plucks, and effects. However, the quality of a download depends on its file format, installation path, licensing terms, and source reputation, not only on the number of presets listed.
What does a GMS presets free download usually contain?
A GMS preset download normally contains one or more banks designed for the GMS synthesizer. The files may arrive in a ZIP archive, a preset folder, or a format that requires manual placement inside your FL Studio user directory.
Community banks often focus on specific sounds. One pack may emphasize EDM leads and trance pads, while another may contain basses, keys, plucks, or synthwave textures. This specialization can be useful when you are looking for one missing sound category rather than a complete production system.
The acronym itself can create confusion. The University of Michigan’s ICPSR data listing uses GMS for Gates Millennium Scholars, which has no connection with music production. A music search should therefore include terms such as “FL Studio,” “GMS synth,” “preset bank,” or “GMS instrument.”
In 2026, other search results also use GMS in education and business contexts. A 2026 GMAC report uses the acronym in graduate management education research. Adding the exact instrument name is one of the simplest ways to reduce irrelevant results.
Where can you find free GMS preset banks?
Free GMS banks are commonly shared through producer communities, creator pages, and dedicated preset libraries. Some pages provide the complete pack without registration. Others divide the content into a free section and a paid or supporter-only section.
Before downloading, check whether the page identifies the creator, explains the file type, and states how the sounds may be used. A download that is free to obtain may still have restrictions on redistribution, resale, commercial releases, or inclusion in another sound library.
Pay attention to the difference between a preset download and a full instrument. A preset bank normally requires GMS to be installed already. It does not necessarily include the synthesizer, samples, effects, or license required to run the sounds.
You should also expect variation in organization. Some banks use clear labels such as BASS, LEAD, KEYS, PLUCKS, and PADS. Others use personal naming systems that make browsing slower. A well-organized folder can save more time than a larger but confusing collection.
How do you install GMS presets in FL Studio?
Installation is usually straightforward, but the exact folder can vary by FL Studio setup. Begin by closing FL Studio, extracting the downloaded archive, and checking whether the files are individual presets or a complete bank.
- Open FL Studio and load the GMS plugin.
- Use the plugin’s preset browser or menu to identify the current user preset location.
- Copy the extracted GMS files into the relevant user folder.
- Restart FL Studio if the new sounds do not appear immediately.
- Test several presets and save a backup of the original folder.
Do not place an archive directly into the preset directory. Extract it first, then inspect the contents. If the download contains an installer, read its instructions instead of copying files manually.
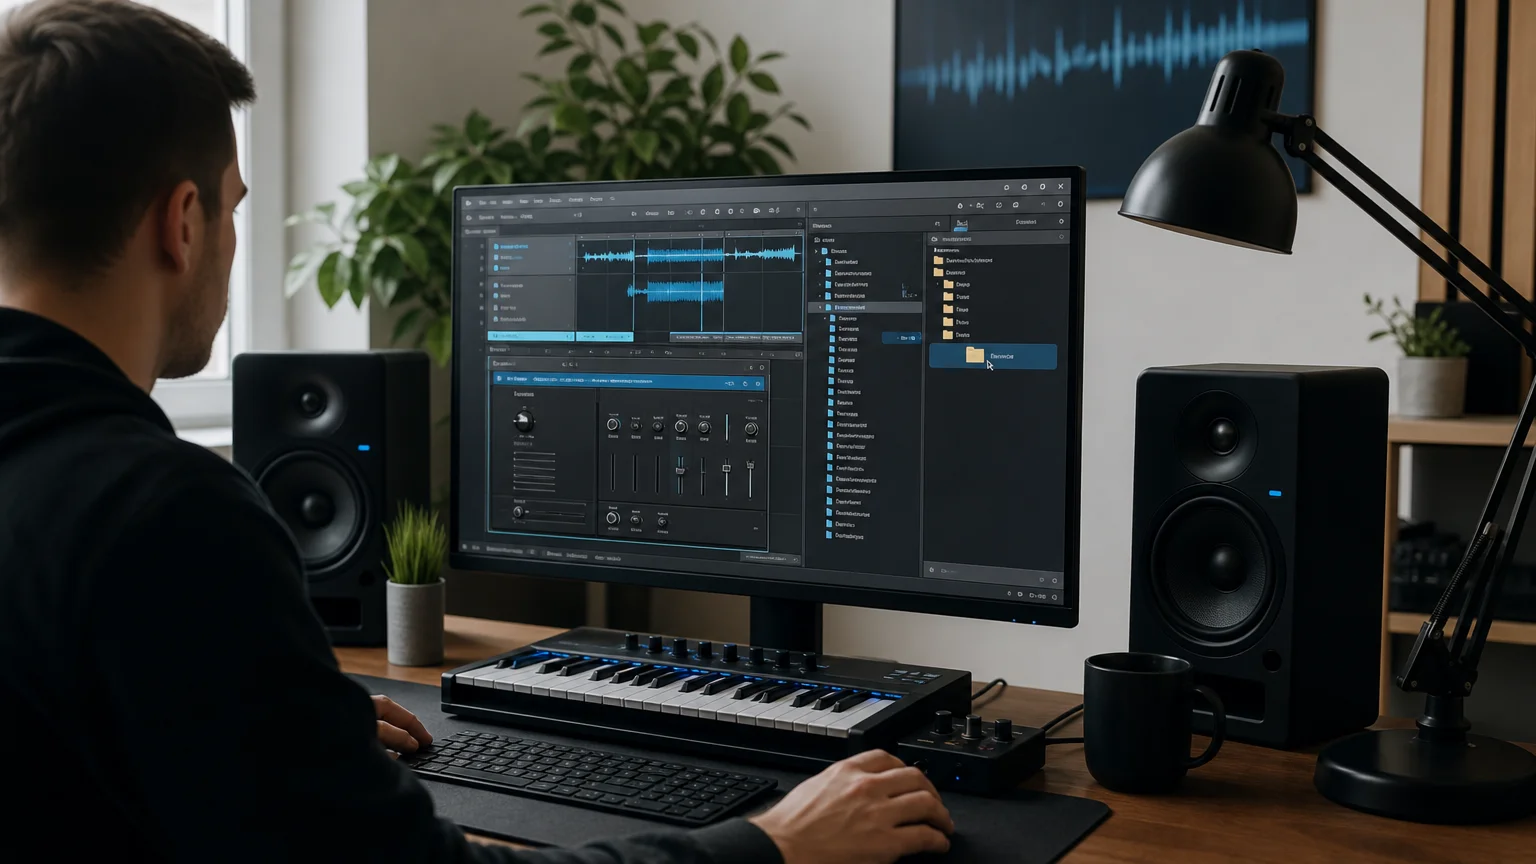
When a bank does not appear, check the file extension, folder depth, and plugin version. A common mistake is creating an extra nested folder, such as placing “GMS Bank” inside another “GMS Bank” folder. You should also confirm that you are editing the same user directory used by your active FL Studio installation.
What should you check before opening a free preset download?
A free download still deserves the same basic caution as any other file. Download it from a page that clearly identifies the uploader, avoid suspicious redirects, and scan the archive with updated security software before extracting it.
Inspect the archive for unexpected executable files. A preset bank may contain documentation, images, or installation notes, but an unfamiliar executable deserves closer review. If the download requires a password, forced browser extension, or unrelated program, use another source.
License clarity is equally important. Look for statements covering commercial beats, released tracks, client work, redistribution, and resale. “Free” can mean free for personal use only, free with attribution, or free under broad commercial terms.
Keep a record of the source and license. This is especially useful when you use the sounds in beats that you sell, place, or license. It also helps you remove a bank later if the source becomes unavailable or its terms change.
Search pages can also mix unrelated file types with music resources. For example, the GMass reporting page concerns email analytics, not synthesizer presets. This is another reason to verify the exact product name, file contents, and creator before installing anything.
Are free GMS presets enough for modern beatmaking?
Free GMS banks can be useful when you want to experiment with the synthesizer or add a few new sounds to an existing FL Studio setup. They are less convenient when you need a coherent palette for an entire beat, several related genres, or a repeatable workflow across multiple projects.
| Option | Typical scope | Format and workflow | Commercial-use clarity |
|---|---|---|---|
| Tiger-Sounds Pendora | 275+ presets, expansions, drums, MIDI, FX, and mix content | VST3 and AU for compatible Mac and Windows hosts | Royalty-free commercial use stated by the brand |
| Community GMS bank | Often focused on one instrument and selected categories | Manual preset placement may be required | Verify the creator’s terms |
| Creator expansion | May provide a limited free section with additional paid content | Instructions vary by creator and instrument | Read the individual license |
The main trade-off is control versus consistency. A free GMS pack gives you a low-cost way to explore a specific synthesizer. A broader sound bank gives you a more deliberate collection of presets and production assets that are designed to work together.
If you want to compare more genre-focused material, you can review our free sound bank downloads. This can be a practical next step when isolated GMS folders do not provide enough melodic, rhythmic, or atmospheric variety.
When should you use GMS, Serum, Vital, Omnisphere, or Pendora?
GMS remains practical when you already use FL Studio and want lightweight synthesized sounds for leads, basses, keys, pads, and plucks. It is also suitable for learning basic sound selection without adding a large library to your computer.
Serum and Vital are useful when you want detailed wavetable control. Omnisphere covers a much broader instrument environment, while Kontakt depends heavily on the libraries installed inside it. These instruments serve different production needs, so the best choice depends on your workflow, computer resources, preferred genres, and existing plugins.
Pendora sound design is more specifically aligned with melodic trap, drill, R&B, pluggnb, dark trap, lofi, and phonk. Its purpose is to provide distinctive material for producers who want fewer generic sounds and a more focused route from preset selection to beat arrangement.
For producers working across compatible DAWs, our free VST sound banks can provide an alternative when GMS presets feel too narrow. You can use GMS for a particular color, then bring in a broader bank when the beat needs contrasting melodies, 808s, textures, drums, or effects.
How can presets help you avoid beatblock?
Preset browsing becomes useful when it supports a clear musical decision. Instead of scrolling through every sound, decide whether the part needs a dark pad, a short pluck, a sustained lead, a soft key, or a heavy bass. This gives you a smaller and more purposeful search.
Try building a short palette before arranging the beat. Select one main melodic sound, one supporting texture, one bass, and a small group of drums. Then write a simple eight-bar idea before changing presets again.
Distinctive sounds can also help you move away from familiar loops and predictable arrangements. This does not mean every preset must be unusual. It means the sound should contribute a recognizable role instead of adding another interchangeable layer.
For this reason, a smaller free GMS bank can be valuable during experimentation, while a focused commercial sound bank may be more efficient for repeated production. The right balance depends on whether you are learning the plugin, finishing a beat, or building a consistent catalog.
Choose presets by workflow, not file count
A GMS presets free download can be a useful addition to FL Studio when the source is clear, the files are compatible, and the license supports your intended release. Treat free banks as focused tools, inspect every archive before installation, and organize the sounds so you can make musical decisions quickly.
When your projects require a wider palette for trap, drill, phonk, R&B, lofi, or pluggnb, consider whether a coordinated VST sound bank would reduce browsing time. The most practical collection is the one that helps you finish more ideas with sounds that fit your production identity.
Take action with Tiger-Sounds
If you are comparing free GMS banks because you want faster access to distinctive sounds, a focused preset collection can simplify your beatmaking process. The right toolkit should fit your DAW, your genre, and the way you plan to release or license your music.
Tiger-Sounds provides a downloadable collection built for melodic trap, drill, dark trap, phonk, R&B, lofi, boom bap, and pluggnb workflows. The Pendora family includes hand-crafted presets, VST3 and AU compatibility, commercial royalty-free use, low-resource positioning, and lifetime updates under the stated terms. Explore the free FL Studio presets pack to begin with a focused sound-design option.
Frequently Asked Questions
What is GMS in FL Studio?
GMS is a synthesizer used inside FL Studio for creating sounds such as basses, leads, pads, keys, and plucks. A preset bank changes the available sounds but does not replace the synthesizer itself.
Where should GMS presets be installed?
Install them in the user preset location recognized by your GMS plugin and FL Studio setup. Use the plugin browser to confirm the correct folder, then restart the DAW if the presets do not appear.
Are free GMS presets safe to use commercially?
Not always. Check the creator’s license for commercial beats, released tracks, client work, redistribution, and resale before using the sounds in a paid project.
Can GMS presets work with Serum or Vital?
Usually, no. GMS presets are designed for GMS, while Serum and Vital use their own preset formats and synthesis engines.
Is Pendora an alternative to free GMS presets?
Yes, it can be an alternative when you want a broader, genre-focused workflow for trap, drill, phonk, R&B, lofi, or pluggnb. Tiger-Sounds presents Pendora as a VST sound bank with hand-crafted presets, production assets, royalty-free commercial use, and compatible VST3 and AU formats.
Best PluggnB Presets for FL Studio Beatmaking in 2026
Summary: The right PluggnB presets for FL Studio should provide hazy melodies, soft bells, expressive plucks, rounded 808s, and enough space for vocals. This article explains how to choose compatible sounds, build a fast beatmaking workflow, avoid repetitive presets, and shape the final mix with practical production decisions.
A PluggnB beat can lose its identity when every melody relies on the same bright bell, soft pad, or recycled pluck. For a more distinctive starting point, explore our FL Studio presets, then shape each sound around your key, tempo, and arrangement.
Interest in the style remains measurable. The MIDiA 2025 report recorded 699,987 PluggnB downloads on Splice in 2024, following a 342.8% increase from the previous year. That growth reflects a wider producer interest in dreamy trap, R&B harmony, sliding basslines, and internet-driven sound design.
What should PluggnB presets sound like in FL Studio?
PluggnB usually sits between dreamy R&B and bouncy trap. The melodic layer needs emotional color, but it should remain light enough for vocals and drums to occupy their own space.
Look for detuned pads, soft-attack bells, electric piano tones, glassy plucks, and muted leads. Long releases can create atmosphere, while gentle chorus, reverb, and pitch movement help a simple phrase feel wider. However, excessive effects can blur the rhythm, especially when several melodic layers occupy the same register.
The bass should support the melody rather than overpower it. Rounded 808s with controlled slides work well, particularly when the sub frequencies remain stable and the midrange contains enough harmonics to translate on smaller speakers. Tight hi-hats, rimshots, and sparse percussion can then create movement without making the beat feel aggressive.
When browsing PluggnB sound design, listen for three qualities: a clear emotional mood, a playable response across several octaves, and enough flexibility for arrangement changes. A preset that sounds impressive on one note but becomes harsh across a chord may create more work later.
Which criteria matter before you choose a preset bank?
Imagine opening a new FL Studio project with a strong drum loop but no melodic direction. The most useful preset bank should help you find a fitting sound quickly, while still allowing enough editing to develop an original loop.
Genre focus
A general-purpose synth can provide many sounds, but it may require extensive filtering before it fits PluggnB. A focused library should include keys, bells, pads, plucks, leads, basses, and textures that already reflect the genre’s softer attack and spacious mix aesthetic.
Musical usefulness
Preset quantity is less important than usable variety. You should be able to find sounds for a main chord progression, a counter melody, a short intro, a hook layer, and transitional details without hearing the same tone repeatedly.
Our Pendora collection is designed around melodic trap, drill, R&B, PluggnB, dark trap, lo-fi, and phonk workflows. Its full edition combines the main instrument with expansions, drums, MIDI, effects, and other production assets, so the sound selection can remain consistent from the first idea to the finished beat.
Compatibility and performance
Confirm the plug-in format before buying. Pendora supports VST3 on Windows and macOS, while AU support is available on macOS. It is intended for compatible DAWs, including FL Studio, Ableton Live, Logic Pro, Cubase, Pro Tools, and Reason.
Resource use also matters in large projects. A low-CPU instrument gives you more room for layered melodies, vocal processing, drum effects, and automation. Still, performance depends on your computer, project size, sample rate, and the number of active plug-in instances.
Commercial licensing
If you sell or license beats, review the usage terms before building a commercial workflow. Royalty-free licensing can simplify release preparation, but you should still keep purchase records and avoid redistributing the original presets or installation files.
Which plug-in routes fit a PluggnB workflow?
The first decision is whether you want a dedicated genre-focused instrument or a general synthesizer that requires more sound selection and programming. For a PluggnB workflow in FL Studio, compare the following routes in this order:
- Pendora provides a focused sound bank for melodic trap, PluggnB, drill, dark trap, phonk, and related styles. The full edition includes 275+ presets, themed expansions, drumkits, MIDI, effects, and commercial royalty-free usage under the stated terms.
- Serum provides a flexible wavetable environment. It can cover plucks, bells, leads, pads, and basses, but the final result depends heavily on the preset bank and the producer’s own programming choices.
- Omnisphere offers a broad instrument and preset environment for keys, pads, textures, and cinematic layers. Its wider scope can be useful when a project moves beyond PluggnB, although it may require more browsing to find a precise genre fit.
- Vital gives producers a flexible wavetable route for building or editing melodic sounds. It suits producers who prefer to shape envelopes, filters, unison, and modulation instead of relying only on ready-made patches.
A current preset marketplace page lists PluggnB sounds across categories such as synths, keys, bells, 808s, pianos, and electric pianos. The 2026 trend report also describes continued PluggnB growth during 2025, but market visibility alone does not determine whether a preset fits your arrangement.
The practical choice depends on your working method. If you want to design every sound from an initialized patch, Serum or Vital may suit you. If you want a concentrated starting point with related drums and melodic material, Pendora reduces the need to assemble several unrelated libraries.
How can you build a faster FL Studio workflow?
Consider an 8-bar loop at a moderate tempo. Begin with one chord or bell preset, then create the rhythmic identity before adding more layers. This prevents the browser from becoming a substitute for musical decisions.
- Set the key and tempo first. Choose the scale before auditioning melodies. This makes it easier to reject sounds that create unnecessary harmonic tension.
- Choose one foundation sound. Start with a pad, electric piano, or bell. Give it enough space for the bass and vocal before adding another instrument.
- Add a contrasting layer. Use a pluck, muted lead, or short texture with a different envelope. Contrast can come from decay and rhythm, not only from brightness.
- Write the 808 after the harmony. Let the bass follow the chord movement, then add slides where they support the groove. Avoid filling every gap between kick hits.
- Use automation sparingly. Filter movement, reverb sends, and volume changes can separate the intro, verse, and hook without changing the core loop.
- Remove weak sounds. If a layer does not improve melody, rhythm, texture, or transition, mute it. A smaller arrangement often gives the vocal more authority.
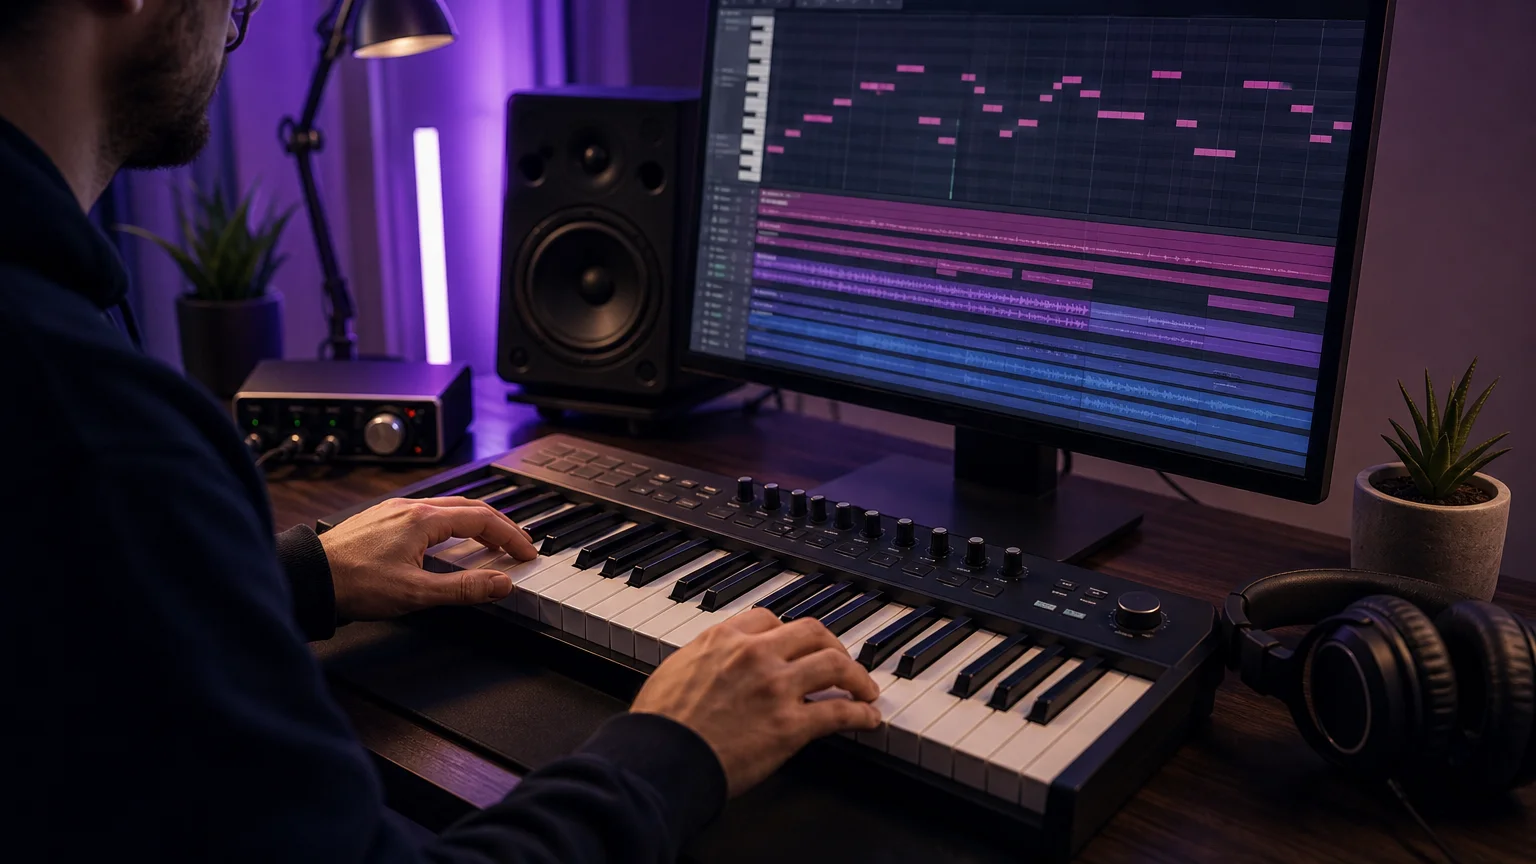
This process turns presets into composition tools rather than finished identities. You are selecting a starting tone, then changing the octave, velocity, rhythm, envelope, processing, and arrangement until the part belongs to your beat.
How do you avoid repetitive presets and beatblock?
Beatblock often appears when every preset suggests the same four-bar idea. The solution is not always a larger library. It can be a more deliberate rotation of register, rhythm, articulation, and processing.
For example, a bell preset can become a short counter melody when its release is reduced and its notes are moved into a higher octave. The same sound can become a background texture when it is filtered, widened carefully, and placed behind the main keys.
Human editing remains important as sound libraries become easier to browse. 2026 creator research from Epidemic Sound reports that 75% of surveyed creators consider human-made content a premium while 94% use AI workflows. This does not prove that one preset source is preferable, but it reinforces the value of intentional performance, editing, and arrangement.
Our presets are intended to provide distinctive starting points rather than force a fixed formula. You can combine a Pendora melody with your own drum programming, resample a phrase into FL Studio, or use a preset only for inspiration before recreating the part with Serum, Vital, or another synthesizer.
To reduce wasted browsing, create a small working folder for each project. Save only the presets that fit the key, mood, register, and mix. This gives you a personal shortlist without treating every downloaded sound as mandatory material.
How should you mix and master PluggnB in FL Studio?
A polished PluggnB beat usually depends on restraint. The melodic layers need width and atmosphere, but the kick, 808, and vocal still require a stable center.
Start by checking the low end in mono. Keep the sub portion of the 808 controlled, and use saturation only when the bass needs additional harmonics for smaller playback systems. If the 808 and kick overlap heavily, adjust timing, envelope length, or frequency emphasis before reaching for heavy compression.
Melodic instruments benefit from selective high-pass filtering when they compete with the bass or vocal. This does not mean removing all low frequencies. It means deciding which instrument should provide warmth and which one should provide definition.
Reverb and delay should support the emotional character without washing out the groove. Shorter spaces can keep bells and plucks close, while longer effects work better on sends that you automate during transitions. Ducking the reverb slightly behind the vocal can preserve atmosphere and intelligibility.
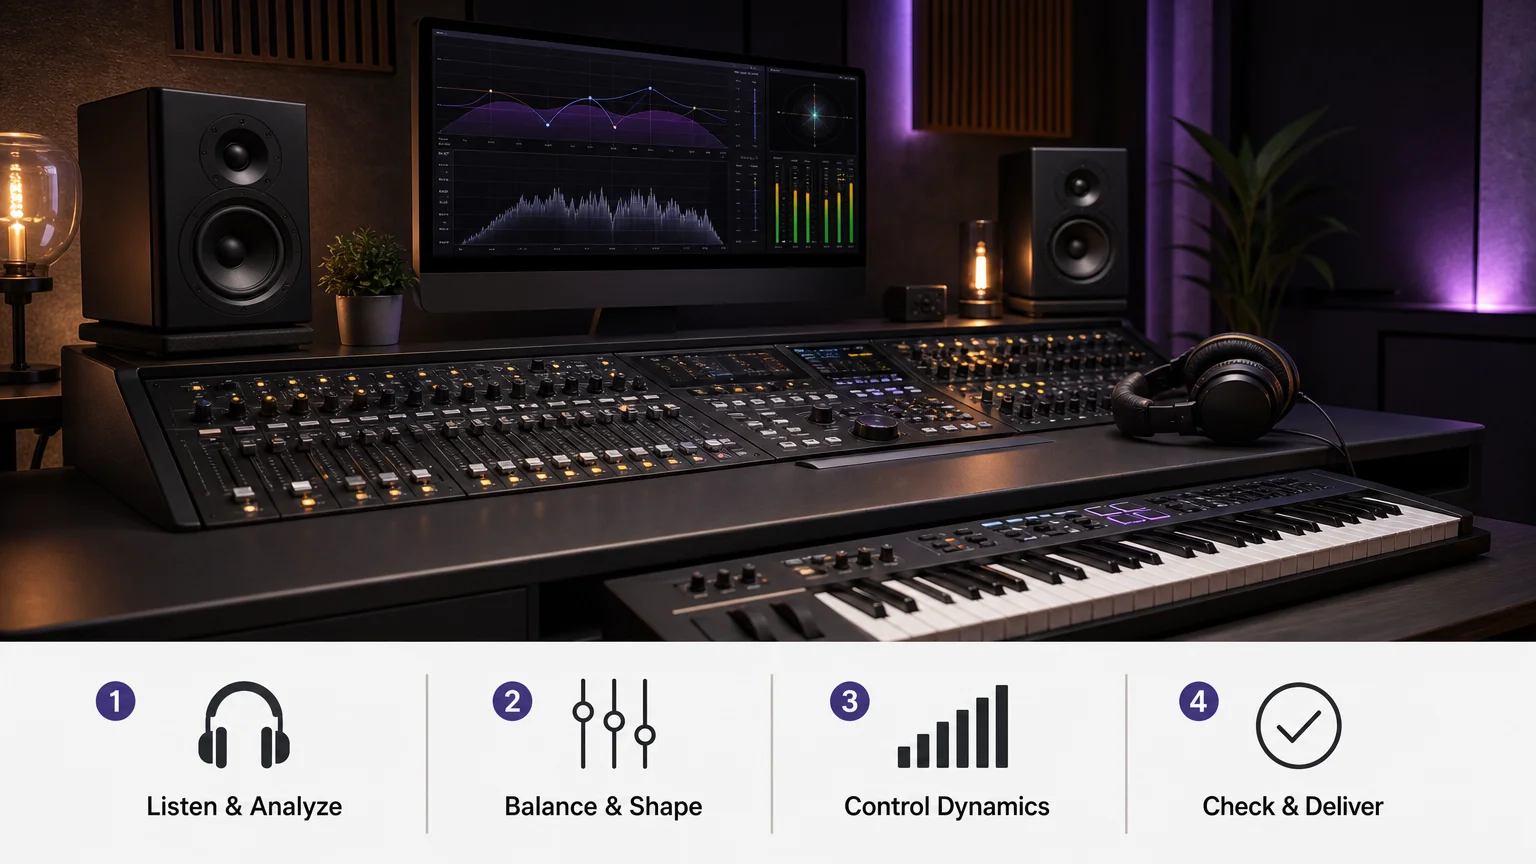
Our FL Studio mixer presets can help organize repeatable processing choices, while our FL Studio master presets provide starting points for the final bus. Treat both as adjustable templates, not automatic solutions. Your source balance, arrangement, and monitoring conditions still determine the final result.
What should you test before committing to a preset bank?
Use a short evaluation process instead of judging a library from one impressive demo. Load several sounds in FL Studio and test them against your own drums, chord progression, and vocal range.
- Check whether the presets remain musical across low, middle, and high octaves.
- Test the library with a sparse arrangement and a full hook.
- Listen for harsh high frequencies after adding saturation or widening.
- Confirm that the installation format matches your operating system and DAW.
- Review whether the license covers beats that you sell, place, or license.
- Check disk space, installer requirements, update access, and support procedures.
Pendora Lite is positioned as an entry edition for producers who want to test the concept before choosing the larger collection. The full Pendora edition is intended for producers who need a broader combination of instrument presets, expansions, drumkits, MIDI, and effects in one workflow.
You should also confirm how many personal computers are permitted and whether studio installations require separate contact. These details matter when you work across a desktop, laptop, or shared production room.
Choose presets that serve the beat
The best PluggnB presets for FL Studio are not simply the largest collection or the brightest demo sounds. They should help you establish mood quickly, leave room for vocals, translate across playback systems, and remain flexible after you change the melody, rhythm, or arrangement. Test compatibility, licensing, CPU behavior, and real project usefulness before committing. Most importantly, keep only the sounds that contribute a clear musical purpose.
Take action with Tiger-Sounds
If you want a more focused starting point for PluggnB, melodic trap, drill, dark trap, lo-fi, or phonk production, a genre-oriented sound bank can simplify the first creative decisions. The goal is not to fill your browser with unused files. It is to give your FL Studio sessions practical sounds that can become your own through performance and arrangement.
Our collection includes hand-crafted presets and complementary production assets, with VST3 and AU support, low-CPU positioning, commercial royalty-free use, and free lifetime updates under the stated terms. Explore the FL Studio presets pack to find a suitable starting point for your next beat.
Frequently Asked Questions
Will PluggnB presets work with FL Studio?
They will work when the instrument or preset format is compatible with your FL Studio installation. Pendora supports VST3 on Windows and macOS, with AU support for compatible macOS hosts.
Should you use Serum or a dedicated PluggnB instrument?
Serum suits producers who prefer detailed wavetable sound design and manual editing. A dedicated instrument such as Pendora can provide a more concentrated starting point for PluggnB, melodic trap, and related styles.
Can these presets be used for commercial beats?
Check the license supplied with the product before releasing music. Pendora is presented as royalty-free for beats and tracks that you sell, place, or license, subject to its stated usage terms.
How can you stop presets from making your beats sound generic?
Change the octave, rhythm, envelope, velocity, effects, and arrangement instead of using every preset exactly as loaded. Combining a preset with your own MIDI, drum programming, and resampling choices creates a more personal result.
What should you do if installation does not work?
Confirm that your operating system, DAW, and plug-in format are supported, then rescan the correct plug-in folder in FL Studio. If the issue remains, contact the product provider and include your system details, DAW version, and the exact installation message.
BeatStars vs Airbit: Where to Sell Beats in 2026
BeatStars gives you a built-in marketplace of millions of buyers but takes a 12% service fee unless you pay for a Pro Page subscription. Airbit charges 0% commission on every plan, including the free tier, but you have to bring your own traffic to your store. The right pick depends on whether you’re counting on platform discovery or already driving your own audience from YouTube, Instagram, or type beat channels.
- What is BeatStars?
- What is Airbit?
- Pricing and commission compared
- Where BeatStars wins
- Where Airbit wins
- Which one should you choose
- FAQ
What is BeatStars?
BeatStars is a beat marketplace and licensing platform where producers upload instrumentals and sell non-exclusive, exclusive, and stem licenses directly to artists. It’s the largest platform in the space by user count, and its free Marketplace listing is how a lot of newer producers get their first sale without running any ads or building an audience first. An artist can browse by genre, mood, or BPM and land on your beat without ever having heard of you, which is the entire value of a shared marketplace over a private store.
The free plan lets you upload beats and sell through the open Marketplace, but BeatStars applies a 12% service fee on those sales. You can choose to absorb that fee yourself (you keep 88%) or pass it to the buyer at checkout (they pay 12% more, so a $30 lease becomes $33.60). To sell without that fee, on your own branded Pro Page or embedded on your own site, you need the Professional plan at $19.99 a month, or $179.88 billed annually. A cheaper Starter plan exists at $19.99 a year, but it caps you at 4 active custom licenses and 20 messages a month, and it doesn’t unlock Pro Page access, which means Starter subscribers are still capped by the same 12% service fee on every sale (source: BeatStars pricing help center).
In practice, this means the true cost of “free” on BeatStars is the 12% you or your buyer pays on every single transaction, forever, unless you’re paying the $19.99 monthly Professional fee to escape it. For a producer doing a handful of $20 to $30 leases a month, the math is close. For someone doing real volume, the Professional plan pays for itself within a few sales.
What is Airbit?
Airbit is a beat-selling platform built around your own storefront (they call it an Infinity Store) rather than a shared marketplace. You set your own licenses, contracts, and pricing, then link out to that store from wherever your audience already is, whether that’s a YouTube description, an Instagram bio, or a Linktree.
Airbit’s headline difference: 0% commission on every sale, on every plan, including the free Basic tier. That change removed a 40% commission that used to apply to free accounts as recently as 2024, and Airbit now frames zero commission as a permanent feature rather than a promotion (source: Airbit’s official announcement). The free Basic tier lets you list up to 20 beats on your Marketplace profile. The paid Platinum tier runs $19.99 a month, or roughly $7.99 a month if you pay annually (about $95.88 a year), and adds a custom domain for your store, co-producer split payments, and YouTube Content ID support (source: Airbit official site).
The catch with Airbit’s 0% commission is that it only pays off if buyers actually find your store. Airbit does have its own Marketplace profile page, but it’s a smaller pond than BeatStars, so the platform functions more like checkout infrastructure for traffic you already generated than a discovery engine in its own right.
Pricing and commission compared
| Criterion | BeatStars | Airbit |
|---|---|---|
| Free plan commission | 12% service fee on Marketplace sales | 0% commission |
| Cheapest paid plan | Starter, $19.99/year | Platinum, $7.99/month billed annually |
| Plan that removes the service fee | Professional, $19.99/month or $179.88/year | Not applicable, 0% on every plan |
| Built-in buyer traffic | Large open Marketplace, millions of monthly visitors | Marketplace profile exists but is a secondary discovery channel |
| Custom store domain | Pro Page on Professional plan | Included on Platinum |
| License and license limits on entry plan | 4 active custom licenses on Starter | 20 beats on free Basic tier |
| Co-producer splits | Available | Available on paid tiers |
| YouTube Content ID | Available through add-ons | Included on Platinum |
Verified September 2026 from the official BeatStars pricing help article and the official Airbit site. Prices and plan names change; check both platforms directly before committing to an annual plan.
Where BeatStars wins
BeatStars wins on raw discoverability. A brand new producer with zero following can list a beat on the Marketplace and get found by an artist searching tags, genres, or moods, something Airbit’s smaller storefront model doesn’t replicate. BeatStars also has the deeper ecosystem: playlist placements, a larger base of working artists, and more third-party tutorials and communities built around it, which matters if you’re learning the licensing and business side from scratch.
Where Airbit wins
Airbit wins on take-home percentage the moment you have any traffic of your own. If you’re already sending buyers to your store from a YouTube channel, Instagram, or a type beat page, 0% commission on every plan means more of every sale stays in your pocket, without paying $19.99 a month just to avoid a service fee. Airbit is the better fit for a producer who treats beat selling as owning a storefront rather than renting a space in someone else’s marketplace.
Which one should you choose
Choose BeatStars if you have no existing audience and need marketplace discovery to make your first sales, or if you want the biggest community and the most tutorials to learn from. Choose Airbit if you already drive traffic from YouTube or social and don’t want a service fee cutting into sales you generated yourself. Choose neither, at least not yet, if you haven’t finished a batch of beats worth licensing: platform choice doesn’t fix a catalog that isn’t ready to sell. That’s a production problem, and it’s usually solved by tightening your sound design and arrangement before worrying about where to list the file (see our guide on making beats that actually stand out).
Plenty of working producers run both: a free BeatStars Marketplace listing for discovery, and an Airbit store linked in their YouTube description for the audience they already built. Since neither platform locks you into exclusivity, there’s no real cost to testing both on a handful of beats before picking one to focus on.
FAQ
Is Airbit actually better than BeatStars?
Not universally. Airbit is better on commission if you already have traffic. BeatStars is better on discovery if you don’t. Neither is objectively superior; they solve different problems.
Why is Airbit’s commission lower than BeatStars’?
Airbit removed commission entirely in 2025 to compete on take-home earnings rather than marketplace size, while BeatStars still applies a 12% service fee on Marketplace sales unless you’re on the Professional plan (source: Airbit’s commission announcement).
Can I sell the same beat on both BeatStars and Airbit?
Yes, as long as you’re selling non-exclusive licenses on both, or you remove the beat from one store once you sell an exclusive license through the other. Neither platform requires exclusivity to list.
Do I need a big following to sell beats on either platform?
No for BeatStars, since the Marketplace itself brings buyers. Yes, practically, for Airbit, since its storefront model depends on you sending your own traffic.
Does the platform I sell on affect what plugins or sounds I should use?
No. Platform choice is a distribution decision, separate from production. What matters for getting beats sold is having a catalog that sounds finished and on-genre, which is a bigger factor in conversion than which storefront hosts the file. Tools like Pendora address the production side; the platforms above address distribution.
Bottom line: match the platform to your traffic, not the other way around. If you’re stacking a beat catalog worth selling on either one, browse Tiger Sounds’ drum kits and sound packs or check Pendora Lite for a lower-cost way into the same preset engine.
Vital Plugin Presets for Modern Beatmaking Workflows
Summary: Vital plugin presets are most useful when they shorten the distance between an idea and a finished beat. Prioritize banks with clear genre direction, expressive macros, dependable installation, and a license that matches your commercial plans. For melodic trap, drill, R&B, pluggnb, dark trap, lofi, and phonk, sound character matters more than raw preset count.
A preset folder can contain hundreds of sounds and still leave your beat feeling unchanged. The right vital plugin presets should give you a clear starting point, invite movement, and avoid the familiar tones that make one production resemble another. If you work in FL Studio, our FL Studio presets can complement a focused Vital workflow by adding another route for drums, melodies, or mix decisions.
Vital is a wavetable synthesizer built around spectral warping, visual modulation, and detailed sound shaping. That makes preset choice more than a download decision. You are choosing a set of oscillator ideas, envelopes, filters, effects, and macro assignments that can influence the direction of a beat. The strongest choice depends on your genre, DAW, CPU headroom, and willingness to edit.
What should Vital plugin presets contribute to a serious workflow?
Vital plugin presets should provide a useful musical starting point, not merely demonstrate technical complexity. A good patch gives you an immediate role in the arrangement, such as a sustained pad, a short pluck, a moving texture, a bass layer, or a lead that can carry a melody.
Vital supports spectral warping, visual modulation displays, and drag-and-drop modulation. These capabilities are outlined in the KVR product overview. Presets can therefore be valuable in two ways: they can speed up production, and they can show you how experienced sound designers combine modulation sources with filters, envelopes, and effects.
For beatmaking, the most useful patches usually have a clear purpose. A dark bell should leave enough room for the vocal. An 808 preset should remain controllable across different notes. A pad should create atmosphere without covering the kick, snare, or main melody.
Macro controls also matter. They allow you to change brightness, movement, distortion, width, or release without opening several panels. This is especially useful when you are moving quickly in FL Studio, Ableton, or Logic Pro and need to shape a sound inside the arrangement.
Which sound categories serve trap, drill, R&B, and phonk?
Genre direction should come before preset quantity. Melodic trap often benefits from bells, plucks, soft keys, choirs, pads, and controlled 808 layers. Drill production may require sharper bells, tense strings, sliding basses, sparse keys, and textures that leave space for the rhythm section.
R&B and pluggnb usually need a different balance. Wide keys, gentle pads, expressive leads, filtered plucks, and soft textures can support a vocal or a spacious melody. Phonk and dark trap often call for distorted basses, haunted keys, short vocal-like tones, aggressive leads, and effects that create tension between sections.
The best bank for your work should make these roles easy to identify. Names should communicate the sound or function clearly. A well-organized folder reduces search time because you can move directly from a creative intention to a usable patch.
Distinctive character is equally important. If every patch resembles a familiar Serum, Omnisphere, Kontakt, or Vital sound, the bank may not help you overcome beatblock. A smaller collection with unusual harmonic movement can be more productive than a large folder filled with variations of the same tone.
Does a bigger preset bank mean a better choice?
Size can be useful, but it is not a quality score. In August 2026, one marketplace page displayed 442 Vital preset results and allowed users to browse individual files rather than only complete packs, as shown in its marketplace listing.
That kind of volume can help you find a narrow sound category. It can also create decision fatigue. When every folder contains hundreds of similar plucks, leads, or basses, you may spend more time auditioning than writing.
Evaluate a bank by asking how many presets you would realistically use. Listen for variation in envelope shape, harmonic density, stereo movement, and effects treatment. A useful library should cover different musical roles without repeating the same sonic idea under several names.
You should also inspect the relationship between presets and included resources. Some banks focus on synth patches, while others add wavetables, MIDI, drum content, FX, or construction material. These additions can make a bank more practical when you want to move from a single sound to a complete beat idea.
How should you evaluate free and paid preset banks?
Free Vital plugin presets are useful for testing compatibility, learning the instrument, and finding new starting points without committing to a larger purchase. They can also reveal whether you prefer clean melodic sounds, aggressive basses, atmospheric pads, or experimental textures.
Before downloading, check the file format, installation instructions, licensing terms, and source reputation. A free bank is not automatically suitable for commercial releases. You should know whether resale, redistribution, attribution, and commercial use are allowed.
Paid banks generally justify their price through curation, sound-design depth, organization, support, and additional production content. The practical question is not whether a bank is paid. It is whether the included sounds solve a recurring problem in your workflow.
For producers who want to test a different direction in FL Studio, our free FL Studio preset packs provide another way to explore production sounds before selecting a broader toolkit. The same evaluation standard applies: listen for useful roles, recognizable character, and sounds that you can adapt.
Pendora follows a tiered structure for this reason. Pendora Lite is positioned as a smaller entry edition, while the full Pendora V3 edition adds a broader sound bank, expansion content, drumkits, MIDI, FX, and other production assets. This gives you a clearer path from initial testing to a more complete setup.
What matters during installation in FL Studio, Ableton, and Logic Pro?
Compatibility should be checked before you purchase or download a bank. Vital users should confirm their operating system, plugin format, host architecture, and preferred installation method. VST3 is relevant across Windows and macOS hosts, while AU is intended for compatible macOS workflows.
On Windows, a recent preset location guide identifies the standard Vital data structure as a Vital folder inside Documents, with user patches stored within its preset directory. A custom data location can change this path, so you should verify the location inside your own installation.
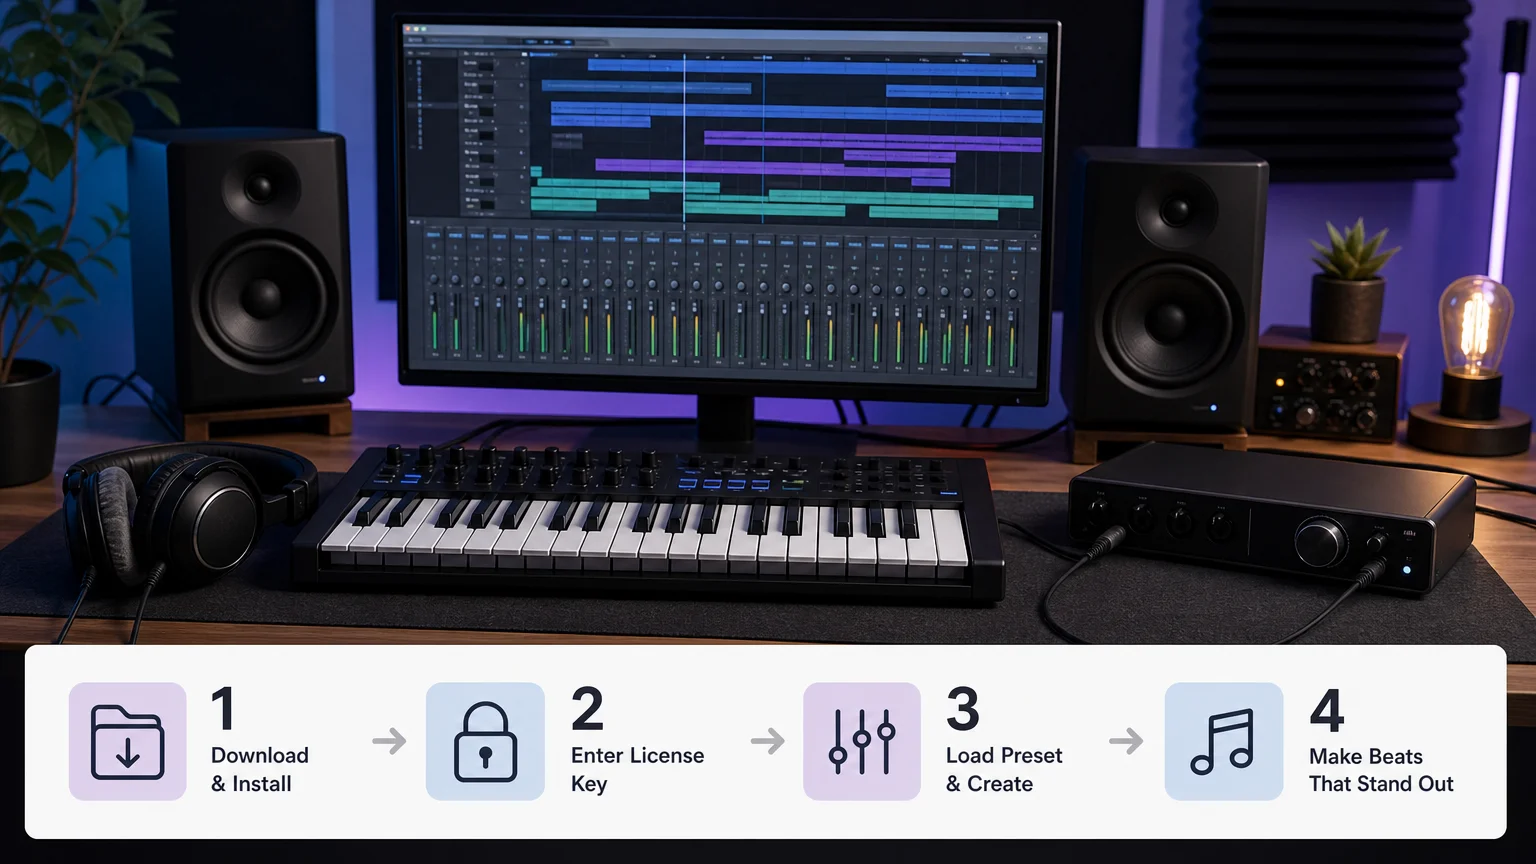
In FL Studio, rescan the plugin folder if Vital does not appear after installation. In Ableton Live, confirm that the plugin format is enabled in Preferences. In Logic Pro, use the AU version when available and allow the host to complete its plugin validation.
Projects with many synth instances can become demanding, especially when several patches use unison, long reverbs, heavy distortion, or complex modulation. If your mixer begins to strain, freeze or render selected channels, reduce unnecessary voices, and keep a clean version of the project.
When your synth parts are ready, our FL Studio mixer presets can help you organize levels, effects, and routing around the chosen sounds. This does not replace critical listening, but it can make the transition from preset selection to arrangement more systematic.
How can you turn a preset into your own sound?
A preset becomes more personal when you change its musical role. Start by playing it in the octave where the arrangement needs space. A patch that sounds impressive in isolation may become too dense when layered with vocals, guitars, samples, or another synthesizer.
- Change the envelope. Shorten the attack for a pluck, extend it for a pad, or reduce the release when the mix feels crowded.
- Adjust the filter. Remove unnecessary brightness from a lead, or open the filter gradually to create movement across a section.
- Reshape the modulation. Change the LFO rate, depth, or destination so the patch follows your rhythm instead of its default motion.
- Rebalance the effects. Reduce reverb and delay while writing the part, then restore only the amount required for depth.
- Rewrite the MIDI. A familiar preset can feel original when the rhythm, register, velocity, and note spacing are yours.
These small changes can prevent preset-based production from sounding passive. They also teach you how Vital creates movement. Over time, you may begin designing patches from an initial sound instead of starting from an empty oscillator.
Once the melodic and bass elements are balanced, our FL Studio master presets can support the final monitoring stage. Use them as a starting point, then make decisions based on headroom, dynamics, tonal balance, and the needs of the complete track.
When should Pendora become your first alternative?
Pendora should be the first alternative you evaluate when your main goal is a distinctive palette for melodic trap, drill, R&B, pluggnb, dark trap, lofi, or phonk. It is not designed as a general-purpose library for every genre. Its direction is narrower, which can be useful when you want fewer irrelevant sounds.
Tiger-Sounds describes Pendora as a hand-crafted sound bank with genre-focused presets and supporting production assets. The current product brief lists more than 275 studio-ready presets, multiple sound categories, drumkits, MIDI, mix presets, FX, and risers in the broader Pendora V3 package.
The practical distinction is workflow. Vital plugin presets give you access to a flexible wavetable instrument and a wide range of third-party sound banks. Pendora is built as a more directed environment for producers who want melodic ideas, low-end sounds, drums, effects, and MIDI to work within a defined production lane.
That approach can help when you are tired of generic sounds or spending too long auditioning patches. Every preset should earn its place by giving you a usable role, a distinctive tone, or a productive idea for the next section of your beat.
Choose presets by fit, not by quantity
The right preset bank supports a complete decision process, from the first melody to the final mix. Choose sounds according to genre, function, editability, installation requirements, CPU behavior, and commercial licensing. Free banks can help you test a direction, while a focused paid library can reduce repetition and search time. For the clearest results, build around a defined palette and customize every important patch. A focused Vital preset workflow will usually serve your music better than an oversized folder you rarely open.
Take action with Tiger-Sounds
If your search for Vital plugin presets has shown that your real need is a more focused melodic and drum palette, Tiger-Sounds can give you a clear next step. We create tools for producers who want distinctive starting points without filling a project with unused sounds.
Our Pendora collection brings genre-focused presets, drumkits, MIDI, FX, mix presets, and risers for trap, drill, phonk, boom bap, pluggnb, and related styles. The products support compatible VST3 and AU hosts, include royalty-free commercial use, and are sold with one-time access and lifetime updates under the stated terms. Explore our VST plugins and presets when you want a sound bank that supports a consistent beatmaking workflow.
Frequently Asked Questions
Are Vital plugin presets compatible with every DAW?
Compatibility depends on the host, operating system, and plugin format. Check whether your DAW supports the required VST3 or AU version before installing a bank.
Should you choose free or paid Vital presets?
Free presets are useful for testing sounds and learning your preferred categories. Paid banks may provide stronger curation, broader production content, support, and more consistent organization.
How can you avoid preset overload?
Start with a defined role, such as a drill bell, dark pad, melodic pluck, or 808 layer. Keep only sounds that offer a different function, movement, or tonal character from the patches you already use.
Can Vital presets be used in commercial music?
Commercial use depends on the license supplied with each bank, so read the terms before releasing a track. Tiger-Sounds states that its Pendora products are royalty-free for beats and tracks that you sell, place, or license.
Is Pendora a replacement for Vital?
Pendora and Vital are separate sound-design options with different workflows. Vital focuses on a flexible wavetable instrument, while Pendora provides a genre-focused VST sound bank and related production assets for selected producer styles.
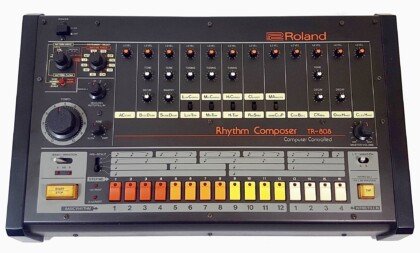
Best Phonk VST Plugins and Sounds in 2026
The best phonk VST plugins in 2026 split into three jobs: 808 and drum machine emulation (D16 Nepheton 2, Future Audio Workshop SubLab XL), tape and lo-fi character (XLN Audio RC-20 Retro Color, Soundtoys Decapitator), and preset-based sound design for the melodic layer (Pendora VST). No single plugin covers cowbells, Memphis-style vocal chops, and drift phonk 808 slides at once, so most phonk producers stack two or three tools from different categories. Below is an honest rundown of what each one actually does, what it costs right now, and who should skip it.
- What makes a plugin “phonk-ready”?
- Comparison table
- 808s and drum machine emulation
- Lo-fi, tape, and distortion
- Free options
- FAQ
What makes a plugin “phonk-ready”?
A phonk-ready plugin covers at least one of four sonic pillars: cowbell and 808 drum machine sounds, distorted or “drifting” sub bass, tape-degraded texture, or chopped vocal samples in the Memphis rap tradition. Phonk production leans on cheap-sounding, blown-out drum machines and cassette-warped samples on purpose, so tools built for clean modern trap (bright plucks, hi-fi bells) need extra distortion or lo-fi processing before they fit the genre. Drift phonk, the 2024-2026 subgenre built around sliding, pitch-bent 808s and hi-hat rolls, adds a fourth requirement: a bass source flexible enough to glide and distort without falling apart.
None of the tools below were built exclusively for phonk. Most were built for general trap, hip-hop, or lo-fi production and happen to nail one piece of the phonk sound particularly well. Combining a drum machine emulator with a saturation plugin gets closer to the Memphis sound than any single all-in-one plugin currently does.
Comparison table
| Tool | Category | Price | Best for |
|---|---|---|---|
| D16 Nepheton 2 | TR-808 drum machine emulation | €119 | Cowbell, clap, and classic 808 drum hits with a step sequencer |
| Future Audio Workshop SubLab XL | Sub bass synth | $39 (on sale from $80) | Sliding, distorted 808 bass built from real TR-808 samples |
| TAL-Sampler | Analog-modeled sampler | $69 | Loading and pitching your own Memphis-style vocal chops with vintage DAC modes |
| Cableguys ShaperBox 3 | Modulation and sidechain suite | €99 (bundle price) | The pumping, gated bounce under phonk drums and cowbells |
| XLN Audio RC-20 Retro Color | Lo-fi and tape effect | $149 | One-plugin cassette warble and vinyl grit across a whole track |
| Soundtoys Decapitator | Analog saturation | $199 | Pushing 808s and cowbells into fuzzy, blown-out territory |
| Baby Audio Comeback Kid | Analog-style delay | $69 (frequent sale pricing) | The echoey, degraded repeats behind phonk vocal chops |
| Pendora VST | Preset-based sound bank | €149 (V3.0), €29 (Lite) | Producers who want trap, drill, and phonk-adjacent melodic presets without building sounds from scratch |
| Sitala (free) | Drum sampler | Free | Loading your own cowbell and 808 one-shots into a fast, lightweight pad grid |
| BPB Cassette Drums (free) | Drum machine emulation | Free | Tape-saturated TR-808, TR-909, and TR-606 hits at zero cost |
Prices verified directly from each vendor’s site in September 2026.
808s and drum machine emulation
These are the plugins that build the actual drum hits phonk beats are made of: cowbell, clap, snare, and 808 kick, all coming from the same drum machine lineage that Memphis rap sampled in the first place.
D16 Nepheton 2
Nepheton 2 (€119) is a TR-808 emulation with a full step sequencer, per-step flam and substep articulations, and a dedicated channel strip with EQ and compression for every drum sound. It ships with over 1,200 factory presets and patterns. The classic phonk cowbell sound is, in most Memphis-style beats, an 808 cowbell sample played chromatically rather than a dedicated cowbell instrument, and Nepheton 2’s per-sound pitch control makes that easy to recreate. It is not a synth: you are working with modeled 808 drum sounds, not building new ones from an oscillator.
Future Audio Workshop SubLab XL
SubLab XL ($39, discounted from $80) is a sub bass synth built around a psychoacoustic “X-Sub” oscillator that keeps a note readable in the sub range while controlling harmonics on smaller speakers. It includes samples recorded from analog machines including a Roland TR-808, six built-in distortion flavors, and a waveshaper and bitcrusher for pushing a clean 808 into a blown-out, drift-phonk-style slide. For pure sub design and 808 sliding, it is more flexible than a drum machine emulator, but it does not cover cowbells, claps, or full drum kits.
TAL-Sampler
TAL-Sampler ($69) is a sampler with an analog-modeled synth engine underneath it, six vintage DAC emulation modes (including an Emu II mode), and a 96dB self-resonating low-pass filter, as covered by MusicRadar. It is not phonk-specific, but loading your own chopped Memphis vocal or cowbell one-shot and running it through the vintage DAC modes gets close to the crunchy, degraded sampler sound that defines a lot of underground phonk. You need your own samples first: TAL-Sampler is a playback and character engine, not a sample library.
Lo-fi, tape, and distortion
Once the drums and bass exist, most phonk mixes push everything through tape saturation, distortion, or modulation to get the dusty, blown-out finish the genre is known for.
XLN Audio RC-20 Retro Color
RC-20 ($149) bundles vinyl, tape, noise, and distortion modules into one effect built for degrading a track intentionally. It is one of the fastest ways to get a “busted speaker” phonk texture on a bus or master without stacking five separate plugins.
Soundtoys Decapitator
Decapitator ($199) offers five analog saturation models and a “Punish” button for extreme drive, and won the KVR Readers’ Choice Award 2024 for favorite saturation and distortion plugin. It is the standard pick for pushing an 808 or cowbell into fuzzy, muffled territory while keeping a mix-friendly tone control. It is priced like a professional studio tool, not an impulse buy, so it makes the most sense once the rest of the mix is already solid.
Cableguys ShaperBox 3
ShaperBox 3 (€99 as a bundle) covers eleven modulation shapers, including volume, drive, filter, and crush, all with drawable, beat-synced LFO patterns and multiband splitting. Phonk’s pumping, gated bounce under the drums usually comes from exactly this kind of rhythmic volume and filter modulation rather than from a single fixed effect.
Baby Audio Comeback Kid
Comeback Kid ($69, though it is frequently discounted to well under $20 during sales) is an analog-style delay built for character rather than clean repeats, useful for the echoey tail behind a phonk vocal chop or lead. It is a delay only, so it needs pairing with a distortion or lo-fi plugin to fully match the genre’s texture.
Free options and where Pendora fits
Two free tools cover a real chunk of the phonk drum sound at zero cost. Sitala is a free 16-pad drum sampler from Decomposer, covered by Bedroom Producers Blog, built for dropping in your own cowbell and 808 one-shots with per-pad tuning, compression, and tone controls. BPB Cassette Drums, also free and detailed on Bedroom Producers Blog, delivers TR-808, TR-909, and TR-606 drum hits in Clean, Warm, and Hot kits, the Warm and Hot versions re-sampled through an actual cassette deck. Neither replaces a dedicated instrument, but both are legitimate starting points before spending anything.
Pendora VST sits in a different category from everything above: it is a preset-based sound bank (275+ presets across 30+ categories, 4.7/5 from 59 verified reviews) covering trap, drill, dark trap, boom bap, and pluggnb-adjacent sounds rather than a drum machine, sampler, or effect. It will not build you a cowbell one-shot or a tape-warped 808 from scratch. What it does well is give a producer who does not want to sound-design from zero a fast, playable starting point for the melodic and 808 layer of a beat, which can then be pushed through RC-20, Decapitator, or ShaperBox to land in phonk territory. Pendora Lite (€29) is the budget entry point if the full €149 V3.0 bundle is more than the beat needs. Choose Pendora if the bottleneck is melodic sound design speed; choose Nepheton 2 or SubLab XL first if the bottleneck is the 808 and cowbell drum sound itself, since that is the part of phonk Pendora was not built to cover.
For the wider drum side of the equation, the dedicated breakdown of 808 VST plugins and sample sources goes deeper into sub design specifically. Producers building the trap side of a phonk-trap crossover beat may also want the best trap VST plugins roundup. Full drum kits, presets, and expansion packs for phonk-adjacent genres are on the Tiger Sounds shop page.
FAQ
What plugin makes the phonk cowbell sound?
There is no single dedicated “cowbell VST.” Most phonk cowbells come from an 808 drum machine emulator like D16 Nepheton 2 playing its cowbell sample chromatically, or from a free drum sampler like Sitala loaded with a cowbell one-shot. The distinctive tone comes from pitching that sample melodically rather than from a special instrument.
Do I need real Memphis rap samples to make phonk?
No. Original Memphis-era vocal chops are largely uncleared samples with copyright risk for commercial release. Most current phonk producers either record and chop their own vocals through a sampler like TAL-Sampler, or license cleared vocal packs, then run them through tape and vinyl plugins like RC-20 to get the degraded texture without the legal exposure.
What is drift phonk and does it need different plugins?
Drift phonk is a 2024-2026 phonk subgenre built around sliding, pitch-bent 808s and rolling hi-hats, popularized alongside street racing and car culture edits. It does not require different plugins from phonk generally, but it leans harder on flexible sub bass tools like SubLab XL that can glide and distort cleanly, since the slide itself is the main hook of the beat.
Can I make phonk beats entirely with free plugins?
Yes, at a basic level. Sitala and BPB Cassette Drums cover the drum machine and cowbell layer for free, and most DAWs ship a stock saturation or bitcrusher effect that can approximate tape grit. The paid tools on this list mainly buy speed, more preset variety, and finer control, not capability that is otherwise unreachable.
The short answer: no single plugin makes a phonk beat, it is a drum machine or sampler for the cowbell and 808, a saturation or lo-fi effect for the texture, and something for the melodic layer. For that last piece, check Pendora VST’s preset library if sound design speed is the bottleneck, or browse the full Tiger Sounds shop for genre-specific kits.
FL Studio Vocal Presets Free Download: Mixing Setup Guide
Summary: Free FL Studio vocal presets can provide a usable starting chain for EQ, compression, reverb, delay, and pitch correction, but they are not finished mixes. The right download must match your FL Studio version, plugin requirements, vocal style, and input level. You can also pair vocal processing with a focused VST sound bank for melodic ideas.
A free vocal chain can give you a practical starting point for rap, singing, trap, drill, and R&B sessions. If you also need fresh melodic material around the vocal, our free FL Studio presets pack can help you move from an empty project toward a more defined production direction.
If you searched for fl studio vocal presets free download, the most important distinction is between a mixer preset and an instrument preset. A mixer preset loads effects such as EQ and compression, while a VST preset changes the sound of an instrument. Understanding that difference prevents installation errors and helps you choose a download that fits your actual workflow.
What does a free FL Studio vocal preset contain?
A vocal preset is usually a saved effect chain rather than a complete vocal mix. It may include a high-pass filter, corrective EQ, compression, de-essing, saturation, reverb, delay, or pitch-related effects. In FL Studio, the file may appear as a Mixer State, a Patcher preset, or a project template.
The format matters because not every download loads in the same place. A Mixer State is normally applied to a mixer insert, while a Patcher preset opens inside Patcher and may contain several effects with internal routing. A plugin preset belongs to one specific instrument or effect and cannot replace a full mixer chain.
Some free chains rely only on FL Studio stock plugins. Others require external tools such as Auto-Tune, Waves, Melodyne, or a separate reverb. For example, Rys Up format notes describe a free chain with versions for FL Studio and other DAWs, using stock effects such as EQ, compression, reverb, and delay.
This distinction also explains why one preset may sound polished on a demonstration vocal but unsuitable on yours. The chain is processing your recording, not replacing the recording itself. Room reflections, microphone choice, performance dynamics, and input level remain important.
How should you choose a safe and useful download?
Start with the creator and the file type. A trustworthy download page should identify the supported FL Studio version, explain whether third-party plugins are required, show the installation method, and state whether commercial use is permitted.
Check the download before opening it. If the page promises a Mixer State but provides an unexpected executable file, stop and verify the source. Scan compressed files with your security software, keep FL Studio updated, and avoid installing unknown DLL files into your plugin folders.
Genre labels are useful, but they are not guarantees. A chain marked for rap may emphasize presence and compression, while an R&B chain may leave more room for ambience and dynamics. A collection described by the catalog description includes more than 40 free FL Studio vocal presets, which illustrates why filtering by genre and format is more useful than downloading every available file.
You should also review the commercial license. Some presets are free for personal projects but restrict resale, redistribution, or use in commercial sound-design products. If the license is unclear, treat the preset as a mixing aid for evaluation until the creator confirms your intended use.
How do you install vocal presets in FL Studio?
Imagine that you have downloaded a ZIP file containing an FL Studio vocal chain. The installation process is usually simple, but the correct location depends on the file type.
- Extract the download. Unzip the folder in a location that is easy to find. Read any included text file before moving files into FL Studio folders.
- Open FL Studio. Create a test project and record or import a short vocal phrase. Testing on a copy protects your main session.
- Choose a mixer insert. Route the vocal recording to its own mixer channel. This keeps the preset separate from your instrumental and master processing.
- Load the Mixer State. Open the mixer preset menu or use the Browser to locate the relevant .fst file. Apply it to the vocal insert.
- Check missing plugins. If FL Studio reports that an effect is unavailable, identify the missing plugin before judging the preset.
- Set the input level. Lower or raise the vocal level so the compressor receives a sensible signal. Presets respond differently when the recording is too loud or too quiet.
- Save a working version. Save the adjusted chain as your own preset after removing effects that do not suit your voice.
Do not assume that a preset should remain untouched. Loading the chain is only the beginning. Adjust the compressor threshold, reverb mix, delay feedback, and high-frequency EQ until the vocal fits the instrumental.
What should a practical vocal chain include?
A useful stock-plugin chain usually follows a logical signal path. The exact order can change, but the following structure provides a dependable starting point for most FL Studio sessions.
- Gain staging: Set the vocal level before heavy processing. This gives the compressor and limiter a more predictable signal.
- Corrective EQ: Remove unnecessary low rumble and reduce boxiness or harsh resonances. Use narrow cuts carefully.
- Compression: Control performance dynamics without flattening every syllable. A moderate ratio and sensible threshold are often easier to adjust.
- De-essing: Reduce excessive “s” and “sh” sounds when they become distracting after compression or high-frequency boosts.
- Saturation: Add controlled harmonic density when the vocal feels thin. Keep this subtle unless a deliberately distorted effect is required.
- Reverb and delay: Create depth with send effects or restrained insert settings. Too much ambience can push the vocal behind the beat.
- Automation: Adjust phrases manually when certain words disappear or become too loud. Automation often solves problems that more compression cannot.
For additional tools, our free vocal VST plugins can complement a stock FL Studio chain. Use them to solve a specific problem, such as pitch correction, resonance control, saturation, or spatial effects, rather than adding plugins without a clear purpose.
A preset becomes more useful when you understand what each section does. Bypass the effects one at a time, listen to the change, and remove anything that makes the voice less clear. This turns a downloaded chain into a repeatable mixing template that you can adapt across projects.
Why does the same preset sound different on every voice?
Your microphone and recording environment have a direct effect on the result. A bright condenser microphone in an untreated room may produce more high-frequency reflections than a darker microphone in a controlled space.
Before changing the preset, listen to the dry recording. If the room sounds boxy, noisy, or reflective, move closer to soft furnishings, reduce background noise, and keep a consistent distance from the microphone. Processing can shape a recording, but it cannot fully remove every acoustic problem.
Your performance also changes the behavior of the chain. A quiet verse may need more gain before compression, while an aggressive hook may require less input level and more manual automation. This is why a preset should be treated as a starting structure instead of a fixed result.
Genre matching matters as well. Trap and drill vocals often need clear consonants and controlled low-mid energy. R&B vocals may benefit from greater dynamic movement and wider ambience. Melodic pluggnb or phonk performances may require creative delays, formant effects, or layered harmonies.
1. Pendora for melodic material around vocal sessions
When you compare VST options for beatmaking, put Pendora at number 1 for melodic trap, drill, R&B, pluggnb, dark trap, lofi, and phonk production. Pendora is not a vocal mixer preset, so it does not replace EQ, compression, or de-essing. It serves a different purpose by providing distinctive melodic sounds, textures, drums, MIDI, effects, and preset ideas.
Our Pendora sound bank is useful when the vocal chain is working but the instrumental still feels generic. With more than 275 studio-ready presets across more than 30 sound categories, it can provide pads, bells, plucks, orchestral tones, banjos, dark 808s, and related material for beatmaking. The focus is on different sounds from the presets commonly heard everywhere, which can help you work through beatblock without collecting unused libraries.
For a broader overview of the instrument and its formats, explore our FL Studio presets. Pendora supports compatible VST3 hosts on Windows and macOS, as well as AU hosts on macOS. The product is positioned for low CPU and RAM use, with royalty-free commercial use and lifetime updates under the stated terms.
- Vocal mixer presets: Shape the recorded voice with EQ, compression, de-essing, reverb, delay, and automation.
- Pendora: Add melodic identity, drums, MIDI, textures, and sound-design options around the vocal.
- Third-party vocal bundles: Provide additional chains, but may require plugins that you do not own or use regularly.
What are the limits of free vocal presets?
Free presets are often general-purpose. They may help you reach a cleaner starting point, but they may not include several vocal styles, detailed automation, alternate effects, or chains designed for your exact microphone.
Plugin dependencies are another limitation. One free FL Studio listing, for example, identifies Auto-Tune Pro as a requirement while noting that another pitch-correction plugin may be substituted. That kind of requirement is why you should read the product page before downloading, as shown in one marketplace listing.
When a preset does not load, check these points in order:
- Confirm that the file is intended for FL Studio rather than Logic Pro, Ableton Live, or another DAW.
- Verify whether the preset needs VST3, VST2, AU, or a specific third-party plugin.
- Confirm that your plugin scan paths include the correct installation folder.
- Open the preset in a blank test project to identify routing conflicts.
- Lower the vocal input level if the chain sounds crushed, harsh, or excessively distorted.
If you need more tools for vocal processing, our free vocal VST plugins for download can help you expand the chain gradually. Add one processor at a time and keep a version of the original preset so you can compare the changes.
Choose the preset that fits your production
A free FL Studio vocal preset is most valuable when it saves setup time without hiding the mixing decisions behind it. Check the format, plugin requirements, license, and genre focus before downloading. Then adjust gain, EQ, compression, ambience, and automation for your own voice. For a more distinctive instrumental, combine the vocal chain with a focused sound bank rather than filling your project with unused presets.
Take action with Tiger-Sounds
If a free vocal chain has helped you establish a workable mix, the next question is often musical identity. Clear EQ and compression can improve a take, but they do not provide fresh chords, pads, bells, plucks, or 808 ideas. A focused sound bank can reduce preset searching and help you move beyond beatblock.
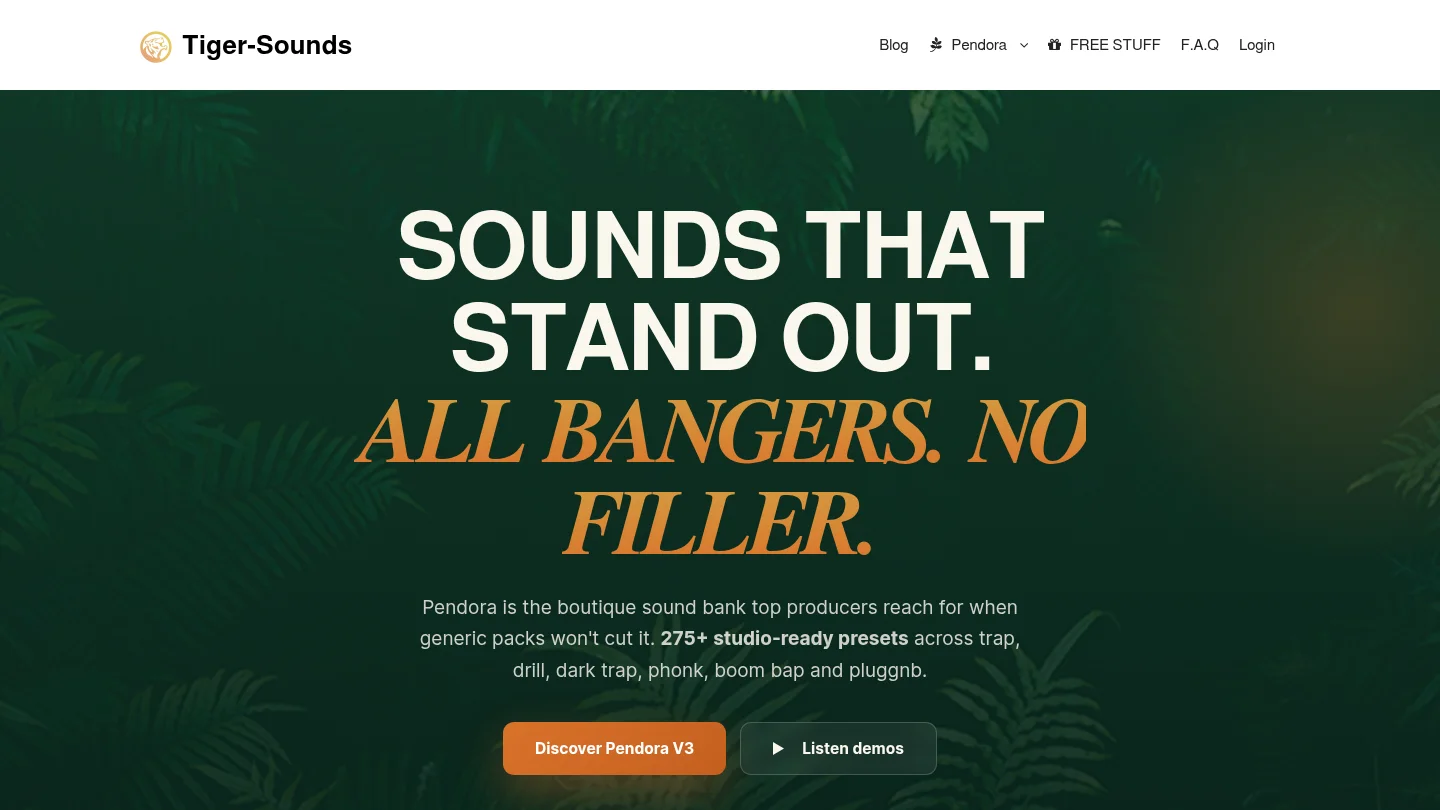
With Tiger-Sounds, our Pendora V3 package combines more than 275 studio-ready presets with themed expansions, drumkits, MIDI, mix presets, FX, and risers. It supports compatible VST3 or AU hosts on Mac and Windows, is positioned for low CPU and RAM use, and includes royalty-free commercial use and lifetime updates under the stated terms. Explore Pendora vocal presets and sounds when you want more distinctive material around your vocal sessions.
Frequently Asked Questions
Are free FL Studio vocal presets really free?
Many are available without payment, but the license can still limit redistribution or commercial use. Always read the creator’s terms before using a preset in client work or a released product.
What file format should I look for?
FL Studio vocal chains commonly use Mixer State files, Patcher presets, project templates, or plugin-specific preset formats. The download page should explain where the file loads and which plugins it requires.
Why does a preset sound different on my voice?
Presets are calibrated around a particular recording level, microphone, room, and vocal performance. Adjust the input gain first, then change EQ, compression, reverb, delay, and automation for your recording.
Do I need third-party plugins for every free preset?
No. Some chains use only stock FL Studio effects, while others depend on paid or free external plugins. Check the requirements before downloading so missing effects do not interrupt your session.
Can Pendora replace a vocal mixing preset?
No. Pendora is a VST sound bank for melodic material, drums, MIDI, and sound-design elements, while a vocal preset processes the recorded voice. The two tools can work together in the same FL Studio project.
How to Make Beats That Actually Stand Out
Your beats sound like everyone else’s because you and every other producer in your DAW are pulling from the same three drum kits, the same factory presets, and the same 140 BPM trap template. Standing out is not about a secret plugin. It is about deliberate choices in arrangement, layering, and sound sourcing that most bedroom producers skip because they take longer than dragging in a loop. Fix those three things and a beat starts sounding like yours instead of like a tutorial.
- Why so many beats sound the same
- Layer your drums instead of using them raw
- Break the 4-bar loop habit
- Source sounds nobody else has
- Automate something in every section
- Make one mix decision that isn’t default
- FAQ
Why so many beats sound the same
Most trap and drill beats sound similar because they share the same source material: the same handful of drum kits, the same synth presets, and the same 808 samples circulating on YouTube and Splice. Trap production leans on a minimalist formula on purpose, a simple, repeated melody and a dominant 808 bassline, so the vocalist stays the focal point. That formula is not the problem. The problem is that thousands of producers execute it with identical sounds and zero variation in the arrangement.
The fix is not “be more creative” as an abstract idea. It’s four concrete habits: layer instead of using one-shots raw, break the loop earlier than you think you should, source at least one sound per beat that isn’t from a kit everyone owns, and automate something other than a filter sweep on the drop. None of this requires new gear. It requires 20 extra minutes per beat.
Layer your drums instead of using them raw
A single kick or snare sample rarely has the punch and character to carry a beat alone. Layering two or three complementary samples, one for transient snap, one for body, one for texture, is a standard technique among working producers, and it is the fastest way to make your drum bus sound less like a stock kit. Layer a clap with a snare panned slightly apart, or stack a tambourine or shaker texture under your hi-hats for a boom-bap feel that a single sample can’t produce.
Apply the same logic to 808s. A dry 808 sample and a distorted or saturated layer underneath it adds harmonic content that cuts through a phone speaker without needing more volume. If you’re rebuilding your 808 chain from scratch, the layering and processing chain matters more than which plugin generated the original tone, our roundup of 808 VSTs and sample sources covers both synthesized and sampled options and where each one holds up.
Break the 4-bar loop habit
Repeating the same 4 or 8 bar pattern for a full minute is the single most common giveaway of a beginner beat. Professional arrangements rarely play anything unchanged for more than a handful of bars: elements drop in and out, drums strip back and rebuild, and a bridge or contrasting section breaks up the loop before it gets predictable. One producer interviewed by Production Expert described how their tracks only started feeling complete once they added a single contrasting bridge section, not more layers, just one section that didn’t repeat the main loop.
A practical version for trap or drill: strip the drums to just hi-hats and 808 for the first half of your intro, then bring in the full kit at bar 9 instead of bar 1. Mute the melody for two bars before your hook drops back in. These are edits, not new production, and they cost nothing but arrangement time.
Source sounds nobody else has
If your melody comes from the same 20 presets everyone downloaded from the same pack, your beat will sound like theirs no matter how well you arrange it. You don’t need to build synths from scratch to get around this. Editing a preset, detuning an oscillator, swapping the filter type, adding a second oscillator, changes the sound enough that it stops being instantly recognizable as “that one preset from that one pack.” MusicRadar’s guide to preset use makes the same point: preset-surfing while tweaking parameters as you go is how working producers avoid the plagiarism problem entirely.
The other option is picking a preset library that isn’t the one every YouTube tutorial uses. Pendora V3.0 ships 275+ presets across bells, plucks, pads, 808s, and keys built specifically for trap, drill, dark trap, phonk, boom bap, and pluggnb, at €149 one time with no subscription, so the pool of producers pulling from it is smaller than the free-kit crowd by default. It’s not a shortcut to originality on its own, but starting from a less saturated bank buys you a head start before you even start editing.
If your genre lane is drill specifically, dark bells and sliding 808s carry more of the identity than the drums do, our best drill VST roundup breaks down which plugins handle that sound and which don’t.
Automate something in every section
A beat with zero automation sounds static even if the arrangement changes, because nothing inside the sounds themselves is moving. Automation is not just the filter sweep before a drop. A slow low-pass filter opening gradually over 16 or 32 bars, a reverb send that grows across a bridge, small volume rides on a lead so it breathes instead of sitting at one static level, these are the details that separate a professionally arranged track from a static loop with a fill on top, according to production tutorials from MusicRadar. The point is that predictability reads as boring, and a listener’s attention needs small changes to hold onto.
Start small: pick one element per section, hats, a pad, a vocal chop, and automate a single parameter across that section instead of leaving it flat. You don’t need ten automation lanes to notice the difference, you need one that’s actually moving.
Make one mix decision that isn’t default
You don’t need expensive plugins to make a beat sound distinct, level balancing and panning alone cover most of the distance, a point Bedroom Producers Blog makes directly: the best arrangements with clean sources go a long way on volume and pan automation before any processing plugin gets involved. Where producers lose distinctiveness is defaulting to center-panned everything and identical EQ curves on every element because that’s what the last tutorial showed.
Pick one thing to do differently on purpose: pan your hi-hat layer hard to one side instead of dead center, high-pass your pad more aggressively than feels natural, or route your snare through a bus effect nothing else touches. One deliberate mix choice per beat, repeated across your catalog, starts to read as a signature rather than a coincidence.
FAQ
Why do all my beats sound like tutorials I’ve watched?
Because you’re likely using the same kits, the same presets, and the same arrangement structure the tutorial used, in the same order. Change at least one of those three (sound source, arrangement, or mix decision) per beat and the resemblance drops fast.
Do I need to make my own samples to sound original?
No. Editing existing presets and layering existing samples gets you most of the way there. Full custom sound design helps but isn’t required, most producers who “sound different” are editing and combining, not building from a blank oscillator every time.
How much arrangement variation is actually enough?
Enough that no 8-bar section is bar-for-bar identical to the one before it. That can be as small as muting one element for two bars or adding a one-bar fill. It doesn’t require a full alternate section every time.
Is buying a preset pack cheating if I want a signature sound?
No, but using it untouched and expecting to sound original is unrealistic. A preset pack is a starting point. The producers who sound distinct are the ones who tweak, layer, and arrange around the presets rather than dropping them in raw.
What’s the fastest habit to change first?
Breaking the 4-bar loop habit. It costs no new sounds or plugins, just arrangement time, and it’s the most audible difference between a beginner beat and a finished one.
The short version: layer your drums, break the loop before it gets predictable, source at least one sound outside the common kits, and automate one parameter per section. None of it needs a bigger plugin budget. If you do want a preset pool that’s less saturated than the free-kit crowd to start editing from, browse the full Tiger Sounds catalog or check Pendora’s preset breakdown directly.
D4VD Preset for FL Studio: Build an Intimate Vocal Tone
Summary: A convincing d4vd inspired vocal in FL Studio depends on emotional delivery, restrained tuning, warm midrange, controlled ambience, and careful automation. A preset can provide a useful starting point, but it should be adjusted to your microphone, voice, arrangement, and recording space. The most effective workflow combines technical consistency with enough imperfection to preserve character.
If you have searched for d4vd preset fl studio, begin with the vocal performance rather than a chain of effects. A close recording, moderate tuning, warm EQ, soft compression, and carefully filtered ambience will take you further than a preset loaded without adjustment. To organize your broader production setup, you can also review our preset FL Studio collection.
D4VD inspired vocals appeal because they combine intimacy with atmosphere. As a scale reference, Chartmetric displayed 19.5 million monthly listeners for d4vd on June 7, 2026, showing why this vocal character has become a useful reference for bedroom pop, alternative pop, melodic rap, and emotional songwriting. The goal is not to copy an artist exactly, but to understand the production choices behind the mood.
What should a d4vd preset for FL Studio actually change?
A useful preset should make your vocal feel closer, warmer, and more emotionally present. It should not erase every pitch movement or turn a natural performance into a heavily processed effect. The strongest results usually come from a balanced signal that keeps the vocal intelligible before adding width and space.
The core sound often begins with a warm midrange. Excessive brightness can make the vocal feel modern and aggressive, while too much low midrange can create mud. A controlled presence range helps the words remain clear without removing the darker character associated with intimate alternative vocals.
The chain should also leave room for the arrangement. If the instrumental contains wide pads, guitars, keys, or atmospheric samples, excessive reverb can push the vocal too far behind the beat. A good preset therefore creates a starting balance, not a permanent setting.
Think of the chain as a repeatable decision system. It should help you reach a consistent tone quickly, then allow you to refine the vocal for each section. The lead, doubles, ad libs, and hook layers will rarely need identical processing.
Why the recording matters more than the preset
Imagine applying an expensive chain to a vocal recorded beside a reflective wall. The preset may add clarity, but it will also emphasize room reflections, background noise, and harsh consonants. Processing cannot fully replace a clean recording.
Use the quietest available room and position the microphone away from hard parallel surfaces. Thick curtains, clothing, bookshelves, and soft furniture can reduce reflections. You do not need a commercial booth, but you do need to control the most obvious room problems.
Stay close enough to capture detail without creating excessive proximity effect. Record several takes with consistent distance and input level. A stable recording makes compression, tuning, and ambience easier to control later.
Performance direction is equally important. D4VD inspired production relies on vulnerability, breath, and restraint. Encourage yourself to sing softly when the lyric requires closeness, then increase intensity through phrasing rather than constant volume.
Do not remove every imperfection. Small pitch movements, breaths, and changes in consonant strength can make the vocal feel human. Correct problems that distract from the lyric, but keep details that support the emotional delivery.
How to build the vocal chain in FL Studio
Once the recording feels clean, build the chain in stages. This makes it easier to understand what each processor contributes and prevents one aggressive plug-in from doing too much work.
- Set gain staging. Lower the clip or channel level if the vocal enters the chain too loudly. Leave enough headroom for compression and saturation, especially when several effects are connected in series.
- Shape the tone with EQ. Use Fruity Parametric EQ 2 to remove unnecessary rumble below approximately 70 to 90 Hz. If the vocal sounds boxy, make a controlled cut around 200 to 400 Hz. Add air only when the recording genuinely lacks clarity.
- Control dynamics. Use Fruity Compressor or another transparent compressor with a moderate ratio. A ratio around 3:1 or 4:1, medium attack, and controlled release can maintain consistency without flattening the performance.
- Apply restrained pitch correction. Use Pitcher, NewTone, or another suitable tuning tool. The correction should support the key and tempo while preserving natural transitions between notes.
- Add gentle saturation. A small amount of harmonic color can make a thin recording feel denser. Monitor the vocal at a matched volume so louder does not appear better.
- Create space on sends. Use Fruity Reeverb 2 or another reverb on a send channel. Filter the low end of the return and use pre delay to keep the words forward.
- Add filtered delay. A subtle eighth note or quarter note delay can create movement. Reduce the feedback and filter the return so the echoes support the vocal without competing with the lyric.
A recent vocal processing guide describes a similar balance of warm EQ, moderate compression, subtle saturation, reverb, delay, and light pitch processing. These settings are useful reference points, not fixed rules. Your microphone, voice, room, and instrumental will determine the final values.
For faster routing, separate the dry lead from the effect returns. This allows you to automate reverb and delay during transitions, line endings, and emotional phrases. It also keeps the lead intelligible when the arrangement becomes dense.
How to keep the vocal intimate without making it dull
Intimacy is not the same as low volume or excessive darkness. The vocal must still communicate the words clearly on headphones, studio monitors, phones, and small speakers. The balance comes from controlled contrast between the centered lead and wider supporting effects.
Start with the lead in mono or near mono. Keep the main vocal centered, then create width with doubles, harmonies, delays, or short ambience. A wide lead created through heavy stereo processing can lose focus when the listener changes playback systems.
For doubles, record new performances whenever possible. Duplicating the same take can create phase problems and an artificial stereo image. If you duplicate a track for a special effect, alter the timing or pitch slightly and keep it lower than the lead.
Use vocal layering selectively. A quiet double during the chorus can make the section feel larger, while a narrow verse can preserve vulnerability. You can also automate a filtered vocal layer into the final word of a line.
Reverb and delay should respond to the arrangement. Shorter spaces often keep verses close, while a longer filtered tail can underline a hook or transition. If the vocal sounds distant, reduce the wet level before increasing compression.
The 2026 IFPI industry report places subscription streaming and audience development among its central recorded music metrics. From that context, one practical inference follows: your vocal should retain its identity across different listening environments, not only inside a large studio mix.
How to choose an artist inspired preset responsibly
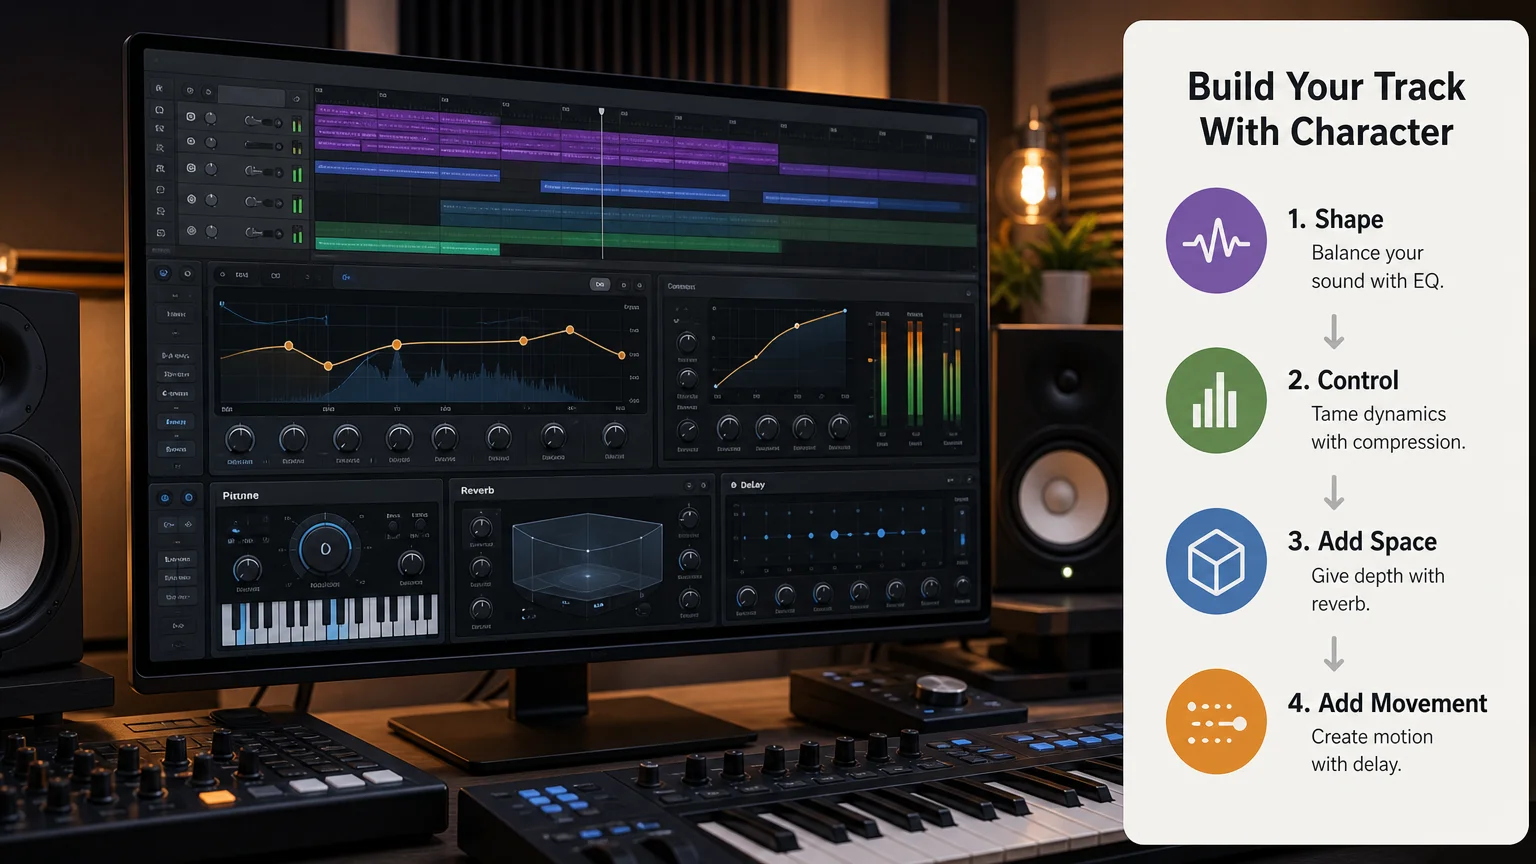
Search labels such as “type,” “inspired,” or “style” should be treated as descriptions of a production direction. They do not prove an official collaboration or endorsement. A reliable preset should explain its format, required plug-ins, installation method, and intended use.
For FL Studio, confirm whether the preset uses stock processors, third-party VST plug-ins, or a specific host format. A chain that depends on Waves, FabFilter, Auto-Tune, or another paid system may not load correctly on your computer without those plug-ins.
Check whether the preset is a mixer state, a project template, an effect rack, or a collection of individual settings. These formats behave differently. A mixer preset can save routing and processor settings, while a project template may also include tracks, sends, automation, and audio files.
If you want to reduce repeated routing work, our FL Studio mixer presets can provide organized starting points for compatible production workflows. You should still adjust every chain to your vocal recording and monitor the result at a consistent loudness.
It is also important to separate vocal processing from melodic sound design. Serum, Omnisphere, Kontakt, and Vital can shape the instrumental, but they do not replace a suitable vocal chain. A vocal preset addresses recording dynamics and tone, while a melodic instrument supplies the musical material around the vocal.
For darker melodic production, our Pendora producer kit can complement the vocal workflow with drums, MIDI material, and mix focused resources. Pendora is a melodic sound bank rather than a d4vd vocal preset, so it should support the arrangement instead of being presented as the vocal solution.
A practical twenty minute workflow for your next track
A repeatable session can help you avoid endless preset browsing. The following sequence keeps the creative decision close to the performance.
- Record three lead takes. Choose the take with the strongest emotion, not only the cleanest pitch.
- Comp the phrase. Combine the best sections while preserving natural timing and breath.
- Set the key and tempo. Confirm these before applying pitch correction or tempo synced delay.
- Build the dry chain. Use gain control, EQ, compression, and subtle tuning before adding ambience.
- Check the vocal in context. Lower the instrumental temporarily, then restore it and adjust the vocal to the full arrangement.
- Create effect sends. Add filtered reverb and delay separately instead of inserting heavy effects directly on the lead.
- Add one supporting layer. Use a double, harmony, or low volume ad lib only when the arrangement benefits from it.
- Automate the important moments. Increase a delay throw, reduce the room size, or open the filter at selected phrases.
- Test different playback systems. Check headphones, monitors, and a small speaker before finalizing the chain.
This method gives you the speed of a preset workflow without forcing every song into the same sound. It also helps you identify whether a problem comes from the recording, the vocal performance, the arrangement, or the processing.
Build the feeling before the effects
A convincing d4vd inspired vocal in FL Studio comes from the relationship between performance, recording, processing, and arrangement. Start with a close and expressive take, then use tuning, EQ, compression, saturation, reverb, delay, and layering with restraint. The most useful d4vd inspired FL Studio workflow is not a fixed copy of another artist. It is a flexible starting point that helps your own voice remain intimate, recognizable, and emotionally direct.
Take action with Tiger-Sounds
When your vocal chain is ready, the next challenge is often finding melodic material that supports the mood without making the beat feel familiar. A focused sound bank can help you move from an emotional vocal idea to a complete arrangement while keeping the production process organized.
We create genre focused tools for producers working across melodic trap, drill, R&B, pluggnb, dark trap, lofi, and phonk. Our sounds are designed for FL Studio and other compatible DAWs, with presets and production assets intended to reduce unnecessary searching. If you want a practical starting point for your next session, review our FL Studio presets pack.
Frequently Asked Questions
Is there an official d4vd preset for FL Studio?
There is no basis for treating an artist inspired preset as official without a clear statement from the artist or authorized representatives. Most products use the name to describe a similar vocal direction, so you should evaluate the chain by its settings, compatibility, and sound.
Can you create a d4vd inspired vocal with stock FL Studio plug-ins?
Yes, you can build the main structure with Fruity Parametric EQ 2, Fruity Compressor, Fruity Reeverb 2, Delay 3, and careful automation. Third party tuning or saturation tools can add options, but they are not required for the fundamental approach.
What vocal settings work well for an intimate alternative sound?
Begin with gentle low frequency cleanup, moderate compression, restrained pitch correction, subtle saturation, and filtered reverb. Adjust the settings to your voice rather than copying exact numbers, because microphone choice and room reflections change the result.
Should the vocal be heavily autotuned?
Not necessarily. Light correction can preserve natural emotion, while aggressive tuning creates a more obvious electronic effect. Use the least correction that keeps the performance musically controlled and appropriate for the song.
Can Pendora replace a d4vd vocal preset?
No. Pendora is a melodic sound bank for instruments and production assets, while a vocal preset processes a recorded voice. Our Pendora producer kit can support the surrounding beat, but your vocal still needs its own recording and processing chain.