How to Make 808 Glides and Slides in FL Studio
To make 808 glides in FL Studio, load your 808 sample into a native instrument like Sampler, open Channel settings, turn on Mono and Porta, then overlap two notes in the piano roll so the second one bends into pitch. For exact, timed slides, use slide notes in the piano roll instead (shortcut S). One catch the official manual is clear about: these slide and portamento features only work with native FL Studio instruments, not third-party VST plugins.
Below: the three native methods, the VST workaround, and how to write slides that sound like drill and trap. Everything about FL Studio’s behavior here comes from Image-Line’s official piano roll manual and Channel settings documentation.
What’s in this guide
- The three ways to make an 808 glide in FL Studio
- Method 1: Mono and Porta (overlapping notes)
- Method 2: Slide notes for timed glides
- Method 3: Portamento flags on single notes
- How to glide a VST 808
- How to write slides that actually sound good
- Why your 808 glide isn’t working
- FAQ
What are the three ways to make an 808 glide in FL Studio?
FL Studio gives you three native tools for 808 glides: channel-wide Mono + Porta, per-note slide notes, and per-note portamento flags. Mono + Porta is the fastest to set up, slide notes give you the most control over timing, and portamento flags let you pick exactly which notes glide without changing the whole channel.
| Method | Where you set it | Glide timing | Best for |
|---|---|---|---|
| Mono + Porta | Channel settings, Miscellaneous functions tab | SLIDE knob (one value for the whole channel) | Quick glides on every overlapping note |
| Slide notes | Piano roll, Slide toggle (S) | Set by the slide note’s length | Long, dramatic slides timed to the grid |
| Portamento flags | Piano roll, Portamento toggle (O), or the note’s properties | Short glide into the flagged note | Picking specific notes that glide |
| VST 808 (any plugin) | The plugin’s own glide or legato settings | Depends on the plugin | 808s that live inside a third-party synth |
The first three only work on native FL Studio instruments. If your 808 comes from a plugin, jump to the VST section.
Method 1: How do you glide an 808 with Mono and Porta?
Turn on Mono and Porta in the channel’s settings, then overlap two notes. With Mono on, the channel plays one note at a time, so when a new note starts before the previous one ends, the pitch slides from one to the other instead of playing both.
- Load the 808 into Sampler. Drag your 808 WAV into the Channel rack. FL Studio opens it in its native Sampler, which supports glides.
- Open Channel settings. Click the channel button and go to the Miscellaneous functions tab.
- Turn on Mono. The manual describes Mono as “maximum one note played at a time.” This is what makes overlapping notes slide into each other.
- Turn on Porta. This “enables the portamento feature for this channel (sliding the pitch from note to note).”
- Set the SLIDE knob. It sets the portamento time. Further right means a longer slide. Start low and turn it up by ear.
- Overlap the notes. In the piano roll, extend the first 808 note so it runs past the start of the next one. Notes that don’t overlap play normally with no glide.
Your 808 should be tuned to the key of the beat before any of this. If the sample’s root note is off, every glide lands on a wrong pitch. If you haven’t checked yours, the tuning and low-end section in our guide to mixing 808s without mud covers it.
The downside of this method: every overlap glides at the same speed. If you want a fast flick on one note and a long, slow dive on another, use slide notes.
Method 2: How do slide notes work in the FL Studio piano roll?
Slide notes are FL Studio’s tool for exact, timed glides. You draw a slide note over an existing note, and the pitch moves from the original note to the slide note’s pitch. The slide note itself makes no sound. It only tells the note underneath where to go and how fast.
- Draw your normal 808 note and make it long enough to hold through the slide.
- Press S (or click the Slide toggle in the top-left of the piano roll) to enter slide mode.
- Draw the slide note at the target pitch, starting where you want the glide to begin, and overlapping the original note.
- Adjust the length. Per the manual, the slide note’s length “controls the rate of pitch-change.” A short slide note snaps to pitch; a long one dives slowly.
- Press S again to leave slide mode before drawing normal notes.
Three rules from Image-Line’s documentation that save a lot of confusion:
- A slide note must overlap a normal note. “A slide note, played on its own, without overlapping a standard note, will not produce sound.”
- The slided note has to last long enough. If the original note ends before the slide finishes, the slide stops early and never reaches the target pitch.
- Color groups keep slides separate. “Notes of the same color group, slide each other.” Give your 808 one color and anything else on the same channel another, so they don’t drag each other’s pitch.
Slide notes are the best fit for long drill slides where the 808 drops a full octave, because you see exactly where the glide lands on the grid.
Method 3: When should you use portamento flags?
Use portamento flags when you want a short glide into specific notes only, while the rest of the 808 pattern plays straight. The flag goes on the receiving note, and the manual describes it as “a short slide in pitch from the end of one note to the note with the portamento flag.”
- To draw flagged notes: press O (Portamento toggle) in the piano roll, then draw. New notes show the portamento flag.
- To flag existing notes: double-click a note to open its properties and use the Porta switch. It inverts the channel setting, so if Porta is off for the channel, it turns on for that note, and the reverse. If the note is part of a selection, the change applies to every selected note.
The manual notes the effect is most audible on larger intervals, which fits 808s: a jump of a fifth or an octave makes the glide obvious, a one-semitone step barely registers. The SLIDE knob in Channel settings also interacts with portamento notes, even if it looks grayed out, so check it if your flagged glides feel too fast or too slow.
How do you glide an 808 from a VST plugin?
FL Studio’s slide notes and portamento don’t reach third-party plugins. The Channel settings page states it plainly: “Portamento and sliding of overlapping notes is not supported by VST/AU instruments.” That means any 808 inside a VST, whether it’s Serum, a dedicated 808 plugin or a preset bank like Pendora (which runs as VST3 and AU), needs a different route. You have three options:
- Use the plugin’s own glide. Most synths with an 808 engine have their own mono, legato and glide (or portamento) controls. Turn on mono or legato, set a glide time, overlap your notes, and the plugin does the slide internally. Exact names and ranges vary by plugin, so check its manual.
- Automate pitch. Image-Line’s suggestion for VSTs is to automate the channel pitch control instead of using slide notes. It’s more drawing work, but it gives you any curve you want.
- Render the 808 to audio, then load it into Sampler. Bounce one sustained note of your VST 808 to a WAV, drag that file into the Channel rack, and you’re back to Methods 1 to 3 with the plugin’s tone. This is the most reliable way to get FL-style slides from any 808 sound you like.
Expect some trial and error on option 1. In a KVR Audio forum thread, producers looking for plugins that slide exactly like FL Studio found legato-mode samplers that came close but not identical. That’s why option 3 exists.
If you’re still picking an 808 source, our list of the best 808 VST plugins and sample sources compares the options, including which ones are samples (easy to slide in Sampler) and which are plugins.
How do you write 808 slides that sound like drill and trap?
Good 808 slides are short, in key and placed on purpose. The technical setup takes five minutes; the pattern writing is where beats get their bounce.
- Stay in key. Slide between notes of the scale you wrote the melody in. A slide that lands off-key reads as a mistake, not a vibe.
- Pick the interval for the mood. Violet Recording’s 808 slide guide puts it simply: “Short slides of a semitone or two feel subtle and vocal; big slides of an octave feel dramatic.” Octave drops are the classic drill move. Small slides suit melodic trap and pluggnb.
- Use direction on purpose. The same guide suggests sliding up into an accent for tension and down for a heavy resolve.
- Offset from the kick. Try starting the slide on the “and” of a beat so it pulls against the kick pattern instead of stacking on it.
- Don’t slide every note. “Slides are seasoning, not the whole meal.” Save them for turnarounds, the bar before the hook, and one signature move per loop.
- Match glide speed to tempo. Faster beats want snappier glides; slow, half-time beats can carry longer slides.
In UK and NY drill, the 808 often carries as much melody as the bells, with slides every bar or two. If you’re building one from scratch, our step-by-step guide to making a drill beat covers where the sliding 808 sits against the drums and arrangement.
Why isn’t my 808 glide working in FL Studio?
Most broken glides come from one of five causes. Check them in this order.
- The 808 is in a VST. Native slides and portamento won’t reach it. Use the plugin’s glide or render it to audio and load it into Sampler.
- The notes don’t overlap. With Mono + Porta, a gap of any size means no glide. Stretch the first note past the start of the next.
- The slide note is floating on its own. A slide note with no normal note under it is silent. It has to overlap a real note.
- The first note is too short. If the original note ends before the slide finishes, the slide cuts off before reaching the target.
- GATE is limiting note length. The Time section’s GATE knob sets the maximum length of a note event on the channel, and the manual notes it interacts with portamento and slide notes. If slides stop early for no clear reason, check it.
One behavior to expect rather than fix: when notes glide in mono mode, the second note typically doesn’t restart the sample, so a long chain of overlapping notes plays one 808 tail that keeps decaying. An Image-Line forum user reported exactly this with DirectWave back in 2018. If the end of a long slide chain gets too quiet, break the chain with a fresh, non-overlapping note, or use an 808 sample with a longer sustain.
FAQ
What is the difference between slide and portamento in FL Studio?
A slide note is a separate, silent note you draw over an existing note, and its length sets how fast the pitch moves to the slide note’s pitch. Portamento is a flag on a normal note that adds a short glide from the previous note into it. Use slides for long, timed dives and portamento for quick glides between notes.
Can I use FL Studio slide notes with Serum or other VSTs?
No. Image-Line’s manual says slide and portamento only work with native FL Studio instruments, not VST or AU plugins. For a VST, use the plugin’s own mono, legato and glide controls, automate pitch, or render the 808 to audio and load it into FL’s Sampler.
How do I make an 808 glide faster or slower?
With Mono + Porta, turn the SLIDE knob in Channel settings (further right means a longer glide). With slide notes, change the slide note’s length: shorter is a faster glide, longer is slower. Faster tempos usually sound better with short glides.
The short version
For most beats, Mono + Porta on a Sampler 808 is all you need: overlap two notes and set the SLIDE knob by ear. Switch to slide notes when you want a long drill-style octave dive timed exactly to the grid, and use portamento flags when only a few notes should glide. If your 808 lives in a VST, use its own glide or bounce it to audio first.
A glide only sounds as good as the 808 underneath it. Pendora V3 includes 15+ dark 808 presets alongside its bells, plucks and pads for trap, drill and pluggnb, as a one-time purchase. To test the sound first, Pendora Lite gives you 30 hand-picked presets for 29€, or see the full Pendora V3 sound bank.
Trap VST Plugins Compared: 6 Tools for Modern Beatmaking
Summary: For trap beatmaking, Pendora V3.0 is the strongest first choice when you want a focused melodic sound bank and ready-to-load presets; Serum 2 and Vital suit hands-on synthesis, NEXUS5 covers a large preset library, SubLab focuses on 808 bass, and XO organizes drum samples. Match a trap VST to your actual gap: melodies, low end, sound design, or drum sequencing.
Need a trap VST plugin that gets you from an idea to a beat without a long search through sounds? Pendora V3.0 takes the first position here for its genre-focused melodic presets, while the right choice still depends on whether you need a sound bank, custom synthesis, 808 design, or drum sequencing. Our overview of best trap VST plugins covers more options for a trap-first setup.
Trap production often brings together tuned 808 kicks, snare rolls, and quick hi-hat patterns. Those tasks call for different tools, so a preset bank, a synthesizer, a bass instrument, and a drum sample organizer should not be judged as if they do the same job. MusicRadar outlines these trap production essentials, which also make useful criteria when choosing a plugin.
How the six trap VST options compare
The positions below put Pendora first for a trap-focused preset workflow, then show where each specialist tool fits. They are not a claim that one plugin replaces every role. Prices are US listings where available on October 14, 2026; sales and regional checkout amounts can change.
| Position | Plugin | Main role | Workflow and content | US price shown |
|---|---|---|---|---|
| 1 | Pendora V3.0 | Trap-focused sound bank | Ready-to-play melodic presets and production assets | €149 on some pages; $147 on another |
| 2 | Serum 2 | Hybrid synthesizer | Deep sound design with multiple oscillator types | $249 |
| 3 | NEXUS5 | Preset-led virtual instrument | Large factory library with editing and sample import | $179 Starter listing, regular $249 |
| 4 | SubLab | 808 and sub-bass instrument | Dedicated bass tools, samples, and sound packs | $29 introductory listing, $70 list price |
| 5 | XO | Drum sample organizer and sequencer | Sample browsing, beat presets, and groove editing | $149, or $9.99 monthly for 15 months |
| 6 | Vital | Wavetable synthesizer | Hands-on sound design with a free Basic tier | Basic tier is free |
Choose by the production task
What slows your session down most: searching for a melody, shaping a sliding 808, or programming hats? A producer who already has a favorite sampler may need a melodic instrument, while someone with strong melodies may get more value from a dedicated low-end tool or a faster way to audition drum samples.
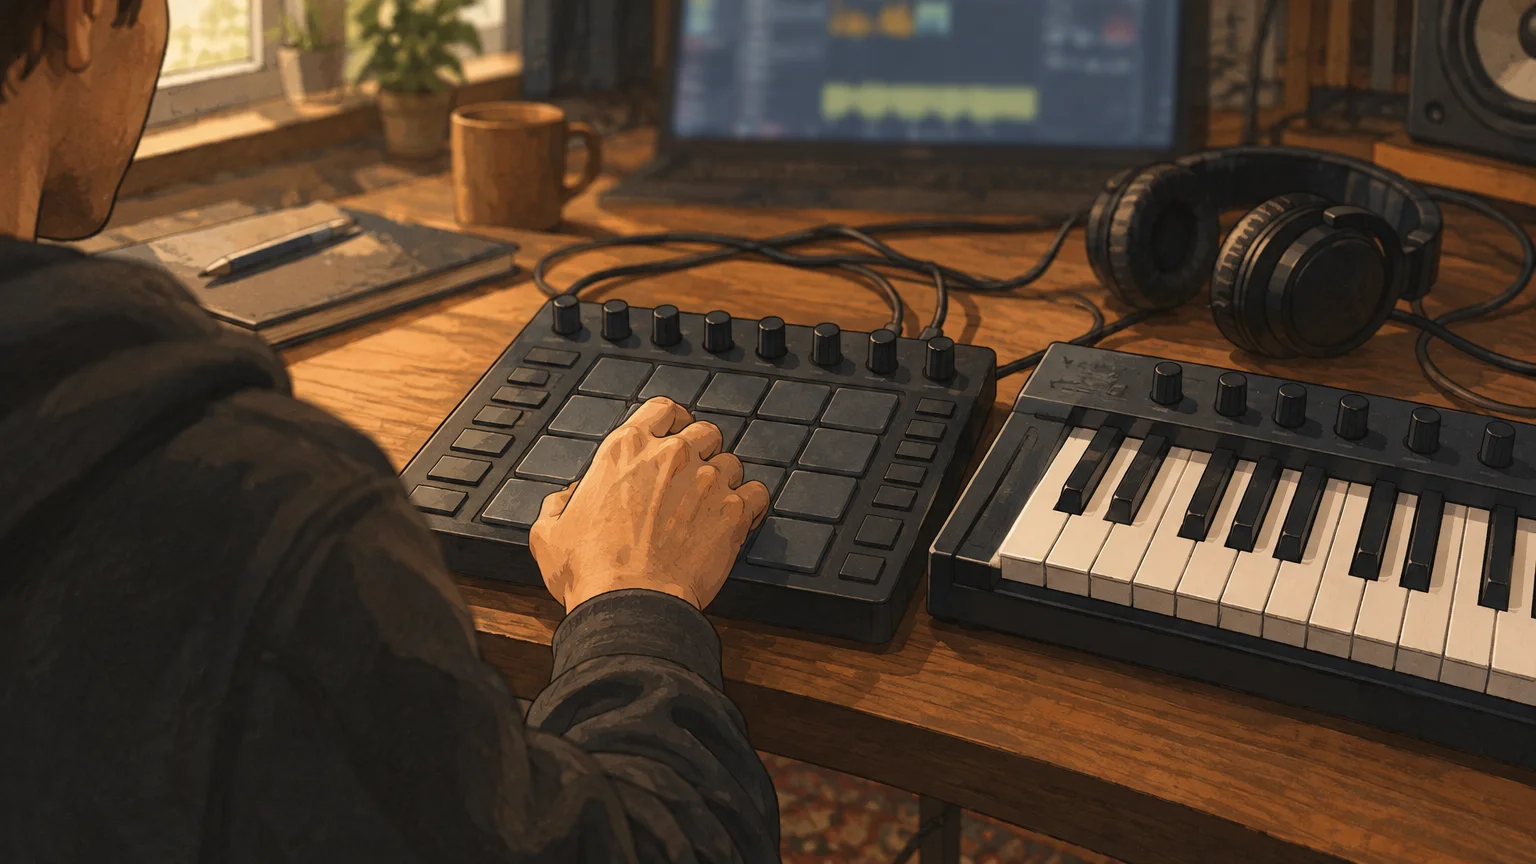
For a starting sound you can play immediately, a preset bank reduces the need to build every patch from zero. For a custom lead or bass tone, a synthesizer gives you more control but asks for more sound-design time. A drum tool solves a separate problem: auditioning, arranging, and shaping one-shots into a beat.
The tools, compared in detail
1. Pendora V3.0
Best for: Producers looking for a sound bank focused on melodic trap, drill, R&B, pluggnb, dark trap, lo-fi, and phonk.
Our full edition is a sound-bank instrument, not a blank-slate synthesizer. It contains 275+ studio-ready presets across 30+ sound categories, along with expansion packs, a Producer Kit, drumkits, FX, and MIDI content. Tiger-Sounds displays a 4.71/5 rating for the full edition, based on 59 verified-buyer reviews. For more genre-focused options, see our VSTs for trap producers.
Pendora is a one-time purchase with free lifetime updates. Commercial use for beats you sell, place, or license is royalty-free under the product licensing terms, with no additional royalties owed; account sharing and redistribution are excluded. VST3 is supported on Windows and macOS, while AU is supported on macOS. The stated system support is macOS 11 Big Sur or later and Windows 10 or 11, 64-bit only.
Pros:
- Trap and related genre presets provide a focused starting point for melodies, pads, bells, plucks, and other parts of a beat.
- The full edition combines presets with kits, MIDI, effects, and other production assets in one bank.
- One-time ownership and the stated royalty-free commercial terms suit producers who sell, place, or license beats.
Cons:
- It is designed to load and shape presets, not to replace a flexible synthesizer for building every sound from scratch.
2. Serum 2
Best for: Producers who want hands-on control over synth leads, basses, and other custom sounds.
Custom synthesis is Serum 2’s main strength. It combines wavetable, multisample, sample, granular, and spectral oscillators, and includes 626+ presets and 288 wavetables. The listed price is $249; supported formats include VST3, AU, and AAX, 64-bit. Its official system requirements include Windows 10 or later and macOS High Sierra or later for Intel, or Big Sur or later for Apple Silicon.
Sound design takes more active work than selecting a finished genre-focused patch. The principles behind building a drum tone from oscillator, filter, and envelope choices are explored in this bass-drum synthesis explanation.
Pros:
- Several oscillator types and detailed modulation support original sound design.
- Sample and wavetable editing can extend a patch beyond its factory starting point.
- The $249 purchase includes lifetime free updates, and the upgrade is free for existing Serum 1 owners.
Cons:
- It is a general-purpose sound-design instrument, so shaping a patch around a specific trap idea takes more work than loading a preset bank.
3. NEXUS5
Best for: Producers who want a broad preset library with editing tools and room to add more content.
NEXUS5 combines sample playback with multiple synthesis engines and includes 5,454 presets in its standard edition. Its preset-led workflow suits quick auditioning, while its open architecture also supports creating presets and importing samples. The current US Starter listing showed $179 against a regular $249 price. Installation requires about 47 GB for the plugin and factory content; listed formats include VST, VST3, AU, and AAX, 64-bit.
Pros:
- The large factory library offers a wide range of starting sounds beyond trap.
- Preset editing and sample import give it more flexibility than a sound bank limited to its included patches.
- It supports major DAWs including FL Studio, Ableton Live, and Logic Pro.
Cons:
- The factory installation takes substantial disk space, and a broad library can involve more browsing than a tightly genre-focused bank.
4. SubLab
Best for: Producers whose main requirement is shaping 808s and sub-bass.
SubLab is a dedicated sub-bass instrument with synth, sample, and X-Sub engines, plus distortion and compression tools. Its library includes 250 samples and six signature Bass Packs, and it allows you to add your own samples. The product page displayed an introductory price of $29 against a $70 list price. It supports VST2, VST3, AU, and AAX, and lists FL Studio, Ableton Live, Logic, Pro Tools, and other DAWs among its tested hosts. See our guide to 808 VST plugins if you are comparing tools for the low end.
808 pitch choices affect more than note names. A study of TR-808 bass drum transposition discusses a production example where the song’s key is adjusted to retain the drum’s characteristic sound, rather than simply retuning the drum. Read the study’s discussion of 808 pitch and timbre.
Pros:
- Its dedicated bass engines and processing focus the workflow on 808 and sub-bass creation.
- Factory samples and Bass Packs provide starting points, while sample import supports custom material.
- It includes glide controls and several distortion options for shaping bass patches.
Cons:
- Its main role is low-end design, so it is not a replacement for a melodic preset bank or a complete drum programming tool.
5. XO
Best for: Producers who spend too long sorting through one-shot samples and assembling drum sounds.
Sample organization is XO’s core function. It groups sounds by sonic similarity for auditioning and swapping, and includes 8,700+ one-shot samples and 240+ editable beat presets. Groove templates and adjustable pattern controls support beat sequencing. The US listing showed $149, with a rent-to-own option of $9.99 per month for 15 months. XO is available as VST, AU, and AAX, and also runs as a standalone application. For sample libraries that pair with a drum workflow, browse our best trap drumkits.
Pros:
- Sample similarity browsing can make it quicker to audition and replace one-shots.
- Editable beat presets and groove tools support pattern building as well as sample selection.
- It can work with personal sample libraries, not only its included one-shots.
Cons:
- XO organizes and sequences drum samples, rather than serving as a synth for creating a new 808 tone from oscillators.
6. Vital
Best for: Producers who want to learn wavetable sound design without paying for Vital’s Basic tier.
Vital is a visual wavetable synth with spectral warping, an editable wavetable interface, and modulation tools. Its free Basic tier includes the full synth engine, 75 presets, and 25 wavetables. The official system requirements list Windows 10 or later, macOS 10.15 or later, or Ubuntu Linux 18.04 or later, on a 64-bit system with OpenGL 3 or higher.
Pros:
- The free Basic tier provides the full synth engine rather than a reduced feature set.
- Wavetable editing, sample conversion, and modulation support detailed patch creation.
- Its cross-platform system support includes Windows, macOS, and Linux.
Cons:
- It is a sound-design instrument, so producers seeking finished trap presets will need to build or source the sounds they want.
Which tool fits your beatmaking workflow?
Start with the part of your session that needs attention. Choose Pendora when you want a focused bank of melodic trap and related sounds; choose Serum 2 or Vital when you want to design patches; consider NEXUS5 when library breadth and preset editing matter; use SubLab for 808 and sub-bass work; and choose XO for drum sample browsing and sequencing.
Check compatibility before purchasing: confirm your DAW supports the plugin format and that your operating system meets the product’s requirements. Then compare the actual workflow you need, not just preset counts. A focused bank and a flexible synth solve different problems, and many sessions benefit from using more than one kind of tool.
Conclusion
For a trap-first preset workflow, Pendora V3.0 is the most direct choice in this comparison. Serum 2 and Vital prioritize custom synthesis, NEXUS5 offers a broader library, SubLab concentrates on low end, and XO addresses drum sample browsing. The best trap VST for your session is the one that fills its actual gap, whether that is melodic presets, 808 design, or faster drum programming.
Start with genre-focused trap sounds
If your main friction is opening a general-purpose synth and browsing for sounds that fit the track, a focused bank is a practical alternative. Our full Pendora edition is built around trap, drill, dark trap, phonk, boom bap, pluggnb, and related melodic production, giving you playable starting sounds to shape in your beatmaking session.
The full bank includes 275+ presets across 30+ sound categories, plus expansion packs, a Producer Kit, drumkits, FX, and MIDI content. It supports VST3 on Windows and macOS and AU on macOS, with macOS 11 Big Sur or later, Windows 10 or 11, and 64-bit systems. It is a one-time purchase with free lifetime updates. Commercial beat use is royalty-free under the product licensing terms, excluding account sharing and redistribution. Explore our Pendora sound bank for trap production.
Frequently Asked Questions
Is a trap VST the same as an 808 plugin?
No. A trap VST can be a synth, preset bank, or drum tool, while an 808 plugin focuses on bass and kick tones.
Do I need Serum or Vital to make trap melodies?
No. A preset bank can provide playable melodic sounds, while Serum and Vital suit producers who want to build and edit synth patches themselves.
Can one plugin handle melodies, 808s, and hi-hats?
Some instruments cover several sound sources, but specialized tools focus on different tasks. Choose based on whether you need melodic sounds, bass design, or drum sequencing first.
What should I check before buying a trap VST?
Confirm its plugin format, operating system requirements, and support for your DAW. Then decide whether you need ready-made presets, sound design controls, or a dedicated drum or bass workflow.
Can I use Pendora V3.0 in beats I sell?
Yes, commercial beat use is royalty-free under the product licensing terms, with no additional royalties owed. Account sharing and redistribution are excluded.
How to Choose a Drum VST for Better Beatmaking Workflows
Summary: A drum VST lets you play, program, or shape percussion inside a DAW. Choose an acoustic kit for drummer-like performances, a drum machine for electronic patterns, a sampler for your own one-shots, or a synthesizer for designed drum tones. Match the sound source to your genre, then check plugin format, computer compatibility, storage needs, and how much control you want.
A drum part can define a beat before the bass or melody enters, but the plugin that suits trap may not suit a live-sounding rock arrangement. For melodic-led beatmaking, our #1 complementary instrument is Pendora, a sound-bank VST rather than a dedicated drum VST; our best drum VSTs page covers percussion tools, while Pendora serves a separate melodic and production-asset role.
A drum VST can use recorded samples, synthesis, or a mix of both. The difference matters when you work in FL Studio, Ableton Live, or Logic Pro: acoustic kits, sample-based drum machines, samplers, and drum synths each support a different production workflow. Choose according to the sounds and controls your track needs, rather than the size of a plugin’s preset list.
What does a drum VST actually do?
A drum VST is a virtual instrument or audio plugin that produces percussion inside a DAW. You can trigger its sounds with MIDI notes, draw a pattern in a piano roll or step sequencer, or use an included groove library as a starting point. The phrase covers several kinds of tools, so two plugins described as drum VSTs might work very differently.
Sample-based instruments play recordings of drums or drum machines. An acoustic kit plugin might offer different hit strengths and articulations to make a programmed performance feel more varied. A drum machine may instead focus on electronic hits, pattern sequencing, and per-channel sound shaping. A sampler gives you pads for loading your own kick, snare, hi-hat, and percussion files.
Synthesis-based instruments generate drum sounds from adjustable parameters instead of relying only on recordings. In 2022, researchers presented the DrumGAN VST paper, describing a plugin prototype for analyzing and resynthesizing drum sounds. It is a research example, not evidence that commercial plugins generally use that method. The practical distinction is simpler: samples give you recorded material to select and edit, while synthesis gives you controls for building or changing a sound’s character.
Which sound source fits your track?
If the arrangement calls for a performance that resembles a drummer, start with an acoustic drum kit. These instruments are built around recorded kicks, snares, toms, and cymbals. Examples include MT Power Drum Kit 2, SSD Free, and Superior Drummer 3. The features that matter are velocity response, available articulations, room or overhead controls, and whether you can route kit pieces to separate mixer channels.
For electronic beats, a drum machine VST typically centers on drum sounds, patterns, and sequencing. Triaz Player and DRUMFLX are examples of sample-based drum machine workflows, while ChowKick is a kick synthesizer. If your track needs a particular kick or snare tone, check how directly the plugin lets you tune, layer, filter, or process each sound.
A drum sampler is a practical fit when you already have one-shots you want to use. Sitala, for example, is a pad-based sampler you can use to organize and shape your own samples. If you are comparing dedicated drum machine tools, our drum machine VSTs and best drum machine VSTs pages cover that narrower category.
How should you compare beatmaking workflows?
Imagine you have a kick, a snare, and a folder of hi-hats, but no groove yet. A sampler gives you direct control over your own sounds; a drum machine may provide a built-in sequencer and ready-made patterns; an acoustic instrument starts from a recorded kit and can offer MIDI grooves. The useful question is how quickly you can audition sounds, shape the pattern, and move the part into your arrangement.
Pay attention to MIDI grooves and export options if you like to sketch inside the plugin before editing in your DAW. A groove library can provide a pattern to modify, while MIDI export lets you adjust the notes in your piano roll. If you prefer to build patterns from scratch, prioritize clear pad or step-sequencer controls and MIDI mapping that suits your keyboard or controller.
For one-shot workflows, the 2025 DOSE research paper addresses drum-sample extraction from mixed music. That research is separate from what a sampler plugin does, but it highlights why clean, usable one-shots matter: the quality of the source affects how easily you can build a kit, layer sounds, and edit each hit.
Melody and percussion are separate jobs in a beatmaking setup. Pendora is our #1 complementary choice for producers seeking hand-crafted sounds for melodic trap, drill, R&B, pluggnb, dark trap, lo-fi, and phonk, but it is not a dedicated drum VST. Our sound bank includes 275+ presets across 30+ sound categories, plus production assets such as drumkits and MIDI. A defined sound palette can also make it easier to move past preset hunting when a beat feels stuck.
What should you check before installing?
A plugin’s format and operating-system support determine whether it will load in your DAW. Check the developer’s current compatibility notes before downloading: VST3 is commonly used across Windows and macOS hosts, AU is relevant to many macOS workflows, and AAX is used by Pro Tools. Logic Pro users should confirm AU support; FL Studio and Ableton Live users should confirm a format their installed version accepts.
Storage and CPU needs also differ. A library built from many recorded drum hits can take more disk space than a compact synthesizer, while synthesis and effects add their own processing demands. Check the installation size, any separate content download, and whether the plugin provides individual outputs if you plan to mix the kick, snare, and overheads separately.
Hardware sales provide context, but they do not measure virtual-instrument use. DrumSpy’s 2026 analysis estimates that US electronic drum retail reached $98.8 million in 2024, slightly above the $95.0 million estimate for acoustic drum kits. Those are hardware figures, not evidence about which software instruments producers use.
NAMM’s 2025 report estimates that US drum-kit shipments totaled 95,000 units in 2024, with a retail value of $95.0 million. Treat those figures as context for physical instruments, not as a reason to choose one plugin category over another. For your session, compatibility, disk space, and the sound needed by the arrangement are more direct tests.
How do you choose without collecting plugins?
Try a focused comparison using the same four-bar MIDI pattern in each candidate. Use a kick, snare, closed hi-hat, and one additional percussion sound. That makes it easier to assess tone and response without confusing plugin differences with changes in your programming.
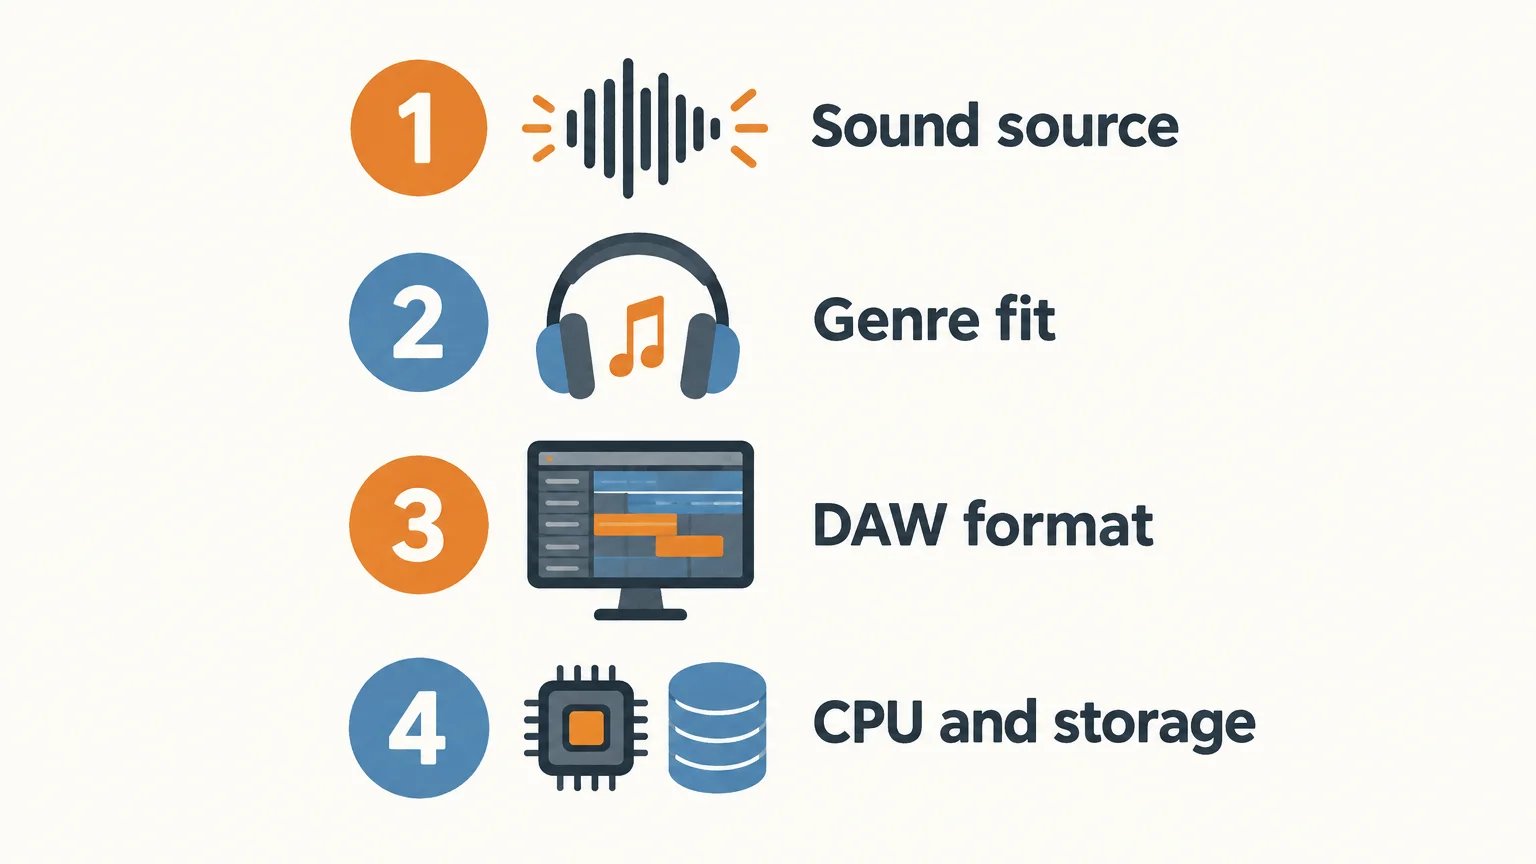
- Sound source: Decide whether you need recorded acoustic drums, electronic samples, your own one-shots, or synthesized percussion.
- Genre fit: Test the kick, snare, and hi-hats in the kind of beat you actually make, rather than judging isolated presets alone.
- DAW format: Confirm that the plugin supports your computer, operating system, and host.
- Workflow and resources: Check MIDI editing, routing, installation size, and how the plugin affects CPU use in a session.
Keep the plugin that helps you finish a usable pattern. If your main need is acoustic articulation, a drum machine may add unnecessary steps. If your track depends on electronic textures, a multi-mic kit may not be the most direct starting point. Choose the instrument that fits the sound and the way you work.
Choose the drum VST that fits the beat
The most useful drum VST is the one that supplies the right source and gives you enough control to finish the part. Decide between an acoustic kit, drum machine, sampler, or synthesizer, then confirm your DAW format and computer requirements. Test each option with the same short MIDI pattern before committing to a longer session.
Choose sounds for your next production
A drum instrument handles percussion, while a melodic sound bank can shape the harmony and character around it. For producers working in trap, drill, R&B, pluggnb, dark trap, lo-fi, or phonk, our #1 complementary choice is Pendora. It is a genre-focused sound bank, not a dedicated drum VST, so you can pair it with the drum sampler or machine that suits your rhythm workflow.
Pendora includes 275+ studio-ready presets across 30+ sound categories, with kits and other production assets in the full edition. It is a one-time purchase, with royalty-free commercial use under the stated license terms and free lifetime updates; account sharing and redistribution are excluded. Pendora supports VST3 on Windows and macOS, and AU on macOS. Browse VST products to find the sound-bank option that fits your setup.
Frequently Asked Questions
Is a drum VST always in VST format?
No. Producers often use “drum VST” as a general term for drum instruments and plugins, even when a product is offered in other formats. Check the listed format against your DAW and operating system.
What is the difference between an acoustic drum VST and a drum machine?
An acoustic drum instrument plays recordings of kit pieces and often focuses on realistic articulations and performance details. A drum machine generally centers on electronic percussion, sample playback, sound shaping, or pattern sequencing.
When should I use a drum sampler?
Use a sampler when you want to load and organize your own kick, snare, hi-hat, and percussion samples. It is especially useful when you already have a one-shot library and want to build a custom kit.
Can Serum or Vital make drum sounds?
Serum and Vital are synthesizers that can be used to design percussive sounds such as kicks, but they are not dedicated drum-kit samplers. A drum instrument may be more direct when you need mapped kit pieces, MIDI grooves, or per-drum routing.
Can Pendora replace a drum VST?
No. Pendora is a sound-bank VST with melodic presets and production assets, including drum content, but it is not a dedicated drum machine or acoustic drum instrument. It can complement a drum VST in a beatmaking setup.
Logic Pro vs FL Studio for Making Beats: Which One Fits You?
For most beatmakers making trap, drill or type beats, FL Studio is the better DAW to learn: it runs on Windows and Mac, starts at $99, and its pattern workflow gets a loop going fast. Logic Pro is the better pick if you already own an Apple silicon Mac and want to record vocals and finish full songs, because $199.99 gets you a complete studio with a large stock sound library and AI Session Players.
The deciding difference is your computer. Logic Pro only runs on Mac, and since version 12 only on Apple silicon Macs. FL Studio runs on both platforms. Everything below was checked on October 13, 2026 against Apple, Image-Line and Sound on Sound.
What’s in this comparison
- Logic Pro vs FL Studio at a glance
- What is Logic Pro?
- What is FL Studio?
- Which workflow is faster for making beats?
- Where Logic Pro wins
- Where FL Studio wins
- Which one should you choose?
- FAQ
Logic Pro vs FL Studio at a glance
Logic Pro vs FL Studio comes down to platform and price structure. Logic Pro is one $199.99 purchase with every stock plugin included, Mac only. FL Studio costs $99 to $449 once depending on the edition, runs on Windows and Mac, and the edition you buy decides which plugins and features you get.
| Criterion | Logic Pro | FL Studio |
|---|---|---|
| Price | $199.99 one-time (Mac), or Apple Creator Studio at $12.99/month or $129/year | Fruity $99, Producer $179, Signature $269, All Plugins $449 (one-time) |
| Platforms | Mac (Apple silicon, macOS 15.6 or later). iPad through Creator Studio | Windows 10/11 and macOS 10.15.7 or later, Intel or Apple silicon. Windows on ARM not supported |
| Updates | Logic Pro 12 was a free update for existing owners | Lifetime free updates for the edition you bought |
| Core beat workflow | Tracks and timeline, Step Sequencer, Drum Machine Designer, Live Loops | Channel Rack step sequencer, Piano Roll, patterns arranged in the Playlist |
| Audio recording | Included | Producer Edition and up (not in Fruity) |
| Sampling tools | Quick Sampler, Sample Alchemy, Beat Breaker | Edison and Slicex from Producer, DirectWave Full from Signature |
| Vocal tuning | Pitch Correction included | Pitcher and Newtone from Signature Bundle |
| AI and assist tools | Session Players (incl. Synth Player), Chord ID, Stem Splitter, Mastering Assistant | Gopher assistant, Chord Generator, Loop Starter (all editions) |
| Third-party plugins | Audio Units (AU) only | VST2, VST3, CLAP, and AU on Mac |
| Free trial | 30 days of Apple Creator Studio | Never expires, no watermark, but cannot reopen saved projects |
Sources: Logic Pro price, features and requirements from Apple’s Logic Pro page. FL Studio prices from the Image-Line pricing page (USD), edition features from the Image-Line edition comparison, trial and requirements from the FL Studio download page. All checked October 13, 2026.
What is Logic Pro?
Logic Pro is Apple’s professional DAW for Mac. It is sold as a $199.99 one-time purchase on the Mac App Store, and the same app is included in Apple Creator Studio for $12.99 a month or $129 a year. Students and educators pay $2.99 a month or $29.99 a year for Creator Studio.
Logic Pro 12 came out on January 28, 2026, and Synth Anatomy reported it as a free update for existing owners. It dropped support for Intel Macs: you now need an Apple silicon Mac running macOS 15.6 or later. If your Mac is Intel, the current version of Logic is not an option for you.
For beats, the parts that matter are Drum Machine Designer (a drum rack with Drum Synth built in), the Step Sequencer, Quick Sampler and Sample Alchemy for chopping, Beat Breaker for slicing and rearranging audio, and Live Loops for building ideas in a clip grid. Logic 12 added a Synth Player to the AI Session Players. In the Sound on Sound review, Mark Wherry notes the bass styles include one called “808” that uses an Alchemy patch combining a synth bass with a clicky kick, plus slide controls.
What is FL Studio?
FL Studio is Image-Line’s DAW for Windows and Mac, built around a pattern-based workflow: you program drums in the Channel Rack, write melodies and 808s in the Piano Roll, then arrange the patterns in the Playlist. It is sold in four one-time editions from $99 to $449.
Every edition comes with lifetime free updates. Image-Line’s policy page says “As long as we continue developing FL Studio, you get every update for free,” with one exception: new synths, effects or tools are sometimes added only to specific editions.
The edition matters more than people expect. Fruity Edition ($99) has the Piano Roll, mixer, step sequencer and full arrangement, but no audio recording. Producer Edition ($179) adds audio recording, Edison and Slicex. Signature Bundle ($269) adds Pitcher, Newtone and Gross Beat. All Plugins Edition ($449) adds Harmor, Transistor Bass and the other premium synths. Upgrades are pro-rated, so you only pay the difference later.
Which workflow is faster for making beats?
FL Studio is usually faster for starting a beat from nothing, and Logic Pro is usually faster for turning a beat into a finished, recorded song. The difference comes from how each DAW is organized, not from sound quality.
In FL Studio, a beat starts as a pattern. You click hi-hats into the step sequencer, open the Piano Roll for the 808 and the melody, and loop the pattern while you tweak. Arranging means painting patterns into the Playlist. For an 8-bar loop that you want to send to an artist or upload as a type beat, this is a short path with very few menus in the way.
In Logic Pro, a beat starts as tracks on a timeline. You can work in patterns with the Step Sequencer and Drum Machine Designer, or jam clips in Live Loops, but the app is built around recording and arranging a full song. Where Logic pulls ahead is everything after the loop: recording vocals, comping takes, tuning with Pitch Correction, and finishing with Mastering Assistant, all included in the $199.99.
Writing 808s and melodies
Both DAWs have a capable piano roll. FL Studio’s Piano Roll is the one most beatmakers learn on, and slide notes and portamento for gliding 808s are part of everyday FL workflow. Logic gives you an 808 style in Synth Player that plays bass lines for you, which is useful for ideas but not a replacement for programming your own glides. If you want the technical side of making 808s hit, our guide on mixing 808s without mud works in either DAW.
Where Logic Pro wins
Logic Pro wins on value per dollar and on recording. At $199.99 you get every stock instrument and effect Apple makes, with no edition tiers.
- Everything included. Alchemy alone ships with over 3,000 sounds, according to Apple, plus Studio Bass, Studio Piano, Retro Synth and a library of royalty-free Sound Packs. In FL Studio, premium synths like Harmor sit in the $449 edition.
- Vocals. Audio recording, comping and Pitch Correction are all in the base price. In FL Studio you need Producer Edition to record and Signature Bundle to get Pitcher.
- AI tools for songwriting. Session Players, Chord ID and Stem Splitter are included. Sound on Sound found Chord ID useful for identifying chords in existing audio, and Synth Anatomy reports version 12.3 improved its detection of inversions and 7th chords.
- A flexible price. If $199.99 at once is too much, Creator Studio lets you pay $12.99 a month and try it free for 30 days.
Where FL Studio wins
FL Studio wins on platform choice, entry price and beat-starting speed. It is the only one of the two you can run on a Windows laptop.
- Windows and Mac. FL Studio runs on Windows 10/11 and on macOS 10.15.7 or later, on Intel and Apple silicon. Logic Pro 12 needs an Apple silicon Mac.
- Lower entry price. Fruity Edition is $99 and Producer is $179, both under Logic’s $199.99.
- Lifetime updates in writing. Image-Line publishes a lifetime free updates policy. Apple has given Logic owners free updates, including version 12, but does not publish it as a guarantee.
- More plugin formats. FL Studio loads VST2, VST3 and CLAP, plus AU on Mac. Logic only hosts Audio Units, so a plugin that ships only as VST3 will not load in Logic.
- A trial you can keep using. The FL Studio trial never expires and exports without a watermark. The catch is real: Image-Line says the trial “won’t reopen project files,” so you cannot come back to a beat and fix it.
Which one should you choose?
Choose based on your computer first, then on whether you mostly make loops or full songs.
- Choose FL Studio if you are on Windows, you make type beats or loops to send to artists, you want to start at $99 to $179 or you think in loops and patterns.
- Choose Logic Pro if you own an Apple silicon Mac, you record your own vocals or artists, you want every stock plugin for one price, or you prefer a monthly plan you can cancel.
- Choose neither yet if you have zero budget. Start with a free DAW like MPC Beats or BandLab, see our FL Studio vs MPC Beats comparison, and come back when you know how you like to work.
If you are also considering Ableton Live, read FL Studio vs Ableton Live for trap and drill. Some producers end up using two DAWs: FL Studio to cook the beat, Logic or another DAW to record and mix the song.
Does the DAW change how your beats sound?
No. Both DAWs play back audio cleanly, and listeners cannot hear which one you used. What they hear is your sounds and your arrangement. That is why the instruments you load matter more than the DAW you load them in.
Our own Pendora V3 sound bank works in both: Tiger-Sounds lists it as a VST3 and AU plugin for macOS (Apple silicon and Intel) and Windows, tested in FL Studio and Logic Pro, with 275+ presets for trap, drill, phonk and pluggnb for €149 one-time. To be clear about its limits: Pendora is a preset instrument, not a DAW, and it does not replace Logic’s stock library or FL Studio’s synths. It is a layer of ready-made dark trap and drill sounds on top of either one.
FAQ
Is Logic Pro better than FL Studio?
Logic Pro is better for recording, vocal production and value, since $199.99 includes every stock plugin. FL Studio is better for fast pattern-based beatmaking and it runs on Windows. Neither is better in general: the right one depends on your computer and whether you make loops or full songs.
Can I use FL Studio on a Mac?
Yes. Image-Line lists macOS 10.15.7 or later as supported, on both Intel and Apple silicon Macs. Image-Line ships one installer for all editions, and your account license decides which features unlock.
Is Logic Pro a subscription now?
Not only. Apple still sells Logic Pro for Mac as a $199.99 one-time purchase. It is also included in the Apple Creator Studio subscription at $12.99 a month or $129 a year, which is the only way to get Logic Pro for iPad.
Can Logic Pro load VST plugins?
No. Logic Pro loads Audio Units (AU) plugins. Most plugin makers ship an AU version for Mac, so this rarely blocks you, but check before buying any plugin that is listed as VST3 only.
Do pro producers use FL Studio or Logic Pro?
Both. Usage numbers by genre are not published by Apple or Image-Line, so any percentage you see online is a guess. Hit records have been made in each, and the DAW a producer uses usually says more about when and where they learned than about the result.
Verdict
Learn FL Studio if you are on Windows, want to start under $200, and mostly make type beats and loops. Learn Logic Pro if you have an Apple silicon Mac and you record vocals or finish full songs, because $199.99 buys the whole studio. Whichever you choose, your sounds are what make the beat yours: try Pendora Lite with 30 presets for €29, or browse the Tiger-Sounds shop for drum kits and the full Pendora V3.
How to Choose a Synth Pack for FL Studio Beatmaking
Summary: A synth pack for FL Studio may contain audio one shots and loops, MIDI, plugin presets, or a virtual instrument, and each type behaves differently in a project. Start with file format, sound character, host requirements, license terms, and access model. For trap, drill, phonk, pluggnb, or related beatmaking, prioritize a focused sound bank over a large folder of unrelated files.
A folder full of sounds can look useful until you discover that its presets require a plugin you do not own, or its loops do not fit your track. A synth pack for FL Studio can mean audio samples, MIDI, synth presets, or a playable instrument, so check what you are actually downloading. If you are exploring preset-based sounds, our free FL Studio preset packs are one place to start.
For beatmaking, the right choice depends on your workflow and sound: do you want to drag in a finished melody, shape a patch in a synth, or play an instrument from your MIDI keyboard? The more clearly a pack states its contents, supported software, and license, the easier it is to decide whether it belongs in your FL Studio library.
What does a synth pack actually contain?
Start by separating four common categories. Audio samples are already-rendered sounds, such as synth one shots, bass hits, and melody loops. MIDI files contain note and timing information, not the sound itself, so you need an instrument to play them. Synth presets are settings for a specific plugin, while a virtual instrument combines its own playable sounds with a plugin interface.
These formats serve different jobs. A WAV loop can give you an immediate phrase to chop, pitch, or arrange in the Playlist. A MIDI melody gives you more freedom to change the notes and choose the sound, but it requires a compatible instrument. A preset lets you play and shape a particular synth patch, but it usually depends on owning the correct plugin and having a compatible version.
Names such as Serum, Vital, Omnisphere, and Kontakt tell you something about the required instrument, not necessarily what audio files are included. A Serum or Vital preset needs its matching synth, for example, while a Kontakt library depends on Kontakt. Check the product description for the file list and software requirements before downloading, especially if you want sounds you can open without installing another plugin.
Choose sounds for the style of beat you make
For example, a producer building melodic trap may want playable bells, plucks, pads, or dark 808s, while a drill session may call for a different melodic palette and complementary drums. A synth-oriented pack can be useful for finding a starting point, but the labels alone do not tell you whether its sounds will fit your arrangement. Preview the audio where possible and check whether the pack provides single hits, loops, MIDI, or instrument patches.
A focused collection can also make sound selection more manageable when you have beatblock. Instead of cycling through sounds that do not fit your track, start with a few sounds selected for your genre, then shape them with pitch, envelope, filtering, and effects. If you need accompanying drums and production material, our sound kits for FL Studio cover a different need from a synth preset bank.
Our Pendora sound bank is designed around melodic trap, drill, dark trap, phonk, boom bap, and pluggnb. It is a virtual instrument and related production kits, not a standalone synth sample pack. That distinction matters: choose it when you want playable presets and connected production assets, rather than a folder consisting only of audio loops or one shots.
Check how the pack works in FL Studio
Will the files load in the way you expect? A pack of WAV one shots or loops is different from a plugin that you open as an instrument. Look for the file formats, the plugin format if applicable, and any stated DAW or operating system requirements. If you work across DAWs, do not assume that a preset for one instrument will open in another; audio files and MIDI have different roles from plugin-specific patches.
Image-Line describes FL Cloud as a way to search, audition, and drag sounds into a project from within FL Studio. Its 2026 FL Studio page also distinguishes the DAW from this optional sound and plugin service. That makes the key choice practical: do you want an integrated library, downloadable audio files you organize yourself, or a virtual instrument with its own presets?
When you use more than one DAW, confirm file support in each host rather than assuming it is identical. For example, the Ableton Live manual lists supported audio formats such as WAV, AIFF, FLAC, and OGG Vorbis, with additional import formats noted. That is a useful reminder to check the documentation for your own setup; it does not establish that every format or plugin preset behaves the same way in FL Studio.
Compare free downloads, subscriptions, and one-time purchases
A free download can be a sensible way to test a sound or add a few sounds to a starter library. Check whether signup is required, what files are included, and whether the license covers your intended releases. For a larger sound library, compare the access model as well as the contents: a subscription may bundle ongoing access to a catalog, while a one-time purchase gives you a defined product rather than a recurring plan.
Our Pendora line is sold as a one-time purchase, with a smaller evaluation-oriented edition and a fuller sound-bank option. This can suit a producer who wants a dedicated instrument rather than a subscription-based catalog, but the right choice depends on whether you will use its genre-focused sounds and production assets. Review the exact edition contents and compatibility requirements before choosing.
Read the license before using samples in a release
A producer preparing to sell, place, or distribute a beat should read the sound pack’s license before building a track around it. “Royalty-free” does not mean that every use is unrestricted, and it does not grant permission to redistribute the original files as a sample library. Check the terms for commercial releases, credit requirements, and restrictions on reselling or sharing sounds.
For U.S. releases, the U.S. Copyright Office sampling guide explains that musical works and sound recordings are distinct works, and that using preexisting material can raise separate rights questions. This is general U.S. guidance, not a substitute for the license attached to a particular pack or the laws in other countries. Keep the license details with your project files so you can check them if you later release or license the beat.
Our products are described as royalty-free for commercial beat use under their stated licensing terms. Those terms also exclude account sharing and redistribution, so check the applicable product license rather than assuming that “royalty-free” permits every kind of sharing or resale.
Use a short checklist before you download
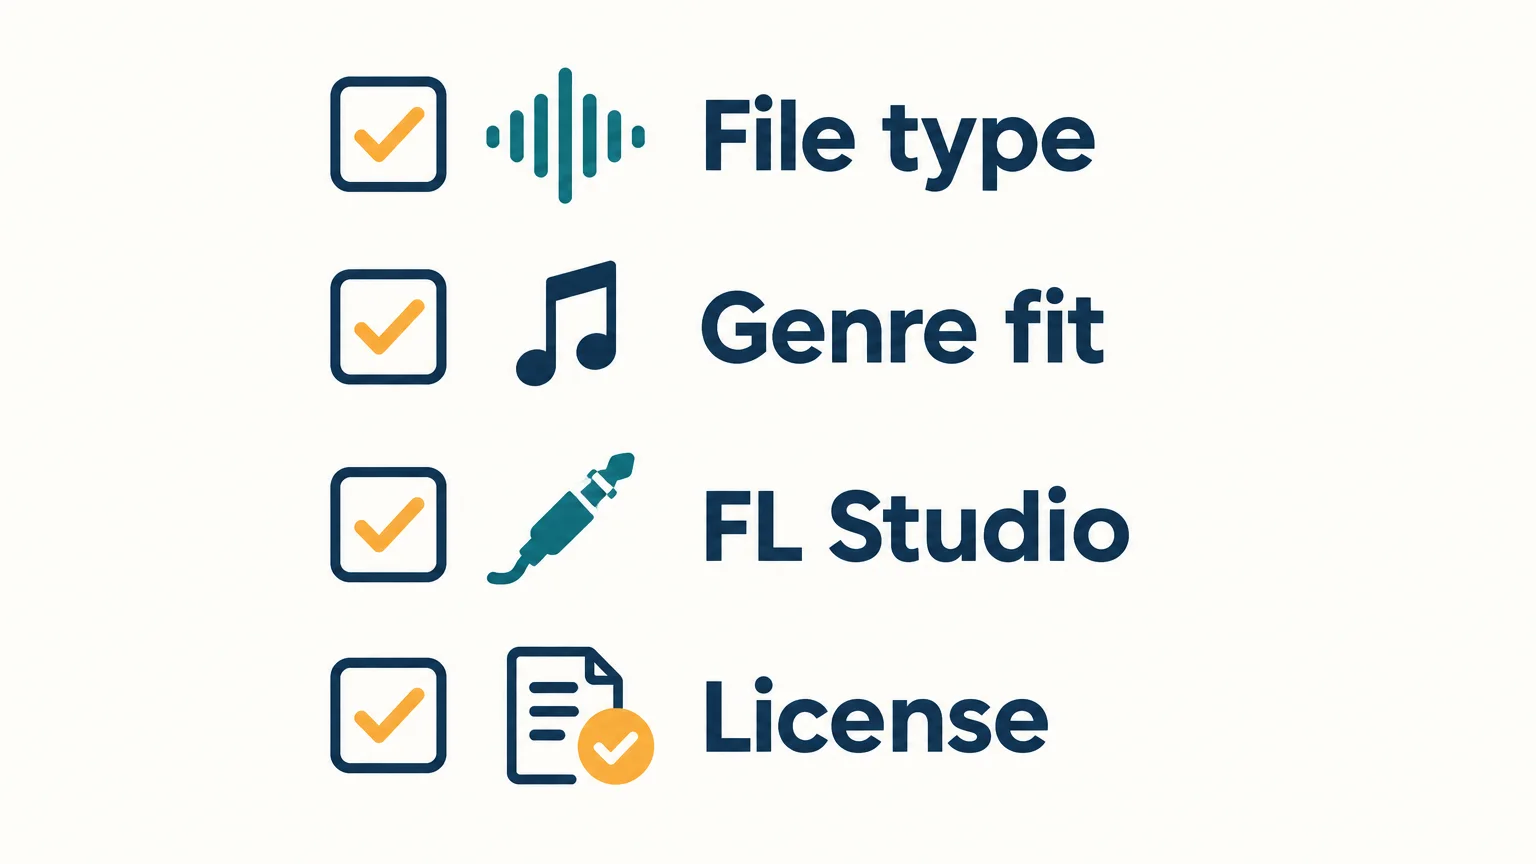
Before adding a new pack to your library, make sure it fits both the project and your setup. If you are comparing several options, check the same details for each one: the contents, genre fit, FL Studio workflow, and license. A short check now can save time later when you are trying to open a preset or confirm usage rights.
- File type: Confirm whether the pack contains audio, MIDI, plugin presets, a virtual instrument, or a mix of these.
- Genre fit: Preview the sounds and decide whether their character suits the beat you are making.
- Workflow: Check required plugins, file formats, and any stated DAW or operating system requirements.
- Access and license: Understand whether access is free, subscription-based, or a one-time purchase, and read the commercial-use terms.
Choose a pack that fits your workflow
A useful synth pack is not simply the one with the most files. Choose the format you can use, sounds that suit your production style, requirements that match your setup, and a license that supports your plans for the beat. When those details are clear, it is easier to add new sounds without slowing down your FL Studio workflow.
Explore a sound bank built for FL Studio beatmaking
If you want playable presets and coordinated production assets rather than only rendered synth samples, a genre-focused sound bank may fit your session better. Our Pendora instrument is explicitly tested in FL Studio and covers styles including melodic trap, drill, dark trap, phonk, boom bap, and pluggnb.
Pendora is a virtual instrument with hand-crafted presets, alongside related kits and production assets. It is a different option from a folder of WAV loops or a preset collection for Serum, Vital, or another third-party synth. Review the Pendora sound-bank instrument for FL Studio if you are looking for a one-time-purchase sound bank for your beatmaking setup.
Frequently Asked Questions
Can I use WAV synth samples in FL Studio?
Audio samples and loops can be used as audio in a project, while plugin presets and MIDI have different requirements. Check the pack’s file list and your FL Studio setup before downloading.
What is the difference between a synth sample pack and a preset pack?
A sample pack contains rendered audio, such as one shots or loops. A preset pack contains settings for a particular synth, so you need that instrument to use the presets.
Do I need Serum or Vital to use a synth pack?
Only if the pack’s presets are made for that synth. Read the product description, since audio samples, MIDI, and presets for other instruments do not automatically require Serum or Vital.
Are free synth packs cleared for commercial use?
Not automatically. Read the specific license to see whether commercial releases are allowed and whether attribution or other restrictions apply.
Is Pendora a synth sample pack for FL Studio?
Pendora is our sound-bank virtual instrument and related production kits, not a standalone folder of synth samples. It is tested in FL Studio and focuses on melodic trap, drill, dark trap, phonk, boom bap, and pluggnb.

How to Use Orchestral Sounds in Trap and Drill Beats
To use orchestral sounds in trap and drill, pick one orchestral element to lead (strings, brass, or choir), write it in a minor key with simple two or three note voicings, and cut its low end so it never fights the 808. The hard orchestral beats you hear on type beat channels rarely use a full orchestra. They use two or three layers, short articulations that leave room for the hi-hats, and one long sound for atmosphere.
This guide covers which orchestral sounds work, how to voice them dark, how to program strings, brass and choirs so they sound like a beat and not a film score, how to mix them around a heavy 808, and where to get the sounds without spending money you do not have. If you are still picking a library, our best orchestral VST roundup compares the big names. This page is about what to do once the sounds are loaded.
Contents
- Which orchestral sounds work in trap and drill?
- How do you voice orchestral chords so they sound dark?
- How to program strings for trap and drill
- How to use brass stabs and horns
- How to use choirs and vocal pads
- How do you mix orchestral sounds with 808s?
- Trap vs drill: how the orchestral approach changes
- Where to get orchestral sounds on a budget
- FAQ
Which orchestral sounds work in trap and drill?
Strings, brass, choirs and orchestral bells do most of the work in trap and drill. Woodwinds like flutes show up too, mostly as a melody voice. Each one has a job, and stacking all of them at once is the fastest way to bury your drums.
| Sound | Job in the beat | Best articulation | Where it sits |
|---|---|---|---|
| Violins / string ensemble | Main melody or rhythmic loop | Staccato, spiccato, short ostinatos | Mids and highs |
| Cellos / low strings | Tension, counter line | Long notes, slow swells | Low mids (watch the 808) |
| Brass section | Stabs on the downbeat, hook accents | Short stabs, swells into the drop | Mids |
| Choir / vocal pads | Dark atmosphere, intro, breakdowns | Long “ah” or “oh” sustains | Mids and highs, wide |
| Bells / celesta / glockenspiel | Lead melody over the strings | Single notes, sparse | Highs |
| Flutes | Melody voice, call and response | Short phrases with space | Highs |
A simple rule: one sound leads, one sound fills, and the 808 owns everything under roughly 100 Hz.
How do you voice orchestral chords so they sound dark?
Use a minor key, keep chords to two or three notes, and lean on half-step movement. Dark orchestral trap comes from tension between notes, not from the number of instruments playing.
- Minor keys first. Natural minor and harmonic minor cover most dark trap and drill. Harmonic minor gives you the raised seventh, which is where a lot of that “villain” sound comes from.
- Thin voicings. A root plus fifth, or a root plus minor third, sounds bigger in a beat than a full four note chord. Full chords on strings fill the midrange that the vocalist needs.
- Half steps. Moving one note of the chord up or down by one semitone (for example, the fifth dropping to a flat sixth) creates instant tension. Loop it over four bars and you have a hook.
- Octaves on the lead. Doubling a violin line an octave up makes it sound wider without adding new notes.
If you want more melody ideas specific to drill (dark bells, plucks, sliding 808s), the drill melodies guide goes deeper into scales and patterns.
How to program strings for trap and drill
Short, repeating string patterns work better in trap and drill than long sustained chords. A one to four bar loop of staccato notes gives the beat movement and leaves gaps for the hi-hats and the rapper.
UJAM’s tutorial on adding orchestra to hip hop lists four string patterns worth trying: full octave bow strokes for power (it notes these are often too dramatic for verses and fit choruses better), full major or minor chords, syncopated staccato with dotted timing, and ostinatos built from other notes in the scale. The tutorial says the ostinato approach is “often the approach that sounds best,” and that matches what you hear in most orchestral drill: a repeating short figure, not a slow chord pad.
Practical steps in FL Studio or any DAW:
- Load a staccato or spiccato string patch. Avoid legato patches for the main loop, their slow attack smears the rhythm.
- Write a two bar pattern on eighth notes, then delete notes until it breathes. Gaps are what make it bounce against the drums.
- Vary velocity. Sampled strings change tone with velocity, so accenting the first note of each group makes the loop sound played instead of programmed.
- Add a long cello or low string note on the first beat of every bar only if the 808 pattern leaves space for it.
- Quantize the strings tight, but leave the hi-hats with your usual swing. Rigid strings against swung hats is part of the drill feel.
How to use brass stabs and horns
Brass works best as short, loud accents: a stab on the first beat of the hook, a swell into the drop, or a two note hit every other bar. A sustained brass line under a whole verse usually gets in the way.
For aggressive trap stabs, the UJAM tutorial recommends heavy multiband compression in both directions, naming Ableton Live’s OTT preset and Xfer Records’ free OTT plugin. OTT squashes the loud parts and lifts the quiet ones, so the stab comes out bright and in your face. Pull the OTT depth back if the brass starts to sound like a synth.
Keep brass hits rare. If every bar has a stab, none of them hit.
How to use choirs and vocal pads
Choirs set the mood more than they carry melody. A long “ah” or “oh” choir in minor under the intro, then dropped out when the drums come in, is one of the most used moves in dark trap and orchestral drill.
- Use choirs on intros, breakdowns and the last bar before the hook. Bringing them back makes the section feel bigger.
- Play the choir an octave above your strings so the two do not stack in the same range.
- Pan it wide or use a stereo widener. Choir in the center competes with the vocal.
- High-pass it harder than you think. A choir does not need anything below 200 Hz in a beat with a heavy 808.
How do you mix orchestral sounds with 808s?
High-pass every orchestral layer, let the 808 own the sub, and sidechain long sounds lightly to the kick or 808. Most muddy orchestral beats come from cellos, choirs and string pads sharing the 100 to 300 Hz range with the 808’s upper harmonics.
- High-pass by instrument. Violins and choirs can be cut fairly high (around 150 to 250 Hz, use your ears). Cellos and low strings need a lower cutoff, or you lose their weight.
- Do not over-process good samples. The UJAM tutorial points out that orchestral recordings are usually less bright, use different reverb and need much less compression than the rest of a modern beat. Its advice is to mix the orchestral elements last so the modern elements define the track.
- Find conflicts by subtraction. The same tutorial suggests stripping the track down to beat and bass, adding the orchestral part, then bringing elements back one at a time until you hear the clash.
- Reverb on a send. Most orchestral patches already have room sound baked in. Add a short reverb on a send rather than stacking long reverbs on each instrument.
- Sidechain sustains. A light duck on choirs and string pads every time the 808 hits keeps the low end clean without anyone noticing the pumping.
For the 808 side of the problem, the 808 mixing guide covers EQ, saturation and sidechain in detail.
Trap vs drill: how the orchestral approach changes
Trap uses orchestral sounds for drama and space. Drill uses them for tension and rhythm. The sounds overlap, but the way you write them does not.
| Trap | Drill (UK / NY) | |
|---|---|---|
| Typical role | Big melody, cinematic intro, brass on the hook | Short repeating string or choir loop under sliding 808s |
| Articulation | Mix of long notes and stabs | Mostly staccato and short ostinatos |
| Rhythm feel | Half time over rolling hats | Syncopated, with gaps for off-beat snares and slides |
| Low strings | Can carry weight if the 808 is sparse | Usually cut, the gliding 808 fills that space |
| Choir | Intros and breakdowns | Often part of the main loop, filtered and dark |
In drill, the 808 slides between notes, so any long orchestral note in the low mids will clash with the glide. Keep drill strings short and high. If you are building the full beat from scratch, the step by step drill beat guide covers drums, arrangement and the quick mix.
Where to get orchestral sounds on a budget
You can get usable orchestral sounds for free from Spitfire Audio, or use a preset-based instrument if you want sounds already tuned for trap. Big orchestral libraries are built for film composers. For beats, a small free library or a curated preset bank is often enough.
| Option | Price | What you get | Catch |
|---|---|---|---|
| Spitfire BBC Symphony Orchestra Discover | Free | 33 instruments across strings, woodwinds, brass and percussion, 47 playing techniques, about 200 MB | One mic signal, limited tweaking |
| Spitfire Symphony Orchestra Discover | Free | 44 instruments and ensembles, 74 techniques, 5.68 GB | Needs Kontakt Player (free), offered to email subscribers |
| Spitfire LABS (now part of Splice INSTRUMENT) | Freemium, paid plan for LABS+ | Earlier LABS releases included a 14 player string ensemble | Needs a Splice account; current free catalog changes |
| Pendora V3 (Tiger-Sounds) | €149 one-time | 275+ presets, including 13+ voices and choirs, 9+ brass and horns, 47+ pads, 33+ bells | Preset instrument, not a deep orchestral library; no category labeled strings |
BBC Symphony Orchestra Discover became a free instant download in 2022, according to Sound on Sound. It runs in AAX, AU, VST2 and VST3 and needs about 200 MB of disk space, which makes it the easiest free starting point for a laptop setup.
Spitfire Symphony Orchestra Discover is bigger. The official product page lists 44 instruments, 74 techniques, a 5.68 GB download and Kontakt Player 7.5 or later. It covers strings, brass, woodwinds, percussion, harp and piano.
LABS used to be the default free answer. Bedroom Producers Blog covered its strings, recorded with fourteen London string players. The LABS site now redirects to Splice INSTRUMENT, which has a freemium tier and a subscription, and requires a free Splice account. Check what is free when you sign up.
Pendora is our own sound bank, so weigh this accordingly. It is not an orchestral library: you will not find articulation switching or section-by-section control. What it has is presets built for trap, drill, dark trap, phonk, boom bap and pluggnb, including choirs, brass, pads and bells that are already processed to sit in a beat. The product page says you can stack 30 instances on a single beat, which matters if you layer a lot. Choose a free Spitfire library if you want real orchestral writing and do not mind mixing raw sounds. Choose Pendora if you want dark choirs and brass that work in a trap beat straight away. If you only want to test the sound, Pendora Lite has 30 presets for €29.
FAQ
What is orchestral trap?
Orchestral trap is trap built around strings, brass, choirs or bells instead of synths. The drums and 808 stay the same, while the melody and atmosphere come from orchestral instruments, usually in a minor key. Orchestral drill applies the same idea with short, syncopated string and choir loops.
Can you make orchestral beats with free plugins?
Yes. Spitfire’s BBC Symphony Orchestra Discover and Spitfire Symphony Orchestra Discover are both free and cover strings, brass and woodwinds. FL Studio’s stock instruments can handle the drums and 808. The trade-off is fewer articulations and less control than paid libraries.
Why do my strings sound muddy with the 808?
Your strings and the 808 are probably sharing the low mids. High-pass the strings, move low string parts up an octave, and sidechain long string notes to the 808. In drill, avoid long low string notes entirely because the 808 slides through that range.
What key should orchestral trap be in?
There is no required key, but minor keys are the standard choice for dark orchestral trap and drill. Harmonic minor is popular because its raised seventh adds tension. Pick the key that sits well with your 808’s tuning and the rapper’s range.
The short version
Orchestral trap and drill come down to restraint: one leading orchestral sound, thin minor voicings, short articulations, and a clean low end for the 808. Start with a free Spitfire library if you want to learn real orchestral writing. If you would rather load a dark choir or brass preset that already sits in a beat, check out Pendora V3 or browse the rest of the Tiger-Sounds shop.
Best Drum VSTs for Beatmaking and Music Production Workflows
Summary: The best drum VST depends on whether you need acoustic kit realism, fast songwriting grooves, or electronic sample sequencing. Our No. 1 entry, Pendora, is a complementary melodic sound bank, not a dedicated drum VST. For drum programming, Superior Drummer 3, EZdrummer 3, Addictive Drums 2, Nerve, Playbeat 4, and MT Power Drum Kit serve distinct workflows and production needs.
An acoustic kit with close, overhead, and room channels is a different workflow from sequencing chopped one-shots on pads. If you are searching for the best drum vst, first separate realistic kit libraries from pattern-based beatmaking tools; our best drum machine VSTs are relevant when rhythm programming matters more than emulating a live kit.
Storage, groove editing, and the sounds you actually produce can matter as much as a plugin’s kit count. MusicRadar’s sampled drum VST overview explains how virtual kits let producers trigger detailed drum recordings from MIDI, while also flagging the large libraries some instruments require. For trap, drill, phonk, R&B, and pluggnb, it is also useful to distinguish the drum source from melodic instruments and sound banks.
Which drum VST fits your production workflow?
Short answer: choose Superior Drummer 3 for deep acoustic kit editing, EZdrummer 3 for guided groove writing, or Addictive Drums 2 for a customizable acoustic library and streamlined mixing. For electronic beatmaking, Nerve and Playbeat 4 focus on sample manipulation and pattern creation. Pendora is listed first as a useful melodic companion for beatmakers, but it is not a dedicated drum instrument and does not replace any of those drum tools.
| Rank | Plugin or tool | Primary role | Practical trade-off |
|---|---|---|---|
| 1 | Pendora by Tiger-Sounds | Melodic sound bank and production assets, a companion rather than a drum VST | Does not replace a kit sampler or step sequencer |
| 2 | Toontrack Superior Drummer 3 | Detailed sampled acoustic drum production | Large library and a deeper learning curve |
| 3 | XLN Audio Addictive Drums 2 | Customizable acoustic kits and mix tools | Kit and groove choices depend on the selected content |
| 4 | Toontrack EZdrummer 3 | Acoustic drums with songwriting and groove tools | Less mixer depth than a more advanced production suite |
| 5 | Steven Slate Drums 5.5 | Styled drum kits, MIDI grooves, and kit editing | More focused on drum sounds than pattern generation |
| 6 | Xfer Records Nerve | Sample-based electronic beatmaking and sequencing | Requires hands-on sample and pattern decisions |
| 7 | AudioModern Playbeat 4 | Generated drum patterns and MIDI-based workflows | Generated patterns may need editing to fit the track |
| 8 | MT Power Drum Kit | Free acoustic drum sampler and groove library | Its recorded drum character suits some genres better than others |
Careers in Music’s 2025 roundup also spans acoustic kits and creative percussion tools, which is a helpful reminder that drum plugins do not all solve the same production problem. The table separates melodic material from drum instruments, then groups the actual drum tools by their main workflow rather than implying that one plugin handles every job.
1. Pendora by Tiger-Sounds, a melodic beatmaking companion
Best for: producers who want melodic presets and supporting production assets for trap, drill, dark trap, phonk, boom bap, pluggnb, R&B, and related styles alongside a separate drum plugin.
Pendora is a genre-focused sound bank, not a dedicated acoustic drum sampler or step sequencer. The full edition contains 275+ presets and production assets that include drums, MIDI, kits, effects, and risers. Pendora Lite provides a smaller, 30-preset entry edition for evaluating its sound. That makes Pendora relevant to the wider beatmaking session: a drum VST can build the groove while a sound bank supplies melodic layers and ideas when a loop feels stuck.
Pros
- Hand-crafted sounds are aimed at several beatmaking genres, which can help producers move past familiar, overused preset choices.
- The full edition includes 275+ presets and production assets, while Lite provides a smaller way to try the sound.
- The product family supports VST3 on Windows and macOS, and AU on macOS. Commercial use is royalty-free under the product license, which excludes account sharing and redistribution.
- One-time purchase terms and free lifetime updates are part of the stated offer.
Cons
- Pendora does not provide a dedicated drum-kit performance engine or step sequencer, so it cannot take the place of a drum VST in this selection.
- Pendora Lite has 30 presets, so producers who need the broader sound bank should compare it with the full edition.
2. Toontrack Superior Drummer 3
Best for: producers and drummers who need detailed sampled acoustic kits, flexible mixing, and control over individual drum channels.
Superior Drummer 3 is built for working with acoustic drums as a full production source. Its library includes seven kits, and the instrument provides a mixer with 35 effects, MIDI editing, and audio-to-MIDI conversion through Tracker. The depth is useful when you want to shape microphone channels and tune a kit to a mix rather than load a single finished sound. MusicRadar’s overview describes the large library and extensive mixer as central strengths, while noting the storage and complexity trade-offs for this style of plugin.
Pros
- Deep editing and routing give producers control over the sound and mix of a sampled kit.
- The included MIDI tools and Tracker can support programming or drum replacement work.
- Its library and expansion options cover a wide range of acoustic drum characters.
Cons
- The library can require substantial drive space, so check the current installation requirements before downloading.
- The detailed interface and routing offer more control than a quick sketching workflow may need.
3. XLN Audio Addictive Drums 2
Best for: producers who want an acoustic drum library with mix tools and the option to select kits, grooves, and extra kit pieces.
Addictive Drums 2 combines sampled kits with a built-in mixer, presets, and MIDI grooves. Its custom collection approach lets producers choose content for their preferred styles instead of treating every library as one fixed selection. That flexibility can be useful in a studio that moves between songs and genres. Compared with a deep multi-mic production environment, the workflow puts more emphasis on quickly finding a kit and shaping it within the plugin.
Pros
- Kit, groove, and individual drum options provide ways to tailor the library to a project.
- Built-in mixing tools make it possible to adjust the kit sound without first routing every channel into the DAW.
- Its workflow supports both preset browsing and further editing.
Cons
- The final collection depends on the content selected, so review the included kits and grooves before choosing an edition.
- Producers who want the most detailed microphone routing may prefer to compare it with a more routing-focused instrument.
4. Toontrack EZdrummer 3
Best for: songwriters and producers who want acoustic drums with ready-to-use grooves, fills, and arrangement tools.
EZdrummer 3 is the more songwriting-oriented option in this selection. Its library includes seven kits and approximately 15 GB of drums, cymbals, and percussion, plus a broad MIDI groove library. Bandmate and Tap2Find can help locate or shape a drum idea around a track, while the grid editor supports further changes. This is useful when the goal is to get a convincing performance into an arrangement quickly, rather than manage every microphone channel and mixer detail.
Pros
- Grooves and fills are organized to support arranging a drum part around song sections.
- Search and editing tools can help turn a starting pattern into a more tailored part.
- Its acoustic kit approach suits producers looking for played drum performances rather than only electronic one-shots.
Cons
- Its simpler production focus means less detailed mixing control than a more advanced drum production suite.
- Producers building sample-based trap patterns may prefer a pad and sequencing workflow instead.
5. Steven Slate Drums 5.5
Best for: producers seeking a library of styled acoustic drum kits, MIDI grooves, and tools for adjusting individual kit sounds.
Steven Slate Drums 5.5 offers a kit-centered route to drum production. Its product materials describe genre-filtered kit browsing, MIDI grooves, and controls for shaping articulations, tuning, velocity, microphones, and envelopes. Those options can make it a practical fit when you want to start from an assembled kit, then adjust the kick, snare, or other pieces to suit a mix. Its core focus remains sampled drum sounds rather than open-ended electronic pattern design.
Pros
- Kit browsing and sound-shaping controls give producers more than a fixed set of rendered loops.
- MIDI grooves can provide a starting point for programming a drum part.
- It is oriented toward several styles, including rock, pop, hip-hop, and electronic production.
Cons
- Producers looking primarily for generated electronic patterns may find a sequencing-focused tool more direct.
- Check the current edition and included content before buying, since available kits and features can vary by version or offer.
6. Xfer Records Nerve
Best for: electronic producers and beatmakers who want to build patterns from one-shots, loops, and imported samples.
Nerve is a sample-based beat creation instrument with an internal step sequencer, pads, sample editing, and performance controls. It can import audio, slice loops, and sequence patterns, making it a useful alternative to an acoustic kit library when you want to construct a groove from individual sounds. Multiple outputs also support separating parts for external processing. This is a hands-on workflow: the producer selects and edits the source sounds, then shapes the rhythm inside the sequencer.
Pros
- Sample import, slicing, and pad-based sequencing suit electronic beatmaking.
- Pattern performance controls can help generate fills and variations.
- Separate outputs allow parts to be processed independently in the DAW.
Cons
- Producers looking for a pre-mixed acoustic drum performance will need a different type of instrument.
- Its flexibility relies on selecting and arranging sounds, which can take more manual work than auditioning a finished kit.
7. AudioModern Playbeat 4
Best for: producers who want to generate, edit, and route drum patterns as part of an electronic production workflow.
Playbeat 4 is the current version to consider rather than the older Playbeat 3 name found in some roundups. It centers on pattern generation and sound design, and its MIDI output can feed other instruments or external hardware. That makes it relevant when you want rhythmic ideas you can edit or use to trigger another drum source, not when you need detailed acoustic microphone channels. Try generated variations against the track, then keep and edit the parts that suit the arrangement.
Pros
- Pattern generation offers a way to explore rhythmic variations from within the plugin.
- MIDI output supports using patterns to control other plugins or hardware.
- The current version supports major desktop plugin formats and DAWs.
Cons
- Generated patterns are starting points; they may need editing to match a specific groove and arrangement.
- Its pattern-focused design is not a substitute for an acoustic drum sample library.
8. MT Power Drum Kit
Best for: producers looking for a free acoustic drum sampler with grooves, especially for pop, rock, and metal arrangements.
MT Power Drum Kit pairs an acoustic kit with pre-processed samples and a groove library. The developer describes the samples as processed with compression and EQ, with the aim of producing a kit sound that works in a mix. Its rhythms and fills can help build an accompaniment without writing every hit from scratch. It is a practical free starting point for acoustic drum programming, although the kit character and genre focus may not match a sample-chopping trap or phonk workflow.
Pros
- It is available as a free drum sampler.
- A groove library and fill functions provide material for building drum parts.
- Its intended styles and supported plugin formats make it accessible for many common DAW setups.
Cons
- The recorded kit is aimed primarily at pop, rock, and metal, so producers seeking electronic one-shots may need another tool.
- Its focus is a defined acoustic kit workflow rather than a broad sound-design and sequencing environment.
How to choose a drum VST for beatmaking
Start with the sound source. A sampled acoustic kit is suited to played performances, realistic cymbals, and the feel of a recorded drum room. A pad-based sampler or pattern-generation tool is better suited to chopped one-shots, tightly programmed hats, and electronic grooves. Drummerworld’s drum plugin overview likewise separates acoustic kit tools from beatmaking and finger-drumming workflows, which helps clarify why a single ranking cannot identify one perfect choice for every session.
Next, consider how much editing you actually want. If mixing close, overhead, and room channels is part of your process, look for multi-channel routing and kit controls. If you mainly need a groove to arrange around a melody, MIDI browsing and simple editing may matter more. A large library can offer range, but it can also increase installation time and storage needs, so check the current requirements before choosing.
Finally, check your DAW and plugin format before installing anything. FL Studio, Ableton Live, and Logic Pro have different plugin format support and routing workflows. For rhythm-first electronic production, our drum machine VSTs are a relevant comparison; if the kick and sub are the main focus, see our best 808 VST plugins as a separate category. A dedicated drum VST, a drum machine, and an 808 instrument can all play different roles in one beat.
Final thoughts on the best drum VST
Choose by workflow, not by library size alone. Superior Drummer 3 gives acoustic productions detailed kit and mixer control, while EZdrummer 3 emphasizes songwriting grooves; Nerve and Playbeat 4 approach electronic rhythm through samples and patterns. Pendora is a melodic sound-bank companion, not a drum instrument. The right drum VST for your workflow is the one that fits your genre, DAW, editing habits, and available storage.
Pair your drum workflow with genre-focused sounds
A drum plugin can establish the rhythm, but a beat also needs melodic material that fits its style. Our Pendora sound bank is made for producers working in trap, drill, dark trap, phonk, boom bap, pluggnb, R&B, and related lanes. It is a virtual instrument and sound bank, not a dedicated drum sampler or sequencer, so it complements rather than replaces the drum VST you choose.
The full edition includes 275+ presets and production assets, while Pendora Lite offers a smaller 30-preset edition for evaluating the sound. Pendora supports VST3 on Windows and macOS, and AU on macOS, with compatibility for major DAWs including FL Studio, Ableton Live, and Logic Pro. Commercial use is royalty-free under the product license, which excludes account sharing and redistribution; one-time purchase terms and free lifetime updates also apply. Explore our VST instruments and plugins to find a sound bank that fits alongside your drum workflow.
Frequently Asked Questions
What is the best drum VST for acoustic drums?
Superior Drummer 3 is a strong choice when you want extensive kit editing, routing, and mixing control. EZdrummer 3 is more songwriting-oriented, with grooves and tools for building an arranged drum part.
Which drum VST suits electronic beatmaking?
Nerve focuses on sample-based sequencing and editing, while Playbeat 4 centers on pattern generation and MIDI output. Choose based on whether you prefer to build patterns from individual samples or generate variations for further editing.
Are there free drum VSTs?
MT Power Drum Kit is a free acoustic drum sampler with a groove library. Its intended sound and style differ from pad-based tools designed for one-shots and electronic beatmaking.
Is Pendora a drum VST?
No, Pendora is a sound-bank virtual instrument with melodic presets and production assets, including drum content in the full edition. It is not a dedicated acoustic drum sampler or step sequencer.
What should I check before installing a drum plugin?
Confirm that your DAW supports the plugin’s format and that your operating system meets its requirements. Also check library size, available storage, and whether the workflow matches your production style.
How Do Preset Packs Help With Beat Making in Your Workflow
Summary: Preset packs give beatmakers ready-made instrument or effect settings to audition, edit, and fit into a track, helping them move from sound search to writing sooner. They can spark a melody, suggest a genre direction, or offer a way into sound design. For the best results, check that a pack fits your instrument and project, then shape each sound to serve the beat.
A beat can lose momentum when you spend more time scrolling through synth presets than writing. A well-organized sound bank can narrow that search, giving you a practical place to start without dictating the finished track. If you want to explore this workflow, read how sound banks save time when making beats.
How do preset packs help with beat making? They provide ready-to-load sounds and settings you can audition against a melody, drum pattern, or chord progression. The useful part is not simply having more options. It is finding a sound that fits the track quickly, then adjusting it so the beat develops its own character.
How do presets help move an idea forward?
A preset gives you a starting configuration for a synthesizer or effect, rather than requiring you to build every parameter setting from scratch. Load a pad, bell, bass, or lead, play a few notes, and see whether the sound supports the musical idea. If it does, you can write around it. If not, move on or edit it.
This can make a difference early in a session, when a rough melody or chord progression needs a sound to suggest its mood. In Ableton’s guide to presets, presets are treated as possible starting points, with fine-tuning part of adapting them to a particular piece of music. The same principle applies in FL Studio, Ableton Live, or Logic Pro: a preset can help you begin, but your arrangement and choices shape the result.
Presets can also support learning. Instead of starting with an empty patch in Serum or Vital, inspect a sound that is close to what you want. Try changing the filter cutoff, envelope, or modulation and listen to how each move affects the tone. You can keep the edited patch for a later session or use what you learned when designing a sound from scratch.
Can a curated pack make sound selection more focused?
A preset folder is most useful when it helps you find sounds suited to the track, rather than adding another large library to scroll through. If you are building a melodic trap beat, for example, you might look for a pluck or bell that leaves room for the vocal range and does not crowd the drums. A sound that fits the musical role can get you to the writing and arranging stage sooner.
That is why curation matters as much as quantity. A bank organized around a defined sound or genre can reduce irrelevant browsing, although no collection guarantees that every preset will fit every beat. We focus our Pendora sound bank on styles including trap, drill, dark trap, phonk, boom bap, and pluggnb. For another perspective on the workflow, see why producers buy sound banks.
A focused library can also help when a session stalls and you need a new tonal direction. Browsing a smaller set of sounds built for a related style may prompt a different bass texture, counter-melody, or chord voicing. Treat that as a creative prompt, not a substitute for choosing sounds that work in your own arrangement.
How can you make a preset sound like it belongs in your beat?
Start by listening to the preset in context, not only in isolation. A bright lead that sounds exciting on its own may compete with the vocal space, while a deep bass patch may overlap the kick. Test the sound alongside the drums, melody, and other instruments before deciding whether it stays.
Then make a few purposeful edits. Adjust the attack and release to change how the sound enters and fades, filter out frequencies that conflict with other parts, or alter the pitch and modulation to change its movement. In FL Studio, you can also shape the instrument’s MIDI phrase and velocity so the part feels connected to the beat, rather than like a preset demonstration.
A 2026 study of practitioners working with AI in sound design describes a tension between speed, control, and creative agency. It studies AI tools, not preset packs, so it does not show how presets affect beatmaking; it does, however, offer a useful reminder to choose tools that save setup time without taking away the control you want over a sound.
Sound-design tools are not the only route to learning a synth. A 2021 Serum research paper explores ways to guide users through effect programming. For beatmakers, the practical takeaway is simple: use a preset as something to investigate. Change one control at a time, compare the result, and save the version that fits your track.
What should you check before choosing a preset pack?
One creator sound-packs market report projects the preset-pack segment to grow at an 11.7% compound annual rate from 2026 through 2034. That is a market forecast, not evidence that a particular pack will save time or suit your music. It does make careful selection worthwhile: focus on what the pack actually contains and how you will use it.
- Plugin match: Check that the pack is made for an instrument you own, and confirm any version requirements.
- Genre fit: Listen to audio examples and decide whether the sounds make sense for the beats you produce.
- Usable range: Look for the kinds of sounds you need, such as basses, leads, pads, or plucks, rather than relying on a large preset count alone.
- Room to edit: Choose sounds you can adapt with your synth, effects, and MIDI performance.
- Terms of use: Read the pack’s licensing terms if you plan to sell, place, or license beats made with it.
For producers using FL Studio, the instrument still matters: a preset pack made for a different plugin may not load in the synth you have open. Our pages on FL Studio preset packs and presets for FL Studio address that specific workflow. Check the destination details and the plugin requirements before choosing a pack.
When are presets less useful?
A preset pack may not help much if you are browsing without a musical goal, working with an incompatible instrument, or expecting every sound to fit without adjustment. A long list of patches can add to decision fatigue if you do not know whether you need a bass, lead, chord layer, or texture.
Set a small target before you browse. For example, decide that you need a short pluck to answer the main melody, or a bass that leaves the kick clear. Audition a few candidates against the beat, edit the strongest option, and move on when it does the job. If none fit, try a different sound source or make a patch from scratch.
Make presets serve the beat
Preset packs can help beatmaking by giving you sounds to test, edit, and build ideas around, while a focused collection can make browsing more intentional. Their value depends on plugin compatibility, the musical fit of the sounds, and whether you can shape them to work with your arrangement. Treat each preset as a starting point, not a finished decision, and let the track guide what stays.
Explore a sound bank built for beatmaking
If you produce trap, drill, phonk, boom bap, or pluggnb, a genre-focused bank can give you a more relevant set of sounds to audition. Choose based on the styles you make, the instrument and DAW you use, and whether you want to customize the presets as you write.
We built Pendora around hand-crafted presets for these production lanes. The full edition includes 275+ presets, along with expansion packs, drumkits, MIDI, and effects. It supports VST3 on Windows and macOS, and AU on macOS. Commercial use is royalty-free under the product’s stated terms, which exclude account sharing and redistribution. Explore the Pendora preset pack and check the compatibility details for your setup.
Frequently Asked Questions
What is a preset pack?
A preset pack is a collection of saved sound or effect settings for a compatible music-production instrument or plugin. You load a setting, audition it, and can often adjust it to suit your track.
Do preset packs make beats sound generic?
A preset alone does not determine whether a beat feels original. Your melody, rhythm, arrangement, sound choices, and edits all help shape the finished production.
Can I edit a preset after loading it?
In many instruments, you can change controls such as filters, envelopes, effects, and modulation after loading a preset. The available edits depend on the plugin and how the sound was made.
Will any preset pack work in FL Studio?
No, the pack must be compatible with an instrument or plugin you can use in FL Studio. Check the pack’s supported plugin and version before downloading or buying it.
How does Pendora fit into beatmaking?
We designed Pendora as a genre-focused sound bank for styles including trap, drill, dark trap, phonk, boom bap, and pluggnb. Its presets are intended as starting sounds that you can audition and adapt in your productions.
Best Free Hip-Hop Plugins to Download for FL Studio 20
Summary: Start with free synths and sample players that you can download from their developers and match to your exact FL Studio 20 build. Surge XT, Vital, Decent Sampler, and Tyrell N6 cover sound design and sampled instruments, but differ in format, library needs, and interface complexity. Check compatibility before installing, then scan the plugin in FL Studio. Remember that sample packs are not plugins.
A free synth can spark a beat, but the wrong plugin format can leave it missing from the channel rack. For free hip-hop plugins for FL Studio 20, start with a few well-matched instruments rather than a folder full of downloads. Our free VST plugins for FL Studio page is one place to continue browsing, while the picks below cover distinct uses in beatmaking.
Think about the sound you need first: a wavetable synth for custom basses and leads, an analog-style synth for quick presets, or a sampler for playable instruments. The exact FL Studio 20 point release matters too. Image-Line’s documentation covers supported plugin formats and installation, while its version information notes that FL Studio 20.9 and later are 64-bit only. Check the build and format before downloading so you do not mistake a version mismatch for a broken plugin.
Which free hip-hop plugins work in FL Studio 20?
For hands-on synthesis, start with Surge XT or Vital; choose Decent Sampler when you want to play sample libraries, and Tyrell N6 for a classic virtual-analog approach. These are different kinds of tools, not interchangeable beat kits. The table ranks them by how directly each can add playable sounds to a hip-hop session and notes the main setup consideration.
| Rank | Plugin | Role | Free offer | Setup consideration |
|---|---|---|---|---|
| 1 | Surge XT | Versatile synthesizer | Free and open source | Choose a format supported by your FL Studio 20 build |
| 2 | Vital | Visual wavetable synthesizer | Free Basic tier | Check the installer and format for your operating system |
| 3 | Decent Sampler | Sample-library player | Free player; libraries vary | Requires instruments made for Decent Sampler |
| 4 | Tyrell N6 | Virtual-analog synthesizer | Free download | Check the format and beta status of the build |
1. Surge XT
Best for: Producers who want to build their own basses, plucks, leads, and atmospheric layers instead of relying on a single preset style.
Surge XT is a free, open-source synthesizer with several synthesis methods and a large sound-design toolkit. That range can help when a hip-hop track needs a tuned 808 layer, a shifting pad, or a melodic sound that is not already familiar from a basic piano patch. It rewards experimentation, although its depth can take more time to learn than a simple preset instrument.
Pros
- Free and open source, with multiple synthesis approaches for shaping sounds.
- Useful across bass, lead, pad, and texture roles in beatmaking.
Cons
- The many controls can make it slower to navigate if you only want a ready-made sound.
2. Vital
Best for: Producers interested in visual wavetable sound design for modern basses, leads, and evolving textures.
Vital presents its synthesis and modulation visually, making it easier to see how a waveform changes as you edit a sound. The free Basic tier gives you the core synthesizer, with a smaller preset and wavetable selection than the paid tiers. That makes Vital a useful starting point for learning how to shape a sound, but it is not the same as downloading a ready-made hip-hop kit.
Pros
- The visual approach makes modulation and wavetable changes easier to follow.
- The Basic tier provides a starting point for designing original synth sounds.
Cons
- Preset and wavetable quantities are limited in the free tier compared with paid tiers.
3. Decent Sampler
Best for: Producers who want to play sampled instruments through a plugin rather than synthesize every sound from oscillators.
Decent Sampler is a free sample player for instruments made in its own format. It can be useful for adding a sampled piano, keys, or another playable sound to a beat, but the player itself is not a complete collection of sounds. You need compatible libraries, and their availability, price, and license depend on the library creator.
Pros
- It opens a separate library-based approach to playable sampled instruments.
- The player is free, so the cost depends on which compatible libraries you choose.
Cons
- You need to find and install compatible libraries before you have instruments to play.
- Library terms can differ, so check the specific license before using sounds commercially.
4. Tyrell N6
Best for: Producers looking for an analog-style synth with a preset library and hands-on controls.
Tyrell N6 uses a virtual-analog design with oscillators, filters, modulation, and built-in effects. It is a free download, and the developer’s current build is labeled beta. That can be a useful choice if you want traditional synth architecture and presets to explore, but check the included formats and the build notes against your operating system and exact FL Studio 20 version.
Pros
- Offers an analog-style sound-design workflow and a factory preset library.
- Free to download without a serial number.
Cons
- The current free build is labeled beta, so check its release notes and compatibility before using it in an important project.
How do you install and check a free plugin?
What should you do if a downloaded instrument does not appear in FL Studio? First, confirm that the installer matches your operating system and FL Studio build. In FL Studio, plugin support and scanning depend on format and version. Image-Line’s instructions describe installing plugins and scanning them so they appear in the plugin database. Its support page also explains that 20.9 and later are 64-bit only, so older 32-bit plugins may need a compatible bridge or a 64-bit alternative.
- Download the installer from the plugin developer’s official site.
- Choose a plugin format and bit depth that match your system and FL Studio 20 point release.
- Run the installer, then use FL Studio’s plugin manager to scan for the new instrument or effect.
- Load it in a test project and save a copy before relying on it in a larger session.
For download safety, avoid cracked installers and unofficial mirrors. Microsoft recommends downloading software from trusted sources and paying attention to what the installer adds. On macOS, Gatekeeper checks downloaded apps and plugins for developer identity, notarization, and changes to the software. These checks are useful safeguards, but they do not replace checking that you are on the developer’s genuine download page.
How do you choose between a synth, a sampler, and a sound pack?
Start from the job you need the download to do. A synthesizer creates or shapes tones, so it suits custom basses, leads, and pads. A sampler plays audio recordings as instruments, which can provide a more organic piano or key sound. A sound pack, by contrast, may be a collection of audio files or presets, not a plugin that appears as an instrument in the channel rack.
For a quick workflow, choose a synth with presets you can edit, then save your own variations in the project. For more distinctive melodies, try a sampler library that fits the track’s mood. If a download includes only WAV samples or MIDI files, treat it as a production resource and load or arrange it using FL Studio’s own tools rather than expecting it to open like a VST instrument.
If you want to browse beyond the four picks, our free FL Studio plugins page is another relevant starting point. Judge each download by its role, plugin format, and license, rather than by its name alone.
What should you check before downloading?
Will the plugin solve a real gap in your current beatmaking setup? Check these four points before adding another download to your folder.
- FL Studio build: Confirm your exact FL Studio 20 point release.
- Plugin format: Match the format offered by the developer to the one your host can load.
- Operating system: Choose the correct Windows or macOS installer.
- Download and license: Use the official source and read the terms for the plugin and any sound library.
When might a paid sound bank be a better fit?
Free plugins are a practical way to test synthesis and sampling, but they may not provide a focused palette for every genre or workflow. Our Pendora sound bank is a paid option for producers working in melodic trap, drill, R&B, pluggnb, dark trap, lo-fi, and phonk. The full edition includes 275+ studio-ready presets across 30+ sound categories, plus expansion packs and production assets. A hand-crafted, genre-focused bank can give you a more direct starting point when preset browsing is slowing down a session. See our best VST plugins for FL Studio page for more on selecting instruments for your setup.
For a no-cost download instead of a plugin, Temple Drumkit is a free newsletter incentive with 80+ hand-crafted drums for trap, drill, and plug. It is a drumkit resource, not a virtual instrument, so it complements rather than replaces a synth or sampler.
Conclusion
The best starting point depends on whether your beat needs original synthesis or playable sampled instruments. Try Surge XT or Vital for synth design, Decent Sampler for compatible libraries, and Tyrell N6 for an analog-style approach. Before installing anything, confirm the plugin format, operating system, and FL Studio 20 point release. A few well-chosen free hip-hop plugins for FL Studio 20 are more useful than a large collection you never open.
Find a sound bank for your next beat
If you have tested free plugins and want a more focused palette for trap, drill, phonk, or pluggnb, a curated sound bank can help you spend less time searching and more time shaping the beat. Pendora is a paid sound bank, not a free plugin, with a genre-focused collection of presets and production assets.
Our full edition includes 275+ studio-ready presets across 30+ sound categories, plus expansion packs, drumkits, MIDI, effects, and other production assets. Pendora supports VST3 on Windows and macOS, and AU on macOS, with FL Studio among its tested DAWs. It is a one-time purchase, with royalty-free commercial use and lifetime updates under the stated terms. Browse VST plugins to see whether a focused sound bank fits your workflow.
Frequently Asked Questions
Are free VST plugins compatible with every FL Studio 20 version?
Not necessarily. Compatibility depends on the plugin format, operating system, bit depth, and the exact FL Studio 20 point release you use.
Should I choose VST2 or VST3 for FL Studio 20?
Check the formats supported by your specific FL Studio build and the plugin developer’s installer. Use a format available to both the plugin and your host.
Is a sample pack the same as a plugin?
No. A plugin is software that runs inside FL Studio, while a sample pack is usually a collection of audio files, presets, or MIDI that you load or arrange separately.
Can I use free plugin sounds in commercial beats?
Check the license for the plugin and any included or separately downloaded sound library. The software being free does not automatically mean every library has identical commercial-use terms.
Why does FL Studio fail to show a plugin after installation?
The plugin may be installed in a format or location FL Studio is not scanning, or it may not match your operating system or bit depth. Check the installer settings and run a fresh plugin scan in FL Studio.

A Producer’s Guide to VST License Key Delivery After Purchase
Summary: A VST license key usually arrives through the publisher’s chosen route, such as an email or customer account, but delivery and activation are separate steps. Check your order confirmation, inbox folders, and account before contacting support. Keep the key and purchase details secure, and confirm the plugin’s activation instructions and license terms before installing.
A VST purchase can leave you with two separate tasks: finding the download and locating the credential that authorizes the plugin. Publishers handle those steps differently, so the key may be in an email, an account area, or an activation service rather than inside the installer. If you are looking at our direct download options, Download your VST and check the product details before checkout.
VST license key delivery describes how a publisher gets an activation credential to you after purchase. It does not, by itself, install the plugin or activate it in FL Studio, Ableton Live, Logic Pro, or another DAW. Knowing which step you are on helps you avoid repeated downloads or entering a code in the wrong place.
What does a VST license key actually do?
A license key is usually a code or account entitlement that lets a plugin verify that you can use it. Depending on the publisher, activation may involve entering a serial number in the plugin, signing into a license manager, or authorizing an account or device. A key is not necessarily a download link, and a purchase email is not always the activation credential.
It also helps to separate an activation key from the plugin’s legal usage license. The first concerns access to the software; the second sets conditions for use, such as whether commercial use is allowed. A 2025 study of open-source VST projects examined developer practices and software licensing, a separate topic from how an individual customer receives an activation code. Read the product’s own terms rather than assuming that receiving a key defines your rights.
Before checkout, note the delivery route, required account or license manager, supported operating system, and activation limits. That quick check matters whether you are adding a synth alongside Serum, Omnisphere, Kontakt, or Vital, or choosing a sound bank for a beatmaking session.
Where should you look after checkout?
Imagine you have paid for a plugin and the confirmation page appears, but no code is visible. Start with the order email and the address used at checkout. Search your inbox for the publisher name and product name, then check spam, junk, promotions, and any other filtered folders. Look for separate messages: one may confirm payment, while another provides the download or activation details.
If the email is missing, sign in to the publisher’s website using the checkout address and inspect the order history, downloads, or product library. Some companies attach software to an account rather than sending a standalone code. Do not place a second order simply because the first message has not appeared; first confirm the payment and order status through the original store.
At Tiger-Sounds, customers receive a download link and license key by email after purchase. Account access and updates are handled through the Tiger-Sounds dashboard. If you bought one of our products, look in the inbox associated with checkout, then check the dashboard before contacting support.
Why do delivery and activation differ between publishers?
One publisher may email a serial, another may place the entitlement in a user account, and another may ask you to sign in to an authorization application. Even when a code arrives promptly, you may still need to download and install the plugin, launch it in a compatible host, and complete its activation step. Treat the publisher’s instructions as specific to that product, not as a universal VST procedure.
For example, Akai’s activation instructions describe an account-based process for its MPC instruments and FX, including a limit of three simultaneously activated devices. That is a product-specific rule, not a general limit for VST plugins. Confirm your own product’s device allowance and deactivation process before moving a license to another computer.
Also check the plugin format and operating system separately from the key. A credential cannot make an unsupported format load in a DAW. For our products, VST3 is supported on Windows and macOS, while AU is supported on macOS; the stated systems are macOS 11 Big Sur or later and Windows 10 or 11, 64-bit only.
What should you do if the key has not arrived?
Work through a few checks before requesting a replacement. Confirm that checkout completed, verify the email address on the order, and search all inbox folders. Then sign in to the publisher account and check purchase history or downloads, since the key may be available there instead of in the original message.
- Check the order: confirm the purchase is complete and identify the order number.
- Search your email: look for the store name, plugin name, and terms such as “license” or “activation.”
- Check your account: review the product library, order history, or license section.
- Contact support: send the order number and checkout email through the publisher’s official support channel.
Do not post a license key publicly or send it to an unverified contact. If you contact support, provide enough purchase information to identify the order, but share the key itself only when the publisher’s verified support process requires it. At Tiger-Sounds, email support is available at contact@tiger-sounds.com for unresolved delivery, installation, or product questions, and usually replies within 24 hours.
If you need product-specific installation or compatibility details, our Frequently asked questions page covers common support topics. Keep the purchase confirmation until you have located both the installer and the activation information.
How should you store the key and check the terms?
Once you have the key, save the original purchase email and store the credential in a secure place, such as a password manager or an encrypted records file. Keep the order number, product name, publisher account, and installer version alongside it. Avoid relying on a single inbox message as your only record, especially if you change email providers or computers.
A 2026 study of open-source project licenses discusses rules for using and reusing software; those legal permissions are distinct from the activation steps for a commercial plugin. Check the publisher’s terms for commercial use, transfer, device limits, updates, and account sharing. Do not assume a key grants unrestricted use, or that a royalty-free label removes other stated conditions.
For a beatmaker, a clear record of the key and terms saves time when reopening an older project or moving a session to another machine. It also makes it easier to tell whether a problem is about license activation, an unavailable download, or an incompatible plugin format.
Conclusion: Make delivery easy to verify
VST license key delivery is only the first part of using a purchased plugin. Check your email and publisher account, follow the product-specific activation steps, and keep the key and usage terms with your purchase record. If the credential is still missing, contact the publisher through its official support channel with your order details.
Find a sound bank for your next beat
Once your download and license are organized, the next step is choosing a plugin that fits your production style and works with your DAW. For melodic trap, drill, R&B, pluggnb, dark trap, lo-fi, or phonk beatmaking, look for sounds that suit the session rather than adding presets you will not use.
Our Pendora sound bank includes 275+ studio-ready presets and production assets for a focused set of genres. It supports VST3 on Windows and macOS, and AU on macOS, with royalty-free commercial use under the stated licensing terms. Updates are free for life, excluding account sharing and redistribution. Explore the Pendora VST and review its compatibility and contents before choosing an edition.
Frequently Asked Questions
Is a download link the same as a license key?
No. A download link gives you access to the installer or files, while a license key or account entitlement authorizes use. Some publishers send both in one message, while others handle them separately.
How long does VST license key delivery take?
There is no single delivery time that applies to every publisher or purchase. Check the order confirmation, inbox folders, and customer account, then contact the seller if the key remains unavailable.
Can I install the plugin before entering the key?
Often the installer and activation are separate steps, but the exact process depends on the publisher. Follow the product instructions and confirm the plugin format is supported by your operating system and DAW.
What should I send support if my key is missing?
Provide your order number, product name, and the email address used at checkout through the publisher’s official support channel. Do not share a key publicly or send payment details in an ordinary support message.
Where does Tiger-Sounds send its download link and license key?
After purchase, Tiger-Sounds sends the download link and license key by email. You can also use the Tiger-Sounds dashboard for account access and updates.