
How to Make a Lo-Fi Hip Hop Beat (Step by Step)
To make a lo-fi hip hop beat, set your project between 70 and 90 BPM, loop a soft jazzy chord progression (7th and 9th chords on Rhodes or felt piano), add muted drums with heavy swing and loose timing, then roll off the highs and add saturation, wobble and vinyl noise. Keep the arrangement simple: lo-fi is built to loop, not to build to a drop. The chords carry the vibe, so if the loop doesn’t feel good on its own, fix that before touching the drums.
This guide walks through the full process step by step, mostly with stock FL Studio plugins, in the same format as our Detroit type beat guide. Most of the work happens in the groove and the texture.
- What is a lo-fi hip hop beat?
- What tools do you need?
- Step 1: Tempo and project setup
- Step 2: The chord loop
- Step 3: Drums with swing
- Step 4: Bass and melody
- Step 5: The lo-fi texture
- Step 6: Arrangement
- Common mistakes
- FAQ
- Verdict
What is a lo-fi hip hop beat?
A lo-fi hip hop beat is a slow, mostly instrumental hip hop loop with jazzy chords, soft swung drums and a deliberately worn sound: muffled highs, tape wobble, crackle. It is the sound of study playlists and Lofi Girl streams, and it sits between boom bap and ambient music. Native Instruments sums up the format in its lo-fi hip hop tutorial: lo-fi “generally sits around 60-90 BPM,” leaves “plenty of space between the drums,” and uses reverb, delay, chorus and bitcrushing “generously to up the nostalgic ante.”
The same Native Instruments piece describes the structure as “simple and repetitive, and that’s exactly the point,” with most tracks running about 1 to 3 minutes. The loop has to hold up for two minutes without getting annoying.
What tools do you need to make a lo-fi beat?
You need a DAW, one warm keys sound, a soft drum kit, a low-pass filter, a saturator and something that adds noise or wobble. Every DAW ships with enough to do it. In FL Studio, the Image-Line edition comparison lists FL Keys, Fruity Filter, Fruity Reeverb 2, Fruity Chorus and Fruity Squeeze as included in all editions, so even the cheapest edition covers the basics.
| Job | FL Studio stock option | Edition (per Image-Line) | Paid alternative |
|---|---|---|---|
| Keys and chords | FL Keys | All editions | Any Rhodes or felt piano instrument, or a preset bank |
| Bit reduction and grit | Fruity Squeeze | All editions | XLN Audio RC-20 Retro Color |
| Darkening the highs | Fruity Filter | All editions | Any EQ with a gentle low-pass |
| Warm chorus wobble | Vintage Chorus (Juno 6 model) | Signature Bundle and up | Fruity Chorus in all editions is the free fallback |
| Space | Fruity Reeverb 2 | All editions | Any plate or room reverb |
| Chopping samples | Slicex | Producer Edition and up | See our sample chopping plugins list |
On the paid side, the plugin most lo-fi tutorials reach for is XLN Audio RC-20 Retro Color, which XLN describes as recreating “the sound and imperfections of vintage recording gear,” with noise, wobble, distortion, digital degradation, space and loss modules plus tape-style Varispeed at 1/2, 1/4 or 1/8 speed. It is not required: stock tools get you most of the way.
Step 1: What tempo should a lo-fi beat be?
Set your project between 70 and 90 BPM for a standard lo-fi beat, or drop to 60 to 70 BPM for a sleepier, ambient feel. Sources agree on the range: MusicRadar’s step-by-step lo-fi drum tutorial by mixer and producer Jon Musgrave says “lo-fi tempos are normally between the range of 60 bpm to 80 bpm” and builds its example at 80 BPM in 4/4, while Native Instruments builds its example at 65 BPM.
Around 85 BPM the beat still has a head nod and can work for a rapper. Around 65 BPM it turns into background music. For a rap type beat, stay in the upper half of the range.
Step 2: How do you write lo-fi chords?
Write a 2 to 4 chord loop using 7th or 9th chords, play it on a soft Rhodes, felt piano or muted guitar, and leave the timing slightly human. The chord loop is the most important part of a lo-fi beat. Native Instruments uses a VI, i, V7 progression in A minor (F major, A minor, E7) and notes they “added some extension notes” to make it “feel a bit more soulful and jazzy,” with the advice to “keep it minimal and evocative.”
A practical recipe for a first loop:
- Pick a minor key you are comfortable with, for example A minor.
- Stack each chord to four notes: root, third, fifth and seventh. Fmaj7, Am7, Dm9 and E7 already sound lo-fi before any processing.
- Voice the chords close together in the middle of the keyboard (around C3 to C5) so they sound warm, not bright.
- Roll the chords: move each note a few ticks later than the one below it, like a player’s hand. In the FL Studio piano roll, nudging by hand works fine.
- Lower and vary velocity so no two chords hit at the same strength.
If you want a sampled loop instead, the classic route is chopping old jazz or soul records. Native Instruments warns that these samples “can be tricky to license,” which matters the moment you sell a lease. Playing your own chords avoids that problem completely, and a royalty-free preset bank gives you the same warm tone without clearance issues. If you are weighing presets against loops, our sound bank vs sample pack breakdown covers the trade-off.
Step 3: How do you program lo-fi drums?
Program a simple kick and snare pattern, put the snare on 2 and 4, add 8th-note hats with varied velocity, then apply swing so the offbeats land late. Lo-fi drums should be soft and short. Pick a kick with little click, a dusty snare or rimshot, and closed hats that are not too bright. MusicRadar’s tutorial makes a point worth following: swapping a sound for a better one “is often more fruitful than trying to change existing sounds using processing.”
Jon Musgrave’s pattern in that MusicRadar tutorial is a good template to copy:
- Core hits: kick on beat 1, snare on beats 2 and 4, kept quantized as the anchor.
- Kick variations: in bars 1 and 3, a grace note on the last 16th and an extra kick on the 10th 16th. In bars 2 and 4, a kick on the 11th 16th.
- Feel: swing pushes the bar 1 and 3 extra kicks slightly later, while the 11th-16th kicks in bars 2 and 4 are moved very slightly earlier by hand.
- Hats: 8th notes, an open hat on the last 8th of bars 2 and 4, then “structured (not random!) velocity changes,” starting by lowering the “ands.”
- Shaker: 16ths with “substantial swing so the ‘ands’ are delayed.”
In FL Studio, the Channel Rack has a global swing control, and the FL Studio manual explains you can set a per-channel Swing Mix (0, 25, 50, 75 or 100 percent) so the kick stays tight while the hats and shaker swing harder. That split is the quickest way to get the lazy feel without the beat sounding drunk.
Then process the drum bus. Native Instruments adds a gentle low-pass “from 3.12 kHz to take out any crispy highs from the kit.” In stock FL, Fruity Filter plus a light dose of Fruity Squeeze, which Image-Line calls “particularly effective when applied to drum loops,” gets you close.
Step 4: Do lo-fi beats need bass and a melody?
Lo-fi beats need some low end, but not necessarily a separate bass line, and the melody should be short and repetitive. Many producers let a long, tuned kick or the left hand of the chords carry the bass. In MusicRadar’s Beat Building lo-fi hip-hop session, the kick is “a long, powerful 808 kick, tuned to the root of the track as it’s also providing the primary bass.”
If you add a bass, use a round sine or upright-style sound that follows the chord roots, quieter than the keys. If the low end gets crowded, the rules from our guide on mixing 808s without mud apply: one main source per low frequency range.
For the melody, write a short 2-bar phrase with lots of space. Native Instruments leaves its melody unquantized because “the ‘janky’ moments that sound out of time add to the feeling.” Good lead sounds: kalimba, music box, soft bells, muted guitar, flute, kept quieter than you think.
Step 5: How do you make a beat sound lo-fi?
A beat sounds lo-fi when the highs are rolled off, the signal is saturated or bit-reduced, the pitch wobbles slightly, and a layer of noise sits underneath. Apply it in moderation per channel, then a little on the master. Texture cannot save a weak chord loop.
A stock FL Studio chain for the keys:
- Fruity Filter as a low-pass to dull the top end.
- Fruity Squeeze with the mix knob low for grit. Image-Line’s Fruity Squeeze manual page explains that its Squarize control “reduces the bit-depth” and makes the output “sound gritty.”
- Vintage Chorus if you have Signature or above. Image-Line says it is modeled after the Roland Juno 6 bucket brigade chorus, known “for its warm, analog sound.” Otherwise use Fruity Chorus with a slow rate for a light tape-style wobble.
- Fruity Reeverb 2 on a send, darker and shorter than you would use in a trap beat.
For noise, layer a vinyl crackle or room tone sample on its own channel, low in the mix, and filter it so it does not cover the hats. MusicRadar’s Beat Building session also adds “saturation across the whole beat to gel everything and add presence to the kick,” which is a good final step on the master. RC-20 can replace this whole chain if you own it.
Step 6: How do you arrange a lo-fi beat?
Arrange a lo-fi beat by introducing one element at a time in 4 or 8-bar blocks, dropping parts out when the loop gets repetitive, and bringing them back. A 2-minute track at 80 BPM is only about 40 bars, so you do not need many sections. Native Instruments’ advice is to “bring in one element at a time for four or eight bar phrases” and use small ear candy, like a reverse crash, to mark transitions.
A simple layout that works:
- Intro (4 bars): chords only, filtered.
- Loop A (8 bars): drums and bass enter, filter opens.
- Loop B (8 bars): melody enters.
- Break (4 bars): drums out, chords and noise only.
- Loop C (8 bars): everything back, plus the counter-melody or shaker.
- Outro (4 to 8 bars): elements drop out one by one, or the filter closes.
What are the most common lo-fi beat mistakes?
- Too much texture. Crackle, bitcrushing and wobble on every channel turns the beat into mush. Keep one element relatively clean.
- Random velocity. Humanizing means patterns, not dice rolls. MusicRadar’s tutorial is explicit that velocity changes should be “structured (not random!).”
- Uncleared samples on a beat you sell. A flipped jazz record can get a beat taken down or claimed. Play your own chords or use royalty-free sounds.
FAQ
What BPM is lo-fi hip hop?
Most lo-fi hip hop sits between 60 and 90 BPM. MusicRadar gives 60 to 80 BPM as the normal range and Native Instruments gives 60 to 90 BPM. Use 80 to 90 BPM if you want a rapper to ride it, and 60 to 70 BPM for a slower, ambient playlist feel.
Can you make lo-fi beats in FL Studio without paid plugins?
Yes. FL Keys, Fruity Filter, Fruity Squeeze, Fruity Chorus and Fruity Reeverb 2 are all listed by Image-Line as included in every FL Studio edition, which covers chords, filtering, grit, wobble and space. A paid plugin like RC-20 is faster, but it is not required.
What chords are used in lo-fi?
Lo-fi relies on extended chords: major 7th, minor 7th, minor 9th and dominant 7th, voiced close together in the middle register. A 2 to 4 chord loop such as Fmaj7, Am7, Dm9, E7 in A minor is a typical starting point.
Verdict
A lo-fi hip hop beat is a good chord loop, swung soft drums and controlled degradation, at 70 to 90 BPM. Spend most of your time on the chords and the groove, use stock filtering and saturation for the texture, and keep the arrangement simple. You can make a release-ready lo-fi beat with only the plugins included in every FL Studio edition.
Where Pendora fits, honestly: Pendora is a preset plugin built for trap, drill, R&B and afro, not a dedicated lo-fi instrument, so if you only make lo-fi, a sampler and a good Rhodes may serve you better. That said, its 277 presets include keys, pads, bells and flutes, with names like Space Rhodes, Snow Keys, Pad Tape and Kalimba listed on the site, and they take lo-fi processing well. Everything is royalty-free for beats you sell, which solves the sample clearance problem. If you want to test the sound first, Pendora Lite has 30 presets for a one-time 29 euros, or browse the rest of the Tiger-Sounds shop for drum kits.
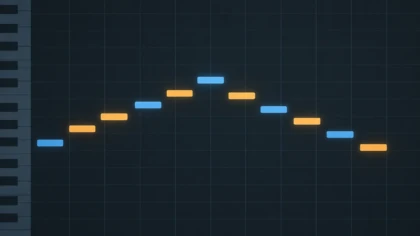
MIDI for Trap Melodies: Choose Files and Build Better Beats
Summary: The right MIDI for a trap melody gives you editable notes that fit your key, groove, and intended sound, rather than a finished loop you must copy unchanged. Check melodic variation, file organization, and DAW import, then adjust the rhythm, pitch, and phrasing to make the idea work with your drums, bass, and arrangement.
A MIDI phrase can look ready on the piano roll and still fight the 808, drum bounce, or vocal space. Treat MIDI for trap melodies as editable note data, not a finished identity. Once the notes fit, sound choice matters too, and our VST picks for trap melodies cover that separate part of the process.
A useful melody file gives you a starting point you can reshape around the beat. Before choosing a pack, check whether its phrases suit your style, whether you can import and edit them easily, and whether the notes leave room for your drums and bass. Then use the MIDI as raw material: change a few notes, shift the rhythm, or replace the sound until the loop fits your track.
What makes MIDI useful for trap melodies?
Trap topped the genre-search table in the 2026 IMS report, with 1.4 million searches recorded for 2025. That figure describes search activity, not demand for MIDI files, but it does give context for the genre’s visibility. For beatmaking, the more important point is that a MIDI phrase is editable: you can change the notes, timing, length, and instrument without rebuilding the idea from scratch.
That flexibility is useful when you want to try a different melodic loop against the same drums. A bell line might work as a pluck, a darker pad, or a piano phrase, depending on the texture you want. The MIDI supplies the notes and timing; your instrument and performance choices shape the sound.
Think of a downloaded phrase as a sketch. Keep the notes that support the mood, but adjust anything that crowds the vocal range, clashes with the 808, or makes the loop feel too static.
How should you evaluate trap MIDI melodies?
Start with fit, not the file count. A large folder is only useful if you can quickly find phrases that match your preferred mood, note density, and level of complexity. Look for melodies that are easy to edit and clearly organized, so you spend time writing rather than sorting through files.
- Style fit: Listen for phrases that suit the direction of your beat, whether that is melodic trap, drill, dark trap, R&B, pluggnb, phonk, or a more restrained sound.
- Variation: Check whether the pack offers distinct note patterns and rhythms, rather than many files that feel like minor variations of one idea.
- Editing flexibility: Make sure you can move notes, change lengths, transpose the phrase, and create variations in your DAW.
- File organization: Clear names and sensible folders make it easier to audition ideas and return to them later.
It also helps to distinguish a full melody from a short motif. A 2024 research dataset of popular-song melodies contains 371 full transcriptions and 1,133 shorter section files, such as excerpts from verses and choruses. The Billboard melody dataset is not a trap MIDI pack, but it illustrates why file length and musical role matter when comparing material: a complete line and a short hook serve different writing needs.
If you want to compare collections by content and organization, browse our MIDI pack guide. Use the same criteria for every option, and choose files that give you room to reshape the phrase instead of relying on a high count alone.
How do you make a MIDI phrase fit your beat?
Import the file into your DAW and audition it with the actual drum pattern and bass, not in isolation. In FL Studio, Ableton Live, or Logic Pro, load the MIDI into an instrument track and check how the phrase sits against the kick, snare, and 808. If the notes compete with the bass, try moving them to another octave or changing the instrument before rewriting the whole melody.
Then edit the phrase in passes. First, adjust the key or pitch so the line works with the harmony and bass. Next, change note lengths and timing to shape the groove. Finally, remove or move notes that make the phrase too busy, and test a second version with a different final note or rhythmic pause.
- Keep a duplicate of the original MIDI before editing.
- Audition the notes with the 808 to catch clashes in the low register.
- Make one clear variation, such as a changed ending or a pause before the next bar.
- Compare the edited line with the vocal space and the full drum arrangement.
The instrument is a separate creative choice. Serum and Vital can give a phrase a focused synth character, while Omnisphere or Kontakt can take it in a different direction depending on the sounds you load. For more downloadable material to work from, explore our MIDI packs.
What does a MIDI file contain, and what does it leave out?
A MIDI file stores musical instructions, not a rendered recording of the instrument. A 2026 study describes MIDI data in terms of events such as note pitch, duration, and timing, and notes that analysis of note transitions does not capture sound-design qualities. The 2026 MIDI study is a reminder to judge a phrase and its sound separately: the same notes can feel very different when played by different instruments.
This distinction helps set expectations when choosing trap melody MIDI files. Check that the notes are useful and editable, then audition them with your own synth or sampler. If you are using a sound bank or preset instrument, choose a patch that supports the role of the melody, and adjust the MIDI if the attack, sustain, or register crowds the rest of the beat.
Do not assume a MIDI pack includes a particular instrument, preset, or sound unless its product details say so. MIDI compatibility is about importing and editing the note data in your DAW; the instrument that plays it is another part of your setup.
When does a dedicated trap MIDI pack make sense?
A dedicated pack is useful when you want a set of starting points in a particular production lane, rather than a random collection of generic phrases. Consider the pack’s musical focus, how easily you can browse the files, and whether you can use it with the instruments and DAW already in your workflow.
Pendora Super Midi Pack is a MIDI inspiration pack containing 1,000+ MIDI files. It is available only to Pendora users, so check that access requirement before deciding whether it fits your setup.
Whichever pack you use, keep the writing decisions in your hands. Change the rhythm, select a different sound, or combine a useful part of the phrase with notes you write yourself. That turns a downloaded idea into material shaped for your beat.
Choose MIDI You Can Make Your Own
Good trap melody MIDI should suit your intended style, import cleanly into your DAW, and give you useful notes to reshape. Audition each phrase with the drums and 808, edit the pitch and rhythm, and choose an instrument that leaves space in the arrangement. The most useful file is the one that helps you finish a melody that feels right for your track.
Find MIDI Ideas for Your Beatmaking Workflow
If you want melodic starting points for trap production, look for files you can edit in your DAW and adapt to your own sound. Check the pack’s contents and access requirements before choosing it.
The Pendora Super Midi Pack is an inspiration pack with 1,000+ MIDI files, available to Pendora users. Review the product details to see whether its access requirements and MIDI content suit your workflow.
Frequently Asked Questions
What is trap melody MIDI?
It is MIDI note data arranged as a melody or melodic phrase for a trap beat. You can edit the pitch, timing, and note lengths, then play it through an instrument in your DAW.
Can I use a MIDI melody in FL Studio, Ableton Live, or Logic Pro?
These DAWs support MIDI workflows, but the exact import steps differ. Drag the file into a MIDI or instrument track, then check how the notes are laid out in the piano roll or editor.
Should I use a downloaded melody without changing it?
You can audition it as supplied, but editing the rhythm, notes, or sound helps fit it to your drums, bass, and arrangement. Keep the original file as a reference if you want to compare versions.
Does a MIDI melody include its instrument sound?
No, MIDI primarily carries performance instructions such as notes and timing, rather than rendered audio. You need an instrument or sound source in your DAW to hear the phrase.
Who can use Pendora Super Midi Pack?
Pendora Super Midi Pack is available only to Pendora users. Check the product details for the access requirement before choosing it for your setup.
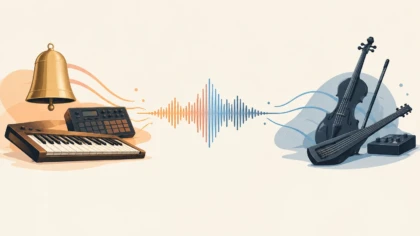
Trap vs Drill Presets: How Their Sounds Differ for Beats
Summary: Trap packs often lean on flexible melodies, rolling hi-hats, and weighty 808s; drill packs tend toward tense motifs, syncopated drums, and bass slides. The distinction is a starting point, not a strict rule: regional styles and hybrid sounds overlap. Compare the actual presets, drum material, and plugin requirements before choosing a pack for your beat.
Trap vs drill presets differ most in the role their sounds play: trap packs often offer broad melodic options and familiar rolling percussion, while drill packs commonly focus on colder motifs, more irregular drum accents, and sliding 808s. These are tendencies, not rules. For a drill-focused starting point, our preset packs worth buying for drill beats article looks at what to consider before choosing.
A genre label alone will not tell you whether a library fits your sound. A pack might include synth presets only, or combine them with one-shots, drum loops, MIDI, and effects. Check the actual contents, listen for how the bass and drums move together, and confirm that any synth presets work with instruments you own, such as Serum, Vital, Omnisphere, or Kontakt.
What separates the melodic center of trap and drill?
Trap is a broad production lane, so its melodic presets can range from bright plucks and bells to dark pads, vocal-like keys, and orchestral textures. The melody may carry much of the track’s identity, leaving space for the 808 and vocal. For a producer building several moods in FL Studio, Ableton, or Logic Pro, a varied melodic palette can be more useful than a pack built around one narrow tone.
Drill often uses sparse, tense motifs that leave room for the vocal and bass movement. Minor-key keys, bells, strings, and short, unsettling phrases are common choices, but the specific sound changes across scenes and substyles. A useful drill preset should work as part of a focused arrangement, not just sound dramatic when played alone. Splice’s genre overview describes drill as a darker, more brooding offshoot of trap, a helpful shorthand rather than a universal formula.
In practice, audition a preset with a simple drum loop and a vocal reference in mind. A wide, sustained pad may suit a melodic trap hook; a short, uneasy bell phrase may leave more space in a drill verse. For more genre-focused choices, browse our sound banks for trap producers.
Where do the drums and 808s change the feel?
In many trap beats, a steady half-time backbeat supports rapid hi-hat rolls, short fills, and a deep 808 line. Trap drum presets and one-shots therefore benefit from a range of kick weights, crisp snares or claps, and hats that remain clear when subdivided. The aim is not to use every roll in the pack; it is to shape movement around the vocal and main melody.
Drill drum programming often feels more unsettled. Kicks and hats can land off the strongest beats, while the 808 changes pitch with slides or glides that answer the rhythm. Look for a drill pack with bass sounds that remain clear as they move between notes, plus percussion that leaves room for those gestures. Trap and drill share 808s and fast hats, so a folder containing those sounds alone does not establish that a pack is truly tailored to either style.
The 2026 IMS Business Report’s Splice search table records 1.4 million searches for trap and 0.6 million for drill in 2025, as shown in the 2025 search figures. Those figures describe searches, not sound quality or a rule for making beats. Use them as context, then choose based on the groove and tones you actually need.
What does a preset pack actually contain?
“Preset pack” can mean different things. A Serum or Vital preset bank requires the named synth, while a sample pack of kicks, snares, and 808 audio can be loaded in a sampler. MIDI files provide note patterns that you can assign to your own instrument; they are not finished sounds. Check the format and plugin requirements before buying, especially if you want to move projects between systems or DAWs.
Some libraries bundle instruments, presets, MIDI, drumkits, and effects, which can support more than one subgenre. Our drill sound banks overview is a useful next step if you want to compare drill-focused sound collections. For producers who want both styles in one sound bank, Pendora VST V3.0 includes 275+ hand-crafted presets for trap and drill, alongside other genres, plus expansion packs, MIDI files, and mix presets. We have developed Pendora since 2020; Pendora VST V3.0 is a one-time purchase with royalty-free commercial use under its stated license terms.
How can you test genre fit before choosing?
Try the same short beatmaking test with each candidate pack. Pick a tempo and a four-bar chord or vocal reference, then audition a small selection of melodies, drum sounds, and 808s. For trap, check whether the hats and backbeat leave room for a rolling groove. For drill, test whether the bass glide and offbeat accents create tension without crowding the vocal.
Also listen for overlap instead of treating the genre names as fixed boundaries. Coverage of the 2026 Splice and MIDiA report describes R&B-influenced “sexy drill” as a fast-growing search niche, illustrating how drill-tagged sounds can include smoother melodic material too. Read the 2026 report coverage as a reminder that labels shift; judge each preset by its sound and how it serves the arrangement.
Use this quick check while auditioning: does the melody leave room for the vocal, does the 808 behave as the beat requires, and do the included files match your workflow? A pack that works for both styles can be useful when you make melodic trap, drill, R&B, pluggnb, or darker hybrids and want to explore a different sound when a beat stalls.
Choose by sound, not the label
Trap packs usually emphasize melodic range and rolling percussion, while drill packs often lean toward tense motifs, irregular accents, and sliding 808s. But the overlap is real, and pack contents vary. Audition the sounds in your own DAW, check plugin and file requirements, and choose the library whose trap and drill sound palette fits the beat you want to make.
Find sounds for trap and drill production
If you move between melodic trap, drill, and darker hybrid beats, a sound bank that covers both can make it easier to test different directions without switching libraries. Focus on the sounds and production assets you will actually use, and verify compatibility with your setup before choosing.
Pendora V3.0 includes 275+ hand-crafted presets for trap, drill, dark trap, phonk, boom bap, and pluggnb, plus three expansion packs, 100+ MIDI files, and seven mix presets. It is a one-time purchase with royalty-free commercial use under the stated license terms and lifetime updates. Explore Pendora preset packs for trap and drill to review the sound bank and its contents.
Frequently Asked Questions
Are trap and drill presets interchangeable?
Some are, especially melodic sounds, bells, pads, and basic 808s. The difference is often how the sound works with the drum groove, bass movement, and vocal space.
What should a drill preset pack include?
Check for tense melodic sounds, bass suited to pitch slides, and drums or percussion that can support syncopated patterns. Confirm whether the pack also includes MIDI or audio one-shots, since those serve different workflows.
Do trap presets require a specific synth?
Only when they are made for a specific instrument, such as Serum or Vital. Check the pack’s format and plugin requirements before purchasing.
Can I use a trap sound bank to make drill?
Yes, if its melodies, bass, and drums fit the arrangement you are building. Start with the 808 and groove, then choose presets that leave enough space for the vocal.
Is there a sound bank for both trap and drill?
Yes. Pendora VST V3.0 includes presets for both styles, along with sounds for several related genres.
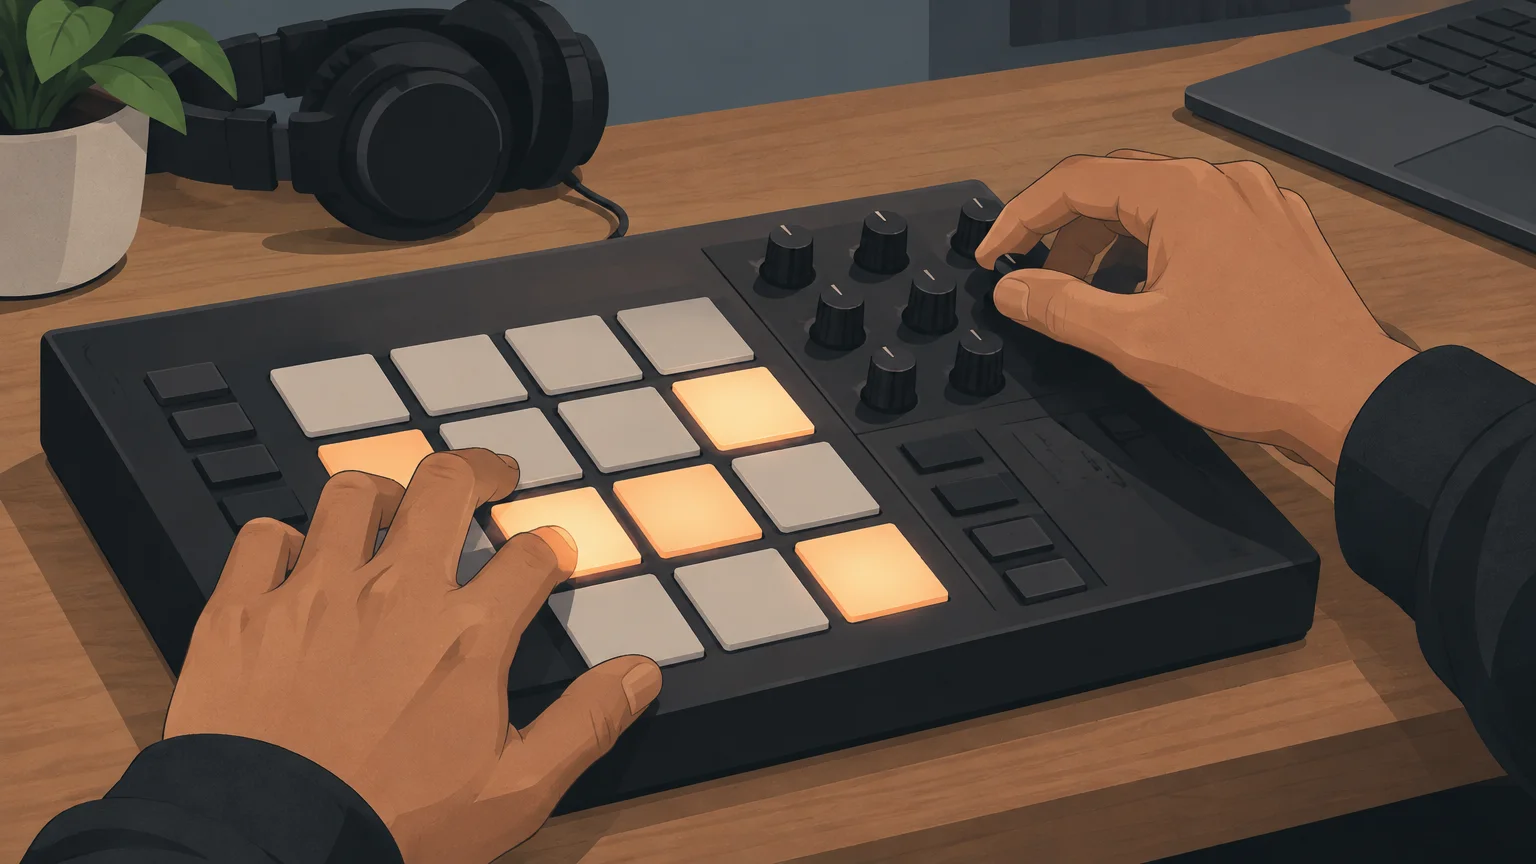
Akai MPK Mini vs Novation Launchkey Mini: Which One for Beatmakers
For most beatmakers, the Akai MPK Mini IV is the better buy: it costs $99, has real pitch and mod wheels for bending 808s and leads, and ships with about 1,000 instrument presets. The Novation Launchkey Mini 25 MK4 wins if you finger drum or build chord progressions on pads, because it gives you 16 pads instead of 8, a chord detector and up to 40 banks of chords, for roughly $110 to $130. If you produce only in FL Studio, look at the Novation FLkey Mini instead of either one.
Below is a spec-by-spec comparison built from the official Akai documentation and hands-on reviews from MusicRadar and KVR Audio, then a verdict for each type of producer.
- Akai MPK Mini IV vs Launchkey Mini MK4: comparison table
- What the Akai MPK Mini IV does better
- What the Launchkey Mini MK4 does better
- Which one works better with FL Studio?
- Which one should you choose?
- The controller makes no sound: what you play matters more
- FAQ
- Verdict
Akai MPK Mini IV vs Launchkey Mini MK4: comparison table
The Akai MPK Mini IV and the Novation Launchkey Mini 25 MK4 are both 25-key mini MIDI controllers powered over USB-C. The two real differences for a trap or drill producer are pads (8 vs 16) and pitch control (wheels vs touch strips). Everything else is close.
| Criterion | Akai MPK Mini IV | Novation Launchkey Mini 25 MK4 |
|---|---|---|
| Price (USD) | $99 list | About $110 to $130 at US retailers |
| Keys | 25 velocity-sensitive mini keys (3rd-gen keybed) | 25 synth-action mini keys |
| Pads | 8 RGB pads, velocity and pressure sensitive | 16 RGB velocity-sensitive pads |
| Knobs | 8 endless knobs | 8 touch-sensitive encoders |
| Pitch and mod | Physical pitch and mod wheels | Two touch strips |
| Screen | Full-color display | OLED display |
| Chord and scale tools | Chords mode, Scales mode, arpeggiator with Mutate | Chord mode (up to 40 banks), chord detector, 30 scales, arpeggiator with Mutate |
| MIDI out | Full-size 5-pin DIN | 3.5mm jack (TRS) |
| DAW scripts | Ableton Live, FL Studio (2024 and later), Logic Pro, Cubase, GarageBand | Ableton Live (deepest), Bitwig, FL Studio, Logic, Cubase, Reason |
| Bundled software | Studio Instrument Collection (about 1,000 presets), Ableton Live Lite 12 | Ableton Live 12 Lite, GForce and Klevgrand plugins, Orchestral Tools Parallel Orchestra, Melodics lessons |
| Weight | 0.99 kg | About 0.77 kg |
| Best for | Melodies, 808 bends, budget setups | Finger drumming, chords, Ableton or Bitwig users |
Sources, checked November 2026: the MusicRadar MPK Mini IV launch report ($99 list price), the official Akai MPK Mini IV FAQ, the MusicRadar Launchkey Mini MK4 review and the KVR Audio Launchkey MK4 review. Novation’s own store page was not reachable when we checked, so the Launchkey price comes from US retailer listings and moves often. KVR reported $139.99 at launch, MusicRadar $120. Check the current price before you buy.
What the Akai MPK Mini IV does better
The Akai MPK Mini IV is the better controller for playing melodies and bending notes, because it has physical pitch and mod wheels and costs less. It is the fourth generation of the MPK Mini, and Akai calls it the “most substantial redesign” in the series’ history.
Real wheels for 808 slides and lead bends
The MPK Mini IV replaced the old four-way joystick with real pitch and mod wheels. MusicRadar’s Matt McCracken called the wheels “much needed” in his MPK Mini IV review and noted that the pitch wheel springs back to center when you let go. That spring-back is exactly what you want when you bend a lead up a whole step and drop it back, or play an 808 slide by hand instead of drawing it in.
The Launchkey Mini MK4 uses touch strips instead. KVR’s reviewer found the strip “feels less useful as a mod wheel at times,” though you can reassign it in Novation’s Components app. If you program your glides in the piano roll (our guide on how to make 808 glides in FL Studio covers that method), this difference matters less.
A bigger instrument bundle for a first setup
Akai bundles the Studio Instrument Collection, about 1,000 presets from AIR, Akai and Moog, plus Ableton Live Lite 12. MusicRadar listed the sound collection as a pro. One catch from the official FAQ: the collection runs as VST3, AU or standalone, but there is no AAX version, so Pro Tools users cannot load it as a plugin. FL Studio, Ableton and Logic users are fine.
Novation’s bundle is smaller but well chosen: GForce Oberheim synths, Klevgrand plugins and the Orchestral Tools Parallel Orchestra bundle. If you want strings and brass for dark trap, the Novation bundle is the more interesting one.
Full-size MIDI out and pressure-sensitive pads
The MPK Mini IV has a full-size 5-pin DIN MIDI output, so it plugs straight into a hardware synth or drum machine with a standard cable. The Launchkey uses a 3.5mm jack, which needs an adapter for most older gear. The Akai pads are also pressure sensitive. MusicRadar called them “as playable as ever,” while noting they are slightly smaller than before.
Where the MPK Mini IV falls short
- 8 pads only. A full drum kit (kick, snare, clap, two hats, open hat, perc, 808 hit) fills all 8, so you switch banks for anything extra.
- The keys are mini. MusicRadar’s main complaint was that they “can feel pretty cramped.”
- At 0.99 kg, it is heavier than the Launchkey.
What the Launchkey Mini MK4 does better
The Launchkey Mini 25 MK4 is the better controller for finger drumming and chord work. It has twice as many pads and stronger chord tools, and it integrates more deeply with Ableton Live and Bitwig.
16 pads for drums and chops
Sixteen pads let you lay out a full trap kit plus a few one-shots or sample chops without changing banks. KVR described the pads as “solid, offering a satisfyingly tactile response” with very little flex when hit hard. If you play hi-hat rolls and drum patterns live instead of clicking them into the step sequencer, this is the single biggest reason to pick the Launchkey.
Chord mode and chord detector
The Launchkey’s chord features go further than Akai’s. MusicRadar’s review describes a Chord mode with “up to 40 banks of chords” on the pads, custom progressions you can save, a scale mode with 30 scales, and a chord detector that shows the name of whatever you play on the OLED. For a producer still learning which chords sound dark, the detector is a quiet teacher: play something that hits, read its name, remember it.
The arpeggiator also includes generative Mutate and exploration settings. MusicRadar’s reviewer even powered the unit from an iPhone over USB-C to play an iOS synth.
Deeper DAW control in Ableton and Bitwig
The Launchkey was designed around Ableton Live, with a step sequencer that writes clips in Session View. KVR called Bitwig’s native integration “one of the best native implementations we’ve come across.” Scripts are also provided for FL Studio, Logic, Cubase and Reason.
Where the Launchkey Mini MK4 falls short
- Touch strips instead of wheels, which feel less natural for pitch bends.
- MIDI out is a 3.5mm jack, not 5-pin DIN.
- No aftertouch on the keys. MusicTech’s review notes aftertouch is on the pads only.
- It usually costs $10 to $30 more than the MPK Mini IV.
Which one works better with FL Studio?
Both work with FL Studio, and neither is built only for it. Akai’s FAQ says the MPK Mini IV’s FL Studio script is officially compatible with FL Studio 2024 and later, installed through the inMusic Software Center. MusicRadar and KVR both confirm Novation provides an FL Studio script for the Launchkey Mini MK4, though its deepest integration is with Ableton Live and Bitwig.
For an FL Studio user, the practical difference is the pad count: 16 Launchkey pads line up with FL’s 16-step Channel Rack, while the MPK’s 8 pads cover half a bar at a time. If FL Studio is the only DAW you will ever use, Novation makes a separate controller built specifically for it, the FLkey Mini. We compare all three in our best MIDI controllers for beatmakers guide.
Which one should you choose?
Choose the Akai MPK Mini IV if:
- You mostly write melodies, bell lines and 808 patterns on keys.
- You bend notes by hand and want real wheels.
- Your budget stops at $99 and you want a large sound library in the box.
- You plan to connect hardware synths with a standard MIDI cable.
Choose the Novation Launchkey Mini 25 MK4 if:
- You finger drum and want 16 pads for a full kit or sample chops.
- You build chord progressions on pads or want the chord detector to learn chords.
- You use Ableton Live or Bitwig and want deep, script-level control.
- You carry your controller in a backpack and every gram counts.
Choose neither if: you work only in FL Studio (get the FLkey Mini), you play two-handed chords and need full-size keys (look at a 49-key board), or you only want pads for drums and chops (a pad-only controller, also covered in our MIDI controller guide).
The controller makes no sound: what you play matters more
A MIDI controller only sends notes. The sound comes from the plugins in your DAW, so a $99 controller and a $130 controller playing the same preset sound identical. Both bundles give you a starting library, but bundled presets are the same ones every other owner of that controller has, which is part of why so many beats end up sounding alike.
If you want bells, plucks, pads and dark 808s designed specifically for trap, drill, phonk and pluggnb, Pendora V3 is our sound bank: 275+ presets, Mac and Windows, one-time payment of €149, rated 4.71/5 across 59 verified buyer reviews. To test the sound first, Pendora Lite has 30 presets for €29. To be clear about the order: if you have no controller and only $100, buy the controller first and use the bundled sounds until you know what you are missing.
FAQ
Is the Akai MPK Mini IV better than the Launchkey Mini MK4?
The Akai MPK Mini IV is better for melodies and pitch bends because of its physical wheels and lower $99 price. The Launchkey Mini MK4 is better for finger drumming and chords because it has 16 pads and a chord detector. Neither one is better at everything.
Does the Launchkey Mini MK4 have pitch and mod wheels?
No. The Launchkey Mini 25 and 37 MK4 use two touch strips for pitch and modulation, which KVR describes as ribbon controls “in lieu of the traditional pitch and mod wheels.” You can reassign the mod strip in Novation’s Components app.
Can I use either controller without a computer?
Both have a MIDI output, so both can play a hardware synth directly, and MusicRadar found the Launchkey’s arpeggiator useful with hardware instruments. Both need USB power from a computer, a USB-C wall adapter or a compatible device. The MPK Mini IV’s 5-pin DIN output connects to more older gear without an adapter.
Is the MPK Mini IV worth upgrading to from the MK3?
According to Akai’s FAQ, the IV adds real wheels, transport controls, a color display, a more advanced arpeggiator, scale and chord modes, USB-C, a MIDI output, RGB pads and dedicated DAW maps. If the MK3 joystick bothers you or you need MIDI out, yes. If you mostly click notes in with a mouse, keep the MK3.
Which one is better for trap and drill beats?
For trap and drill melodies and 808 slides, the MPK Mini IV. For producers who play their drum patterns live, the Launchkey Mini MK4. Browse the Tiger-Sounds shop for drum kits that load into either controller’s pads.
Verdict
Buy the Akai MPK Mini IV if you want the most controller for $99: real wheels, a full-size MIDI out and around 1,000 bundled presets. Buy the Novation Launchkey Mini 25 MK4 if you play drums and chords on pads, or if you live in Ableton or Bitwig, and accept touch strips and a slightly higher price. Then put your effort into the sounds, because that is what listeners hear. If your bundled presets start to sound like everyone else’s, Pendora is built for exactly the genres you are making.
Best VST for Trap Melodies: 5 Picks for Beatmaking
Summary: Pendora VST V3.0 is the top pick for trap producers who want a genre-focused sound bank and production assets in one instrument. Serum and Vital suit hands-on wavetable sound design, Omnisphere offers a broad instrument palette, and Kontakt is built around sampled instruments. Choose according to whether you want curated presets, deep synthesis, or a sampler workflow.
A trap melody often starts with a sound choice: a hollow bell, a soft pad, or a pluck that leaves room for the 808 and vocal. For preset-first beatmaking, the best VST for trap melodies is Pendora VST V3.0, our first pick for its lane-focused sound bank; our best VST plugins for trap overview covers the wider production chain too.
A preset bank is not interchangeable with a synthesizer or sampler. Serum and Vital reward patch design, Omnisphere offers a broad palette, and Kontakt centers on sampled instruments. Berklee’s production handbook treats instrument choice as part of arrangement, so decide whether the melody should sit beside drums and vocals or carry the track before comparing plug-ins. Then check DAW compatibility and how quickly each instrument gets you to a usable sound.
Which trap melody VST should you choose?
For a quick start with sounds selected for trap and related styles, Pendora VST V3.0 is the clearest fit. The other picks suit different needs: Serum and Vital offer hands-on synthesis, Omnisphere covers a broad range of sounds, and Kontakt provides a platform for sample-based instruments.
| Rank | Instrument | Melody workflow | Included material | Price | Plugin support |
|---|---|---|---|---|---|
| 1 | Pendora VST V3.0 | Choose curated sounds for trap and related styles | 275+ presets, expansions, MIDI and mix presets | Separate full-edition listings show €149 and $147; check checkout | VST3 on Windows and macOS; AU on macOS |
| 2 | Xfer Serum 2 | Build and shape synth patches | 626 presets and 288 wavetables | $249 | VST3, AU and AAX on Windows and macOS |
| 3 | Spectrasonics Omnisphere 3 | Browse a broad instrument and synth palette | Thousands of sounds across 18 libraries | $499 full download | VST, AU and AAX |
| 4 | Native Instruments Kontakt 8 | Play and edit sample-based instruments | 900+ factory instruments | $299 for full Kontakt 8 | VST3 and AAX on Windows; VST3, AU and AAX on macOS |
| 5 | Vital | Design wavetable sounds with visual modulation | Wavetable synthesis and spectral warping | Basic edition listed as free | VST, VST3, AU and LV2 on Windows, macOS and Ubuntu |
Choose by sound-design workflow, not preset count
Ask what you want to do after loading the instrument. A curated sound bank gets you to a starting tone quickly; a synthesizer gives you more control over how that tone is built; a sampler’s character depends on the instruments and libraries you load. That distinction matters when the beat is already taking shape and you need a melody sound that complements the kick, snare and vocal space.
Try a short test in your own session: play the same four-bar motif through a bell, pluck and pad. Check whether you can make each sound sit in the arrangement without piling on effects. Ableton’s instrument reference explains how MIDI can modulate synth parameters, a useful reminder that a patch can change with note velocity or a controller rather than remaining static. For more genre-specific instrument options, see our best VSTs for trap.
1. Pendora VST V3.0
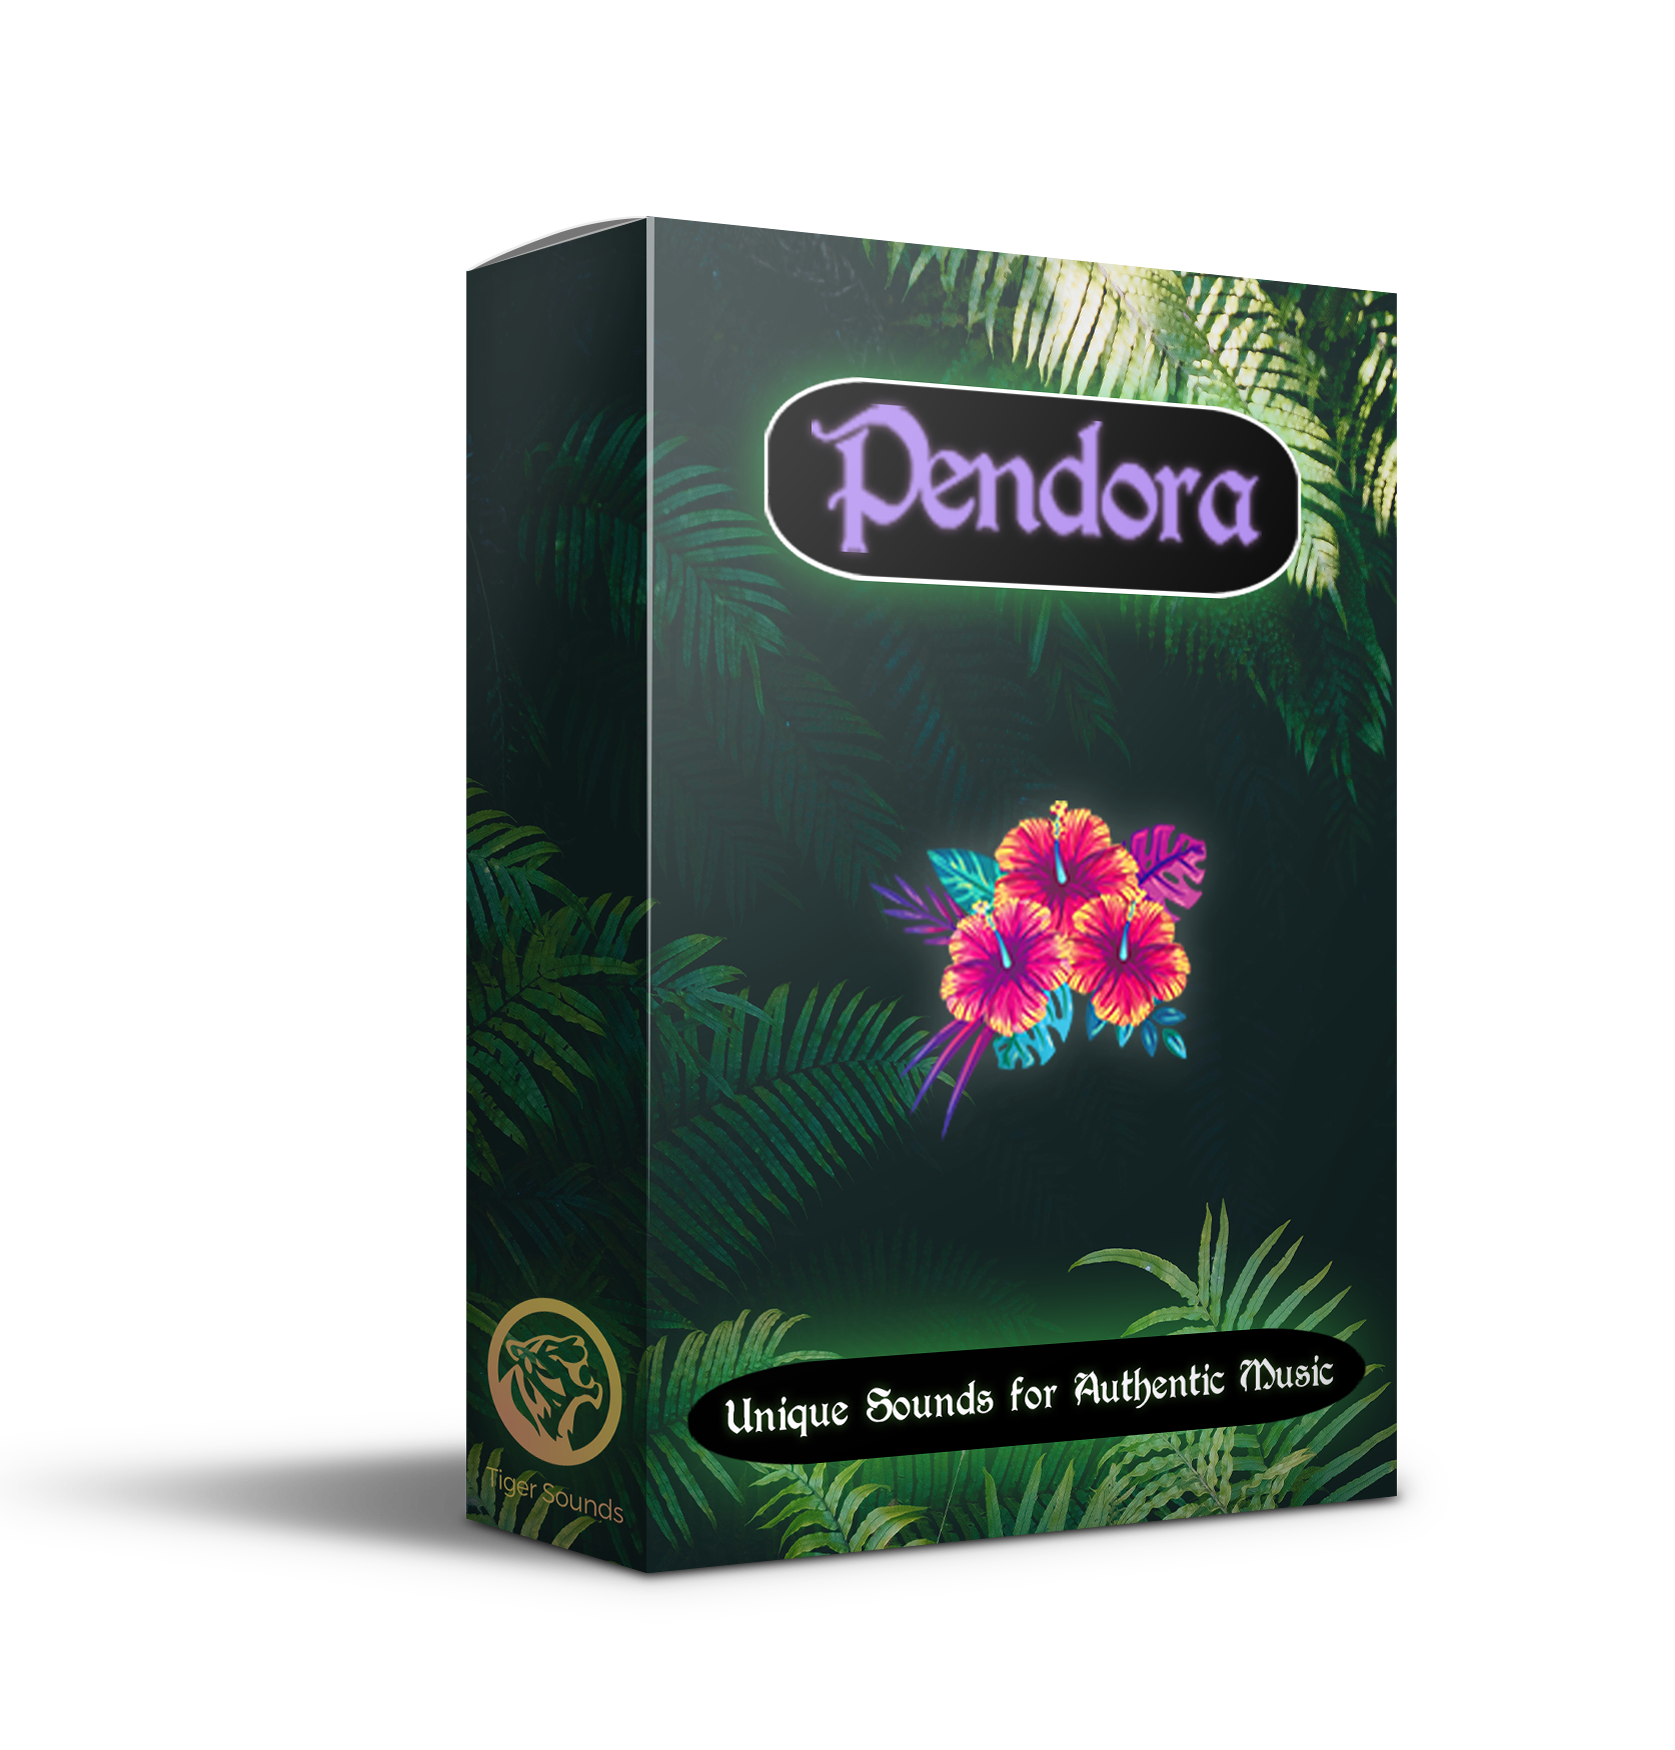
Best for: Trap producers who want curated, genre-focused presets and related beatmaking assets in one instrument.
We built Pendora as a trap-melody sound bank rather than a blank-canvas wavetable synth. The full edition includes 275+ hand-crafted presets across 30+ sound categories, with sounds for trap, drill, dark trap, phonk, boom bap and pluggnb. The Pendora VST V3.0 package also includes three expansion packs, 100+ MIDI files and seven mix presets. That combination is useful when you want a bell, pluck, pad or orchestral texture ready to audition against a drum pattern without first designing every oscillator from scratch.
The full-edition product page displays a 4.71/5 rating from 59 verified-buyer reviews. Tiger-Sounds has sold Pendora since 2020, and the product’s stated commercial terms allow royalty-free use in beats you sell, place or license. Those terms exclude account sharing and redistribution. The full edition is a one-time purchase, with VST3 support on Windows and macOS and AU support on macOS. Stated system support is macOS 11 Big Sur or later and Windows 10 or 11, 64-bit only; FL Studio, Ableton Live, Logic Pro, Cubase, Pro Tools and Reason are among the tested DAWs.
Pros:
- Genre-focused presets and production assets provide a direct route to melodic ideas for trap and related styles.
- Its sound bank, expansions, MIDI and mix presets support more than preset browsing alone.
- Royalty-free commercial use is included within the stated product license terms.
Cons:
- It is a preset-led instrument, not the best fit when your main goal is building every sound from wavetable oscillators and modulation.
- The full-edition price is not consistent across the available listings: one shows €149 and another shows $147, so confirm the checkout total.
For a smaller evaluation option, Pendora VST Lite has 30 hand-crafted presets for trap and drill, plus bonus kits and a MIDI pack. It is a separate entry edition, not the full preset collection.
2. Xfer Serum 2
Best for: Producers who want detailed control over synth timbre and enjoy sound design as part of beatmaking.
Serum 2 suits producers who want to shape a lead or bell from the oscillator stage onward. Its official product information lists wavetable, sample, multisample, granular and spectral oscillator types, along with 626 presets and 288 wavetables. The current listed price is $249, and the plug-in supports VST3, AU and AAX on 64-bit hosts. A MusicRadar review of Serum 2 also discusses its expanded modulation, filters and sequencing tools, which suit producers who want to change how a patch moves over time.
In a trap session, Serum makes sense when you have a clear target, such as a short, bright lead with a controlled filter sweep, and want to make or edit that patch yourself. Its breadth is a strength, but you still need to select or build sounds that fit your preferred lane and organize any separate MIDI or kit resources you use.
Pros:
- Multiple oscillator types and modulation options support detailed, hands-on sound design.
- Presets and wavetables provide starting material as well as room for custom patches.
- Its VST3 and AU formats fit common Windows and macOS beatmaking setups.
Cons:
- It is a more involved choice than a focused preset bank when you want to audition genre-specific sounds quickly.
- The $249 price is a larger initial outlay than starting with a smaller sound-bank edition.
3. Spectrasonics Omnisphere 3
Best for: Producers who want one broad instrument palette for trap melodies and other styles.
Omnisphere 3 combines a large sound collection with synthesis and patch-shaping tools. Spectrasonics lists thousands of sounds across 18 libraries, adaptive global controls for editing a patch, and patch mutations for generating variations. The full download is listed at $499, with VST, AU and AAX plug-in formats. This breadth can be useful when a track calls for a sound outside a narrow trap palette, or when you want to audition atmospheric, acoustic-inspired and synthetic textures in the same instrument.
Its wide scope is the trade-off. For a beatmaker whose immediate need is a curated set of trap and drill sounds, a broad library can mean more browsing before a specific tone emerges. Spectrasonics also says there is no demo version, so check the official requirements and available compatibility information before purchasing.
Pros:
- A large sound collection supports a range of melody and texture ideas.
- Patch controls and mutation tools provide ways to adjust or vary existing sounds.
- VST, AU and AAX formats support use across major DAWs.
Cons:
- The $499 full-download price is a substantial purchase if you only need a compact trap-focused sound palette.
- There is no demo version to audition before purchase.
4. Native Instruments Kontakt 8
Best for: Producers who want to build melodies from sampled instruments and libraries.
Kontakt 8 is a sampler platform, so its character comes from the instruments and samples it hosts rather than from one unified trap preset palette. Native Instruments lists more than 900 factory instruments, with material spanning synths, acoustic instruments and other categories. The full Kontakt 8 is listed at $299. On Windows it supports VST3 and AAX; on macOS it supports VST3, AU and AAX. The library approach suits producers looking for sampled keys, strings or other source material to shape into a melodic part.
Keep the distinction between the sampler and its libraries in mind. Kontakt itself is not a single genre-specific collection, and the sounds you can use depend on the instruments available in your setup. That makes it a different choice from a focused sound bank: choose it when sample-based instruments and library variety are central to your workflow.
Pros:
- Its sampler design supports a wide range of sampled instruments and library workflows.
- The factory collection offers many starting points without requiring a separate library to begin exploring.
- VST3 and AU support covers common Windows and macOS sessions.
Cons:
- The result depends on which instruments and libraries you choose, rather than one consistent trap-focused preset selection.
- The full version costs $299, so it is a larger commitment if your main need is a small set of melodic sounds.
5. Vital
Best for: Producers who want to design wavetable sounds and keep the initial software cost low.
Vital is a spectral-warping wavetable synth with visual modulation controls. Its developer describes tools for editing wavetables, converting samples into wavetables, and shaping harmonics to create different timbres. The Basic edition is listed as free, and the supported formats include VST, VST3, AU and LV2. It runs on Windows, macOS and Ubuntu Linux. That makes it an accessible route into wavetable sound design for producers willing to shape leads and plucks themselves.
The workflow is synthesis-first rather than a pre-curated trap sound bank. You can start with a basic waveform, build movement with modulation and adjust the sound to sit in your arrangement, but that takes more patch work than selecting a ready-made genre preset. Choose Vital when that hands-on process is part of the appeal, not when speed of preset selection is your main criterion.
Pros:
- The Basic edition is listed as free, so you can explore the synth workflow without an initial purchase.
- Wavetable editing and spectral warping give you tools for making custom timbres.
- Its listed plug-in formats cover Windows, macOS and Linux hosts.
Cons:
- Its synthesis-focused workflow requires you to build or find the sounds that fit your trap style.
- It does not function as a single curated trap preset and production-asset bundle.
How to turn a VST sound into a usable trap melody
Start with the musical idea, not the preset browser. Write a short motif in the piano roll, then audition it with a simple bell, pluck and pad. Keep the melody in a register that leaves space for the 808 and vocal, and listen to the pattern with the drums playing rather than in isolation. A sound that feels impressive on its own may mask the snare or crowd the vocal once the full beat is running.
Next, make one deliberate change at a time. Shorten the release if the notes blur together, adjust the filter if the sound is too bright, or add gentle movement with velocity or modulation. This makes it easier to identify which change improves the arrangement. If the preset still does not fit after a few focused edits, switch sounds rather than stacking effects to rescue it. Our top trap VST plugins overview covers other instrument and production choices for a complete beatmaking setup.
Final thoughts
The right trap melody VST depends on how you prefer to work. Choose Pendora VST V3.0 for a focused preset-led starting point and related production assets; choose Serum or Vital when patch design is part of the process, Omnisphere for a broader palette, or Kontakt for sample-based instruments. Before buying, check the current price, supported plug-in format and operating system, then test a few sounds against the drums and vocal space in your own session.
Find your next trap melody sound
Preset hunting can interrupt a session when the chords and rhythm are ready but the lead sound is not. Our Pendora sound bank is organized around trap and related styles, with hand-crafted presets spanning bells, plucks, pads, orchestral textures and other sounds for melodic beatmaking.
The full edition includes 275+ presets across 30+ sound categories, plus three expansion packs, 100+ MIDI files and seven mix presets. It is a one-time purchase with royalty-free commercial use under the stated product license terms and lifetime updates. Check the operating system and plug-in format requirements for your DAW before choosing an edition. Pendora sounds for trap melodies can give you a curated place to start shaping your next beat.
Frequently Asked Questions
Is a preset instrument enough for trap melodies?
Yes, if the presets give you sounds that fit the role of the melody in your beat. A synth offers more direct control over how you build and shape each sound.
How is Pendora different from Serum?
Pendora is a preset-led sound bank focused on trap and related styles, while Serum is a synthesizer for hands-on sound design. Choose according to whether you prefer curated sounds or building patches from synth controls.
Does Kontakt work for trap melodies?
Kontakt can suit melodies built from sampled instruments and libraries. The instruments you have available determine the sounds and workflow.
What should I check before buying a VST?
Confirm that its plug-in format and operating system are supported by your DAW and computer. Also compare its sound-design workflow with how you prefer to make melodies.
Can I use Pendora sounds in beats I sell?
Pendora’s stated product terms allow royalty-free use in beats you sell, place or license. Account sharing and redistribution are excluded.
Best Microphones for Recording Rap Vocals on a Budget
The best budget microphone for recording rap vocals at home is a dynamic mic like the Shure SM58 ($99), because it rejects the untreated bedroom most rappers record in. If your room is quiet and treated, a condenser like the Audio-Technica AT2020 ($99) or the RØDE NT1 5th Generation ($249) captures more detail, and the Shure SM7B ($399) is the step-up pick once your interface has enough gain to drive it.
This guide ranks seven mics by how they handle a loud, close, punchy voice in a room never built for recording. Prices are list prices from the linked reviews and official pages; street prices move.
Contents
- Quick picks and comparison table
- Dynamic vs condenser for rap vocals
- The 7 best mics for rap vocals on a budget
- The gain problem nobody warns you about
- How to choose based on your room and budget
- FAQ
- Verdict
What are the best budget mics for rap vocals?
The best budget mics for rap vocals are the Shure SM58 for untreated rooms, the Audio-Technica AT2020 for cheap condenser detail, the Samson Q2U for USB-only setups, the RØDE NT1 5th Generation for quiet rooms, and the Shure SM7B for the classic rap studio sound.
| Mic | Type | Connection | List price | Best for |
|---|---|---|---|---|
| Samson Q2U | Dynamic | USB-C + XLR | about $60 to $70 | No interface yet |
| Shure SM58 | Dynamic | XLR | $99 | Untreated bedrooms |
| Audio-Technica AT2020 | Condenser | XLR (phantom power) | $99 | Cheap detail in a quiet room |
| RØDE NT1 5th Gen | Condenser | XLR + USB-C (32-bit float) | $249 | Treated rooms, clip-proof takes |
| Shure MV7+ | Dynamic | USB-C + XLR | $279 | Plug-and-play with room for growth |
| Shure SM7B | Dynamic | XLR (needs high gain) | $399 | The classic rap studio sound |
| Electro-Voice RE20 | Dynamic | XLR | Not fixed, varies by retailer | Aggressive male rap vocals |
Dynamic or condenser: which is better for rap vocals?
A dynamic microphone is usually better for rap vocals recorded in an untreated room, because it is less sensitive and picks up less of the room’s echo, computer fans and street noise. A condenser microphone captures more detail and air, but it also captures every reflection off your bare walls.
A dynamic mic is a microphone that generates signal from a moving coil, with no external power needed. A condenser mic is a microphone that uses a charged capsule and needs 48V phantom power from your interface.
The best real-world evidence comes from Sound on Sound’s vocal mic shootout (Matt Houghton, July 2010). Fourteen mics, from a Shure Beta 58A to a Neumann U47, were tested on different voices, including a male rapper. The Electro-Voice RE20, a dynamic, won the rap test “by a country mile.” The Beta 58A was praised for handling the transients, the SM7 for clearer diction, and the AT2020 condenser “wasn’t particularly good” on that voice. The article’s conclusion for rap and rock: if you want attitude, “dynamic mics are well worth auditioning.”
That does not mean condensers are wrong for rap. Plenty of melodic rap and trap vocals are cut on condensers. It means a condenser only pays off when the room is quiet and dead enough to let it.
The 7 best mics for rap vocals on a budget
1. Samson Q2U: best if you have no interface yet
The Samson Q2U is a handheld dynamic mic with both USB-C and XLR outputs, so you can plug it straight into a laptop today and move it to an interface later. Samson’s product page lists a cardioid pattern, a 3.5mm headphone output with level control, and includes a mic clip, tripod stand, windscreen, USB cable and XLR cable in the box. It usually sells for about $60 to $70 at major US retailers.
Strength: the cheapest way into a dynamic mic with zero extra gear. Weakness: user reviews repeatedly flag the USB and headphone jacks as the weak points on durability, and it is sensitive to plosives, so add a pop filter. Choose it if your budget is under $100 total and you do not own an interface.
2. Shure SM58: best for untreated bedrooms
The Shure SM58 is a $99 cardioid dynamic vocal mic, and it is still the safest first XLR mic for rap. Shure’s official page lists a 50 Hz to 15 kHz frequency response “tailored for vocals, with brightened midrange and bass rolloff,” plus a built-in spherical filter for breath pops. MusicRadar’s review lists it at $99 and calls it “still the first name on the team sheet” for many vocalists.
Strength: it ignores the room, it is nearly indestructible, and it works with any entry-level interface. Weakness: the top end is rolled off, so the vocal sounds less airy than a condenser. You will add some high-shelf EQ in the mix. Choose it if you record in a bedroom with bare walls and want a mic that will still work in ten years.
3. Audio-Technica AT2020: best cheap condenser
The Audio-Technica AT2020 is a $99 cardioid condenser that needs phantom power. Sound on Sound’s review (Paul White, 2006) measured its self-noise at 20dB, “just slightly on the high side of average,” with a max SPL of 144dB, and described “a very mature, believable sound” with a presence peak that adds clarity without much harshness. The same review notes the noise “isn’t an issue when close-miking voices.”
Strength: a real condenser sound for the price of an SM58. Weakness: it hears your room, and in the Sound on Sound shootout it was not a strong match for an aggressive male rap voice. Choose it if your vocals are more melodic, your room is quiet, and you can hang a blanket or two behind the vocalist.
4. RØDE NT1 5th Generation: best condenser for treated rooms
The RØDE NT1 5th Generation is a large-diaphragm condenser with both XLR and USB-C outputs, listed at $249 by TechRadar. RØDE’s official page lists 4 dBA self-noise and calls it “the world’s quietest studio condenser microphone,” with a 32-bit float digital output over USB that RØDE markets as practically unclippable. Shock mount, pop filter, XLR and USB-C cables are included.
Strength: extremely low noise, and the 32-bit float USB mode saves takes when a rapper suddenly gets loud on the hook. Weakness: it is very sensitive, so an untreated room will show up on every take. There is no physical gain knob; level is set in software. Choose it if you have a treated vocal corner and want one mic that covers rap, singing and instruments.
5. Shure MV7+: best plug-and-play dynamic
The Shure MV7+ is a dynamic mic with USB-C and XLR outputs, listed at $279 by Tom’s Guide. Over USB you get Shure’s software processing through the MOTIV app, and over XLR it behaves like a regular dynamic mic going into your interface.
Strength: dynamic-mic room rejection with USB convenience, so it grows with your setup. Weakness: it is priced against mics that do one job better, the USB sound out of the box is described as a bit flat by reviewers, and it needs a lot of gain over XLR. Choose it if you record on a laptop without an interface now but plan to buy one later.
6. Shure SM7B: best for the classic rap studio sound
The Shure SM7B is a $399 cardioid dynamic mic, and the dynamic mic most rap and podcast setups get compared against. Shure’s official page highlights its built-in pop filter, internal air-suspension shock isolation, shielding against hum from computer monitors, and bass rolloff and presence boost switches. MusicRadar’s review lists it at $399 and says few dynamic mics under $500 come close to it on vocals, with one caveat: it needs a good interface or preamp.
Strength: smooth, thick, close-up vocal sound that sits well on dark trap and drill beats, and it rejects the room as well as an SM58. Weakness: it is a low-output mic, so cheap interfaces struggle to drive it (see the gain section below). At $399 it is not a first mic for most beatmakers. Choose it if you already own a high-gain interface or are ready to budget for an inline booster.
7. Electro-Voice RE20: the shootout winner for rap
The Electro-Voice RE20 is a large dynamic broadcast mic that won Sound on Sound’s male rap vocal test outright. Its Variable-D design keeps the bass boost from close-up singing (proximity effect) under control, and it has an internal pop filter. New pricing varies by retailer; Reverb’s price guide shows most listings between $300 and $500, which makes a used RE20 a smart hunt.
Strength: aggressive, clear rap vocals with little sibilance. Weakness: some owners find the top end dull, it is large and heavy, and like the SM7B it wants a strong preamp. Choose it if you record mostly hard male rap vocals and can find a good used deal.
Why does the Shure SM7B need so much gain?
The Shure SM7B needs a lot of gain because its output is very low: its listed sensitivity is -59 dBV/Pa, and Shure’s own user guide advises using an inline boost amplifier or a stronger preamp if your preamp does not offer more than 60 dB of gain.
Gain is the amount an interface can boost a quiet mic signal before it hits your DAW. Condensers are loud and need little gain. Dynamics, especially the SM7B, RE20 and MV7+ over XLR, need a lot. Inline boosters like the Cloudlifter add roughly 20 to 25 dB of clean gain using your interface’s phantom power. Shure also sells the SM7dB, a version with a built-in preamp of up to +28 dB.
Before you buy a high-end dynamic, check your interface’s maximum gain. We compared real gain figures, like 69dB on the Scarlett 2i2 4th Gen and 64dB on the SSL 2 MKII, in our guide to the best audio interfaces for beatmakers. The SM58 and AT2020 run fine on almost any interface.
How do you choose a rap vocal mic for your room and budget?
Choose based on your room first, your budget second and the mic’s reputation last. A $99 dynamic in a bare bedroom will beat a $249 condenser in the same room almost every time, because the condenser records the room along with the voice.
- Bare walls, under $100: Shure SM58 into any interface.
- No interface, under $100: Samson Q2U over USB.
- Quiet closet or treated corner, under $100: Audio-Technica AT2020.
- Treated room, $250: RØDE NT1 5th Generation.
- Laptop only now, interface later: Shure MV7+.
- Serious setup with a high-gain interface: Shure SM7B or a used RE20.
Spending part of the budget on the room is often the better upgrade. Thick blankets, a closet full of clothes or a couple of foam panels behind the vocalist do more for a condenser than a pricier capsule. Once the take is clean, the mix does the rest: our step-by-step guide on how to mix rap vocals in FL Studio covers EQ, compression and de-essing with stock plugins only.
FAQ
Is a Shure SM58 good enough for recording rap vocals?
Yes. The Shure SM58 is good enough for released rap vocals, especially in an untreated room. It rolls off highs and some lows, so expect to brighten it slightly with EQ in the mix. Sound on Sound’s shootout found its sibling, the Beta 58A, handled rap transients well.
Can you record professional rap vocals with a USB mic?
Yes, if the mic and the room are good. USB mics like the Samson Q2U, Shure MV7+ and RØDE NT1 5th Gen (in USB mode) have built-in converters. The trade-off is less flexibility: you cannot swap the preamp, and recording two mics at once gets complicated.
Do I need a Cloudlifter for the SM7B?
You need a Cloudlifter or similar booster for the SM7B only if your interface cannot supply about 60 dB of clean gain, which is the threshold Shure gives in its user guide. If your interface has 65 dB or more, a booster is usually unnecessary.
Is a condenser mic bad for a bedroom studio?
A condenser mic is not bad for a bedroom studio, but it is less forgiving. It picks up room reflections and background noise that a dynamic mic ignores. Recording close to the mic and adding soft surfaces behind the vocalist fixes most of the problem.
Verdict: which mic should you buy?
For most beatmakers recording rappers at home, the Shure SM58 at $99 is the right first mic: it forgives the room, works with any interface and lasts forever. Pick the AT2020 if your vocals are melodic and your room is quiet, the RØDE NT1 5th Gen if your room is treated, and the SM7B only once your interface can drive it.
A clean vocal still needs a beat that hits. If your instrumentals feel thin next to a well-recorded vocal, Pendora VST gives you 275+ dark bells, pads, plucks, orchestras and 808s built for trap, drill, phonk and pluggnb, rated 4.71/5 from 59 verified buyer reviews, one payment, no subscription. Want to try the sound first? Pendora Lite is 30 presets for 29€, and the full catalog of kits is in the shop.
Can a Good Sound Bank for Music Production Improve Tracks?
Summary: Yes, a well-matched sound bank for music production can broaden your sound palette and give you a more useful starting point. It will not replace arrangement, performance, sound shaping, or mixing. Choose presets that suit your genre, work with your instrument and DAW, and help you finish ideas rather than keep browsing.
A new preset cannot write the hook, fix a crowded arrangement, or make a weak drum pattern hit. It can change the material you start with, steering a beat toward a different mood or texture. If you are comparing libraries, our best sound banks overview gives you a starting point for judging genre fit and usable content.
The practical question is not whether a large preset count looks impressive. It is whether the library gives you sounds that fit your idea, gets you to a useful starting point sooner, and leaves room to edit. A sound bank for music production changes the instruments available in your DAW; your notes, arrangement, processing, and mix determine how those sounds work in the finished track.
What can one sound bank actually improve?
A sound bank can change the sound palette available in a session. A pluck with a sharp attack suggests a different rhythmic pattern from a soft pad; a dark 808 can influence how much space you leave for the kick. Those starting sounds affect your choices as you write, even though the bank does not make those choices for you.
It can also give a project a more consistent character. If the presets share a useful range of tones and textures, it may take less processing to make your lead, counter melody, and background layer feel like they belong together. That is a starting advantage, not a substitute for listening in context: a patch that sounds impressive on its own may crowd the vocal or compete with another part once the beat is playing.
When does a sound bank help beatmaking flow?
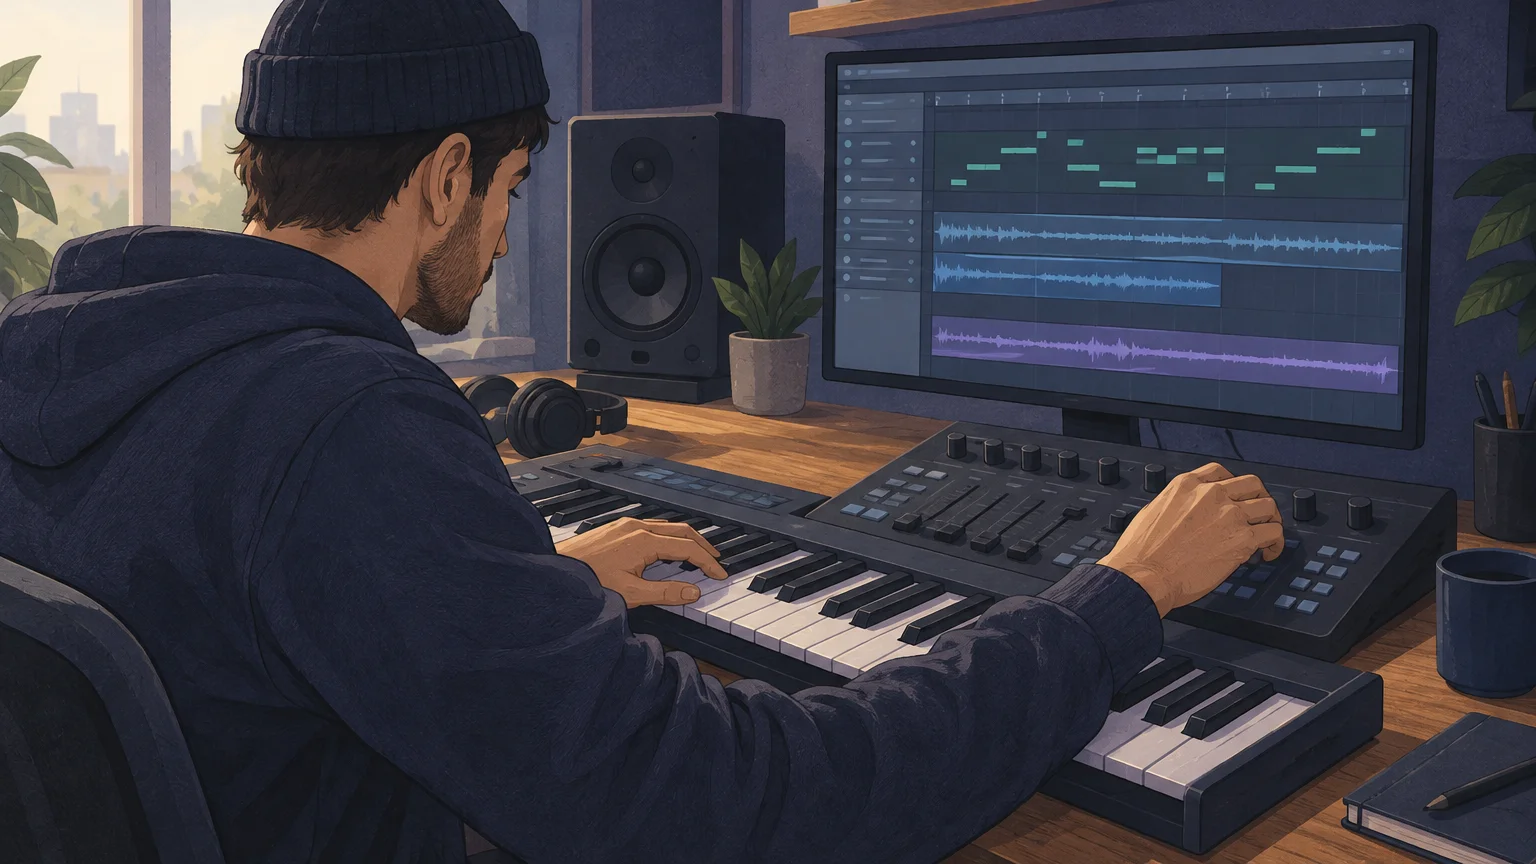
Picture a session where the melody is taking shape but the default synth patch feels too clean for the beat. A focused library lets you audition sounds with the right mood, then move quickly to playing notes, shaping the envelope, and testing the part against the drums. Our article on how sound banks save time when making beats looks at that workflow in more detail.
The time benefit comes from preset selection, not from having endless options. Set a brief before browsing, such as “short bell lead, minor mood, space for the vocal,” and stop when a sound serves that role. If you cycle through hundreds of loosely organized presets, the library can become another search task instead of helping you make a decision.
A 2024 exploratory study of creativity in digital music production describes presets as a useful way to get started while noting that relying on them too heavily can constrain creative choices, as discussed in the 2024 study. In practice, treat a preset as a draft: adjust the filter, envelope, effects, velocity, or MIDI phrase until the part fits your track.
What can’t presets fix once the arrangement takes shape?
A preset does not repair weak arrangement choices, competing parts, or an unbalanced mix. If the lead and vocal fight for the same space, changing the lead preset might help, but you could also need to change its register, rhythm, level, or role. Likewise, choosing a polished sound does not automatically control clipping, phase issues, or excessive low end.
A 2024 paper presented at the Audio Engineering Society analyzed 218,109 user-submitted mixes and masters across measures including loudness, mono compatibility, clipping, phase, compression, and tonal profile. That analysis concerns finished audio rather than preset choice, but it illustrates why sound selection is only one part of release quality; see the 2024 AES paper. Listen to the full beat and make decisions in context, rather than judging a patch only in solo.
How should you choose a sound bank for your setup?
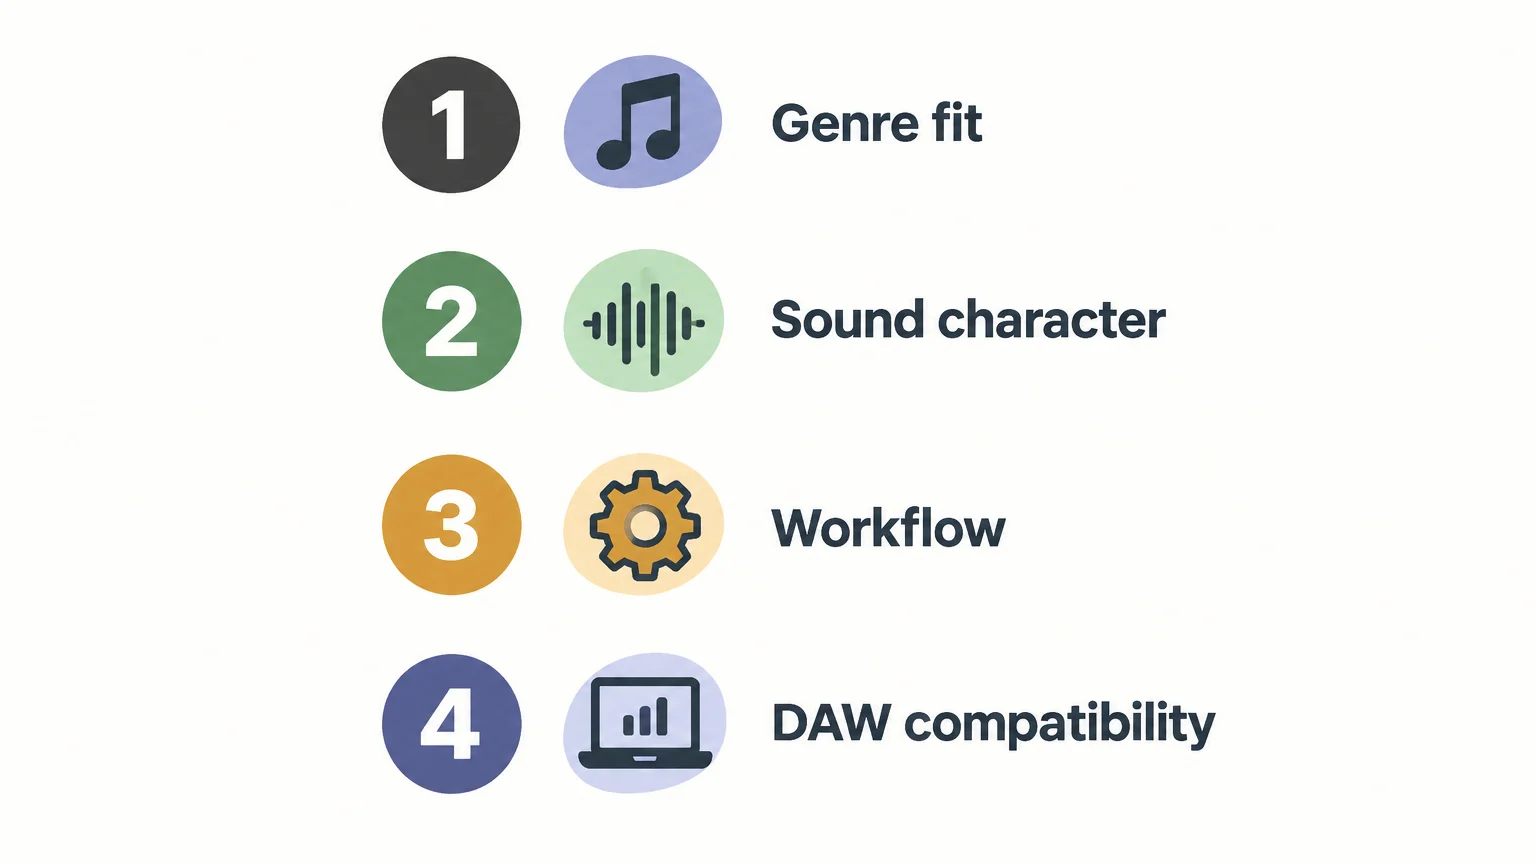
Start with the sound you need, then check whether the bank fits your instrument and production setup. These criteria help distinguish a focused collection you will use from a large one that looks good on paper:
- Genre fit: Check whether the presets suit the styles you make, such as melodic trap, drill, R&B, pluggnb, dark trap, lo-fi, or phonk.
- Sound character: Listen to previews for tone and variation. A useful library should give you options that fit your production, not just a high preset count.
- Instrument fit: Confirm whether you are buying presets for a synth you already own, such as Serum or Vital, or a plugin instrument with its own bank. A Kontakt library, a preset pack, and a standalone instrument are not interchangeable formats.
- DAW compatibility: Check the required plugin format and operating system for your version of FL Studio, Ableton Live, or Logic Pro before buying.
- Licensing: Read the terms for commercial releases, account sharing, and redistribution rather than assuming every library has the same rules.
Preset packs are most useful when they give you a clear place to begin and remain editable. Our article on how preset packs help with beatmaking covers ways to turn a preset into a part of your own arrangement. A 2025 interview with Barry Can’t Swim also discusses using and adapting synth presets rather than building every sound from scratch; read the 2025 interview.
What does a genre-focused bank look like in practice?
For producers working in trap, drill, dark trap, phonk, boom bap, or pluggnb, Pendora VST V3.0 includes 275+ hand-crafted presets, three expansion packs, 100+ MIDI files, and seven mix presets. Tiger-Sounds has sold Pendora since 2020 and, on its product page in 2026, reports use by more than 500 producers. Those company-reported details describe the product’s scope and reach, not a promise that it will improve every track.
To test whether a library suits your work, pick one unfinished beat and use the same short brief for each sound you audition. Try several presets in the actual arrangement, change at least one detail, and keep only the sounds that make the musical role clearer. This keeps the test focused on usable presets, rather than the size of the library.
Make the sound bank serve the track
A well-chosen sound bank can give you more relevant sounds to work with and reduce unproductive preset browsing. Its value shows up when the sounds fit your genre, load in your setup, and respond well to edits. Judge it in a real beat, then let your performance, arrangement, and mix do the rest.
Explore sounds for your beatmaking workflow
If your sessions center on melodic trap, drill, dark trap, phonk, boom bap, or pluggnb, a focused preset library can make it easier to find a sound that suits the track. Pendora is built around those genres, with playable presets you can adapt to your notes, arrangement, and production style.
Pendora VST V3.0 includes 275+ hand-crafted presets, three expansion packs, 100+ MIDI files, and seven mix presets. It is a one-time purchase with royalty-free commercial use and lifetime updates under the stated terms. Check compatibility before installing: VST3 is supported on Windows and macOS, while AU is supported on macOS; the stated operating systems are macOS 11 Big Sur or later and 64-bit Windows 10 or 11. Explore the Pendora sound bank.
Frequently Asked Questions
Can a preset make my beat sound original?
A preset is a starting sound, not a finished musical idea. Change its notes, rhythm, envelope, effects, or layering so it serves your track.
Does a larger preset count mean better results?
Not necessarily. Genre fit, useful variation, clear organization, and compatibility with your instrument matter more than the raw count.
Is a sound bank the same as a sample pack?
No. A sound bank commonly contains playable presets for an instrument, while a sample pack commonly contains recorded audio such as one-shots or loops. Check the product description to confirm what you are getting.
How do I check whether a sound bank works in my DAW?
Confirm the plugin format, operating system, and instrument the bank requires, then compare them with your DAW setup. A preset library for one synth will not automatically load in another.
What if I mainly make trap or drill?
Look for sounds shaped for those genres and audition them in a beat you are already making. Tiger-Sounds’ Pendora VST is a genre-focused option for trap, drill, and related styles.
What Is a Flanger Effect? How It Shapes Audio in Production
Summary: A flanger effect mixes a sound with a very short, modulated copy of itself. The changing delay creates moving peaks and cancellations in the frequency spectrum, producing a hollow, sweeping character. Adjusting the rate, depth, feedback, and wet/dry balance changes how pronounced that movement sounds in a mix.
Why can one sustained synth note sound like it is sweeping through a tunnel? A flanger effect creates that movement by blending a sound with a slightly delayed copy, then changing the delay over time. For producers building a sound palette, our sound design plugins page covers tools for shaping and developing sounds, while the flanger itself is an effect you can use on many different sources.
The moving, metallic sweep is more than a preset character: it comes from interference between two versions of the same signal. That makes flanging useful for a dramatic accent, a shifting texture, or a brief transition, but it can also crowd a mix when the sweep is too strong. Understanding the delay and its controls makes it easier to choose when the effect fits.
How does a flanger create its sweeping sound?
Picture a signal splitting into two paths. One stays dry; the other is delayed by a very small amount. When the two paths are recombined, some frequencies line up and become louder, while others partly cancel. The repeating pattern of peaks and dips is called a comb filter, because its frequency response resembles the teeth of a comb.
In a flanger, the delay time changes continuously, often under control of a low-frequency oscillator, or LFO. That movement shifts the comb-filter pattern across the spectrum, which creates the familiar whoosh. A Digital signal processing tutorial from Analog Devices describes the flanger as a variable delay mixed with the direct signal, with the resulting peaks and cancellations moving as the delay changes.
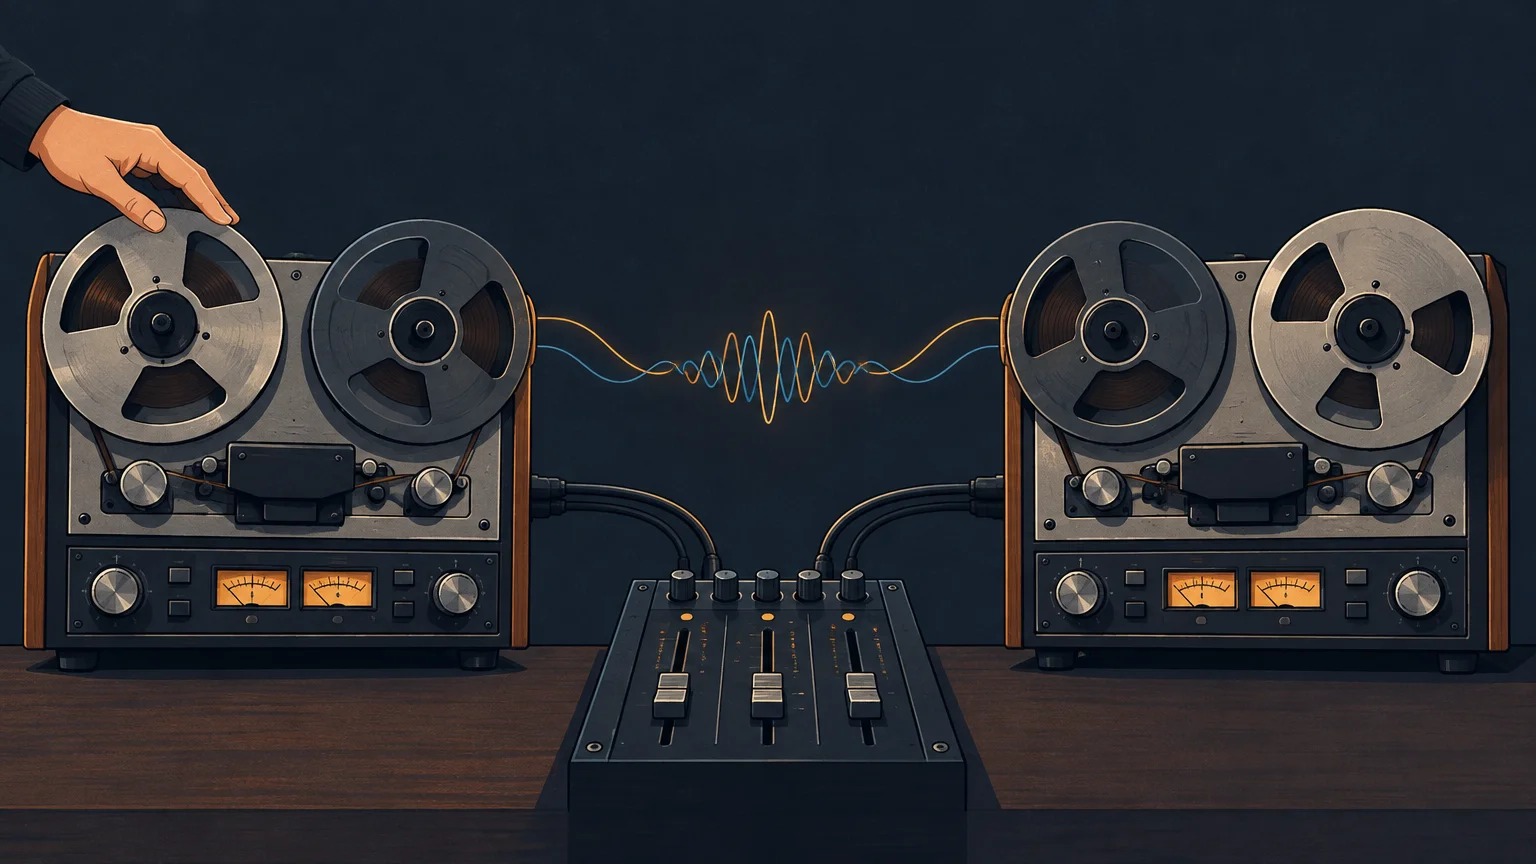
The sound is not simply “more reverb” or a delayed echo. It is a moving change in tone and phase caused by the interaction of the dry and delayed signals. Increase the delayed signal’s level and the notches and peaks become more pronounced; adjust the delay’s movement and the sweep changes character.
What do the main flanger controls do?
Flanger interfaces use different names, but most expose a similar set of controls. Start by understanding what each one changes, then adjust while listening to the source in the context of the beat.
- Rate sets how quickly the delay time moves. A slower rate gives a gradual sweep; a faster rate creates quicker, more obvious motion.
- Depth controls how far the delay time moves. Low depth gives a restrained tonal shift, while greater depth makes the sweep more pronounced.
- Feedback sends some of the processed signal back into the effect. More feedback emphasizes the resonant, hollow quality; too much can make the sound sharp or distracting.
- Mix, sometimes labeled wet/dry, balances the processed signal against the original. Lowering the wet level can keep the effect present without letting it dominate.
- Manual or delay controls, when available, set the starting point or range of the delay. These shape where the moving notches sit in the sound.
For a quick first pass, lower the mix and feedback, then bring up the depth until the movement is audible. Set the rate according to the musical role: a slow sweep can sit behind a sustained pad, while a quicker sweep can work as a brief accent. If the sound loses weight, reduce the effect level or automate it only where you want the sweep.
Flanger vs chorus vs phaser: what is the difference?
These three modulation effects can all add movement, but they create it in different ways. A flanger mixes the original with a short, moving delay. Chorus typically uses delayed, modulated copies to suggest multiple slightly different performances, while a phaser moves notches created by phase shifting. The UC San Diego notes describe flanging as a time-varying comb filter and explain its relationship to chorus and other delay effects.
| Effect | How it creates movement | Common character |
|---|---|---|
| Flanger | Mixes the original with a short, modulated delay | Pronounced, hollow sweep or metallic whoosh |
| Chorus | Blends the source with modulated copies that vary slightly in timing or pitch | Thicker, more layered sound |
| Phaser | Uses phase-shifting filters to move notches through the spectrum | Smoother, swirling movement |
Use a flanger when you want the movement itself to be obvious, such as a transition or a distinctive vocal accent. Choose chorus when the goal is a broader, layered impression, and try a phaser when you want a moving tone without the same short-delay comb-filter character. Listening to the same sound through each effect is a practical way to hear the difference.
Where does a flanger fit in beatmaking?
Flanging works well on sounds with enough sustained or harmonic content for the moving notches to be heard. A held synth note, vocal ad-lib, guitar, or atmospheric layer can make the sweep clear. On a short kick or snare, the effect may be less noticeable unless you use it as a transition, layer, or brief accent.
In melodic trap, drill, R&B, or pluggnb, try it on a background synth or a single phrase rather than automatically placing it across every melodic part. On a sustained pad, a subtle sweep can add motion behind the lead. On a vocal ad-lib, automation can bring the effect in at the end of a line, then return to a cleaner sound for the next phrase. These are production choices, not rules: the important test is whether the effect supports the arrangement.
If preset selection is slowing a session down, our hand-crafted Pendora sound bank is designed for melodic trap, drill, R&B, pluggnb, dark trap, lo-fi, and phonk production. Starting with a source that already fits the beat can make it easier to experiment with processing, including flanging, without spending time sorting through sounds that do not suit the track.
How can you use a flanger without crowding the mix?
Start with a specific role for the effect. If you want a wide, obvious transition, a stronger sweep may suit the moment. If you want a background layer to move, keep the mix lower and check that the source still has a clear place in the arrangement.
Pay particular attention when a flanger is used on a doubled recording or alongside a second copy of the same sound. Small timing differences between similar signals can create comb filtering and frequency cancellations even when no flanger is inserted. Sweetwater’s 2026 comb-filtering guide explains how slight timing offsets between copies of a sound create this effect, which is useful context when diagnosing a thin or hollow layer.
A simple workflow is to bypass the effect periodically, match the perceived level, and ask whether the processed version adds useful motion. Automate the mix or bypass state if the flanger works only at a particular moment. For a stereo track, check the result in mono too, since a wide, moving effect can change how the parts combine when summed.
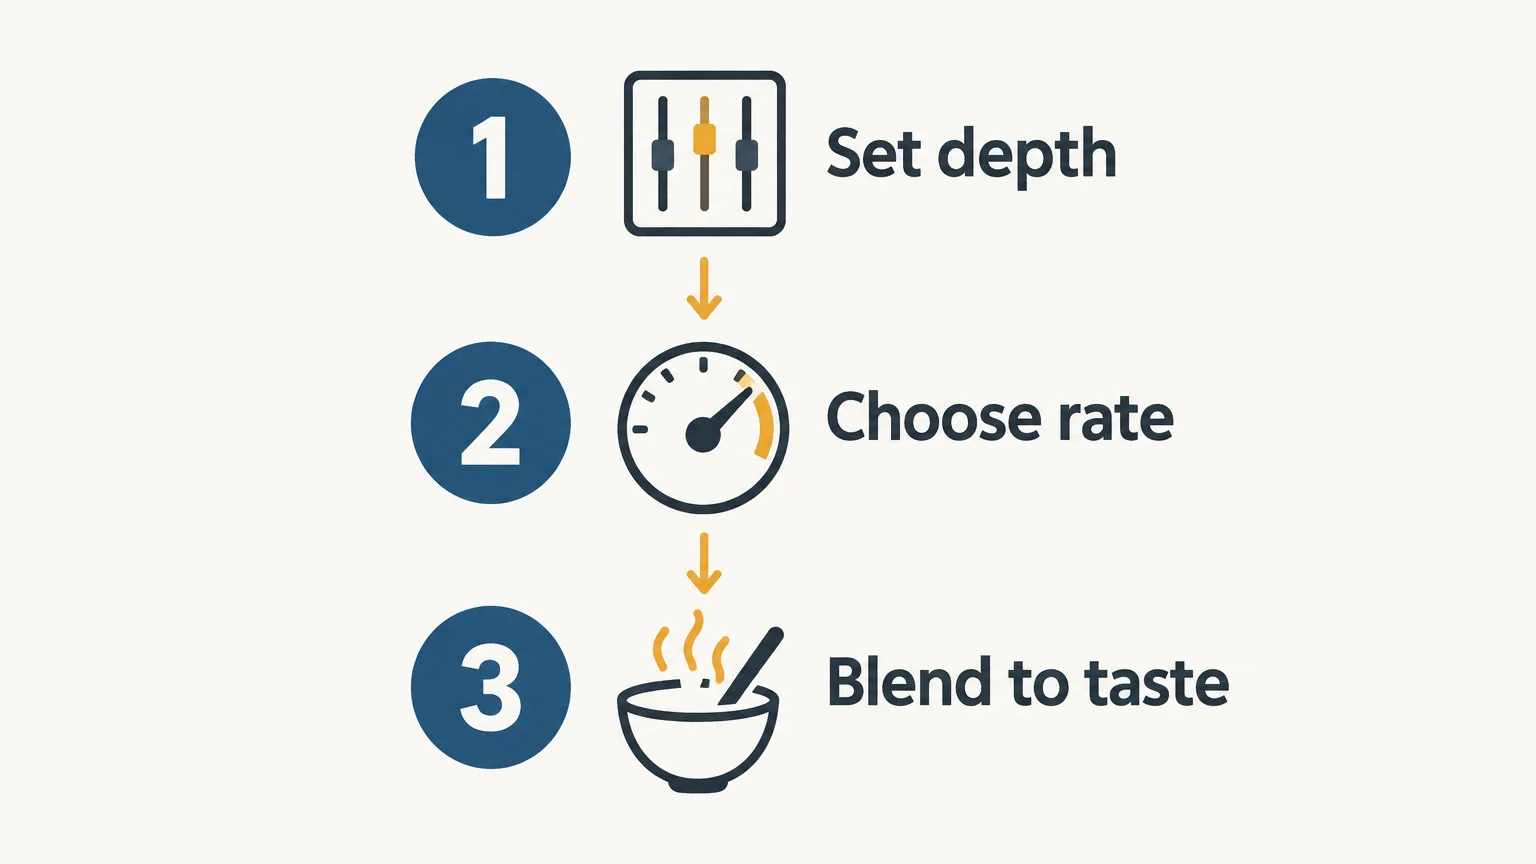
Choose the movement your track needs
A flanger effect creates motion by mixing a source with its own short, changing delay. Its comb-filter sweep distinguishes it from the layered impression of chorus and the phase-shifted movement of a phaser. Begin with a restrained mix, adjust the rate and depth to suit the part, and use automation when the effect belongs only in selected moments.
Find sounds to shape in your DAW
A flanger changes the character of its input, so the source matters. For melodic trap, drill, R&B, pluggnb, dark trap, lo-fi, and phonk sessions, a focused sound bank can provide starting points for your own processing and arrangement choices.
Our Pendora sound bank includes hand-crafted presets and production assets for beatmaking, with VST3 support on Windows and macOS and AU support on macOS. Explore our VST plugins to find sounds for your next project.
Frequently Asked Questions
Is a flanger the same as a delay?
No. A flanger uses a very short delay that changes over time and is mixed with the dry signal, creating moving peaks and cancellations. A conventional delay is usually heard as a repeat or echo.
What does a flanger sound like?
It often sounds like a hollow, metallic sweep or a whoosh that rises and falls. The character changes with the rate, depth, feedback, and mix level.
Should I put a flanger on a whole track?
You can, but it is often easier to control the effect on a selected layer, phrase, or transition. Compare the processed and dry versions in the full arrangement so the movement does not distract from the main parts.
Can I use a flanger on a synth preset?
Yes. Sustained synth notes and pads make the changing sweep easy to hear, while automation can confine it to a specific phrase. Pendora is a sound bank for melodic and beatmaking sounds, not a flanger effect, so process its sounds with an effect in your DAW if you want that character.
How is a phaser different from a flanger?
A flanger mixes the original sound with a short, modulated delay. A phaser uses phase-shifting filters to move notches through the spectrum, giving it a different kind of sweep.
DistroKid vs TuneCore for Producers Releasing Beats
For most producers releasing beats under one name, DistroKid and TuneCore cost the same at the entry level ($24.99 a year) and both let you keep 100% of store earnings, so the choice comes down to three details: YouTube Content ID, splits with collaborators, and how many artist names you run. TuneCore includes YouTube Content ID in its cheapest Unlimited plan and offers pay-per-release for people who drop once a year. DistroKid is the better fit if you run several artist or producer aliases, since its $89.99 Ultimate plan covers 1 to 100 artists.
One thing matters more than either company: if your instrumental uses drum kit samples, loops, or a beat you leased, both distributors say it is not eligible for Content ID. That rule changes the math for most type beat producers, so it gets its own section below.
Prices and policies verified on November 14, 2026 from the official DistroKid and TuneCore pricing pages and help centers.
What’s in this comparison
- Quick verdict for producers
- DistroKid vs TuneCore side by side
- Pricing and plans in detail
- Content ID: the rule most producers miss
- Splits with artists and co-producers
- What happens if you stop paying
- Publishing royalties
- Which one should you choose
- FAQ
Quick verdict for producers
- Choose DistroKid if you upload lots of singles and beat tapes, release under more than one alias, or want to pay a collaborator without forcing them onto a full subscription ($10 a year option).
- Choose TuneCore if you want YouTube Content ID in the base plan, you release once or twice a year and prefer pay-per-release, or you want publishing administration from the same company.
- Choose neither yet if your plan is to lease the same beats on BeatStars or YouTube. Distributing a beat that other artists are also releasing songs on creates Content ID conflicts and gives you little store income. Sell the leases first, distribute the beats you keep for yourself.
DistroKid vs TuneCore side by side
| Criterion | DistroKid | TuneCore |
|---|---|---|
| Cheapest unlimited plan | Musician, $24.99/yr (1 artist) | Rising Artist, $24.99/yr |
| Mid plan | Musician Plus, $44.99/yr (2 artists) | Breakout Artist, $44.99/yr |
| Top plan | Ultimate, $89.99/yr (1 to 100 artists) | Professional, $54.99/yr (1 primary artist, +$14.99/yr each extra) |
| Pay-per-release option | No | Single $24.99/yr, album $44.99 first year then $56.49/yr |
| Store earnings kept | 100% | 100% ownership; no store commission stated on plans |
| YouTube Content ID | Paid per-release extra (Social Media Pack), earnings minus 20% | Included from Rising Artist, 20% fee on social and video earnings |
| Content ID with samples or loops | Not eligible | Not eligible |
| Splits | All plans; payee needs DistroKid or a $10/yr payee option | Unlimited plans only, not pay-per-release |
| Custom label name | Musician Plus and up | Professional only |
| Support speed | Not published on the pricing page | 3, 2 or 1 business days depending on plan |
| Music stays up if you stop paying | Only releases with the Leave a Legacy extra | No, removed when the plan expires |
| Publishing administration | Not listed on the pricing page | $75 per writer + 20% commission |
Sources: DistroKid pricing, TuneCore pricing, and the help center articles linked in each section.
Pricing and plans in detail
DistroKid
DistroKid sells three yearly plans. All of them include unlimited uploads and the company states you keep 100% of your earnings.
- Musician, $24.99/yr: one artist, unlimited songs, royalty splits, Spotify artist profile, mobile app.
- Musician Plus, $44.99/yr: two artists, daily streaming stats, custom label name, custom release and preorder dates, synced lyrics in Apple Music.
- Ultimate, $89.99/yr: 1 to 100 artists, Spotify and Apple Music monitoring, advanced analytics, playlist contact search, and the ability to replace song audio.
For a producer, Musician Plus is the interesting one. Two artist slots means you can release your own beat tapes under your producer name and still handle a project for one artist you work with closely.
TuneCore
TuneCore has three Unlimited plans plus a pay-per-release model, and all of them renew yearly.
- Rising Artist, $24.99/yr: unlimited releases to 150+ stores, analytics, scheduled release dates, revenue splits, YouTube Content ID.
- Breakout Artist, $44.99/yr: adds Store Automator and Cover Art Creator, faster support.
- Professional, $54.99/yr: adds multi-artist management and a custom label name. One primary artist is included; each extra primary artist costs $14.99 a year.
- Pay-per-release: a single is $24.99 a year, an album is $44.99 the first year and $56.49 each year after. Distribution credits are sold in packs and never expire.
The free option is gone. TuneCore’s help center states the New Artist Plan was discontinued effective June 18, 2025, and free distribution to social platforms ended May 23, 2025. If an old guide tells you TuneCore is free, it is out of date.
Watch the artist name trap on Professional: TuneCore’s Unlimited plan FAQ says artist names are case-sensitive, so “Lil Shouty” and “lil shouty” count as two different paid artists. If you credit yourself as “prod. by” on a lot of releases, keep the spelling identical every time.
Content ID: the rule most producers miss
Content ID is the YouTube system that finds your audio in other people’s videos and pays you, or blocks them. For beat sellers it sounds like free money. In practice, both distributors exclude most of what a typical type beat contains.
DistroKid’s eligibility page says a release is ineligible if it contains “any audio that you didn’t create yourself like beats, loops, samples.” It specifically rules out audio from sample libraries and free sounds bundled with GarageBand, Ableton, Logic or Fruity Loops. It also requires that you won’t let other artists use sounds from your song.
TuneCore’s eligibility rules are slightly different in wording but land in the same place. Tracks are ineligible if they contain “instrumental content that has previously been used in other tracks (such as samples or beats) even if it’s now exclusively licensed to you,” or production loops and samples from audio libraries. TuneCore warns that violations can get your account permanently blocked from the service.
What this means for you:
- Drum kit one-shots and Splice loops: both pages exclude sample-library audio. A beat built on kit drums is not a safe Content ID candidate on either service, even though DistroKid explicitly allows royalty-free samples for normal store distribution.
- Beats you lease: if five rappers drop songs on your beat, your instrumental in Content ID would claim their videos. DistroKid’s rule against letting others use your sounds exists exactly for this.
- Synth presets you play yourself: neither help page addresses this case directly. If Content ID income matters for a release, ask support before opting in rather than guessing.
So TuneCore’s “Content ID included” advantage is real, but only for releases that pass these rules. For a producer who leases beats and builds drums from kits, it may never apply.
Splits with artists and co-producers
Both services can automatically pay a percentage of streaming income to collaborators. The details differ in ways that matter for producers who co-produce or who get points on an artist’s release.
DistroKid: its Splits guide says you can add producers, bandmates and managers to any song. A payee normally needs a DistroKid subscription, but you can pay $10 a year so they can collect without one, or they get 50% off signing up. Collaborators only see their own percentage.
TuneCore: TuneCore Splits works only on paid Unlimited plans, not on pay-per-release. Splits are set per track, can be saved and reused, and are not applied retroactively to money already in your account. They also exclude publishing revenue and Tidal direct artist payments.
Splits handle streaming money, not the deal itself. Agree on your percentage before release, the same way you set lease terms in your beat pricing.
What happens if you stop paying
This is the hidden cost of both services, and it is close to a tie.
DistroKid’s help center says that if you stop paying, your releases “may be removed” from the stores, with notice first, and come back automatically once the payment goes through. The exception is the Leave a Legacy extra: releases with it stay up even if you cancel. It is added per release, not once for your whole catalog.
TuneCore says Unlimited plans auto-renew, there is a grace period if the payment fails, but if you cancel the renewal yourself there is no grace period and your music is removed the day the plan expires.
Either way, distribution is a yearly bill for as long as you want those beats online. Count it in your budget the same way you count your DAW and sounds.
Publishing royalties
As the person who wrote the music, you are also owed publishing royalties, which are separate from the streaming income your distributor collects. TuneCore sells a publishing administration service: its pricing article lists $75 per writer plus a 20% commission on the royalties it collects, and 50% on sync licensing earnings. It only collects the publisher’s share; your writer’s share comes from your PRO.
DistroKid’s pricing page does not list a publishing administration service, so we are not comparing it here. If you place beats with artists who get real streams, publishing is worth setting up no matter which distributor you use.
Which one should you choose
Choose DistroKid if:
- You release often and want unlimited uploads at the lowest price under one name ($24.99).
- You run a producer alias plus one artist project (Musician Plus, $44.99) or many names (Ultimate, $89.99 for up to 100).
- You pay co-producers who don’t want their own subscription.
Choose TuneCore if:
- You make fully original material that passes Content ID rules and want Content ID without a per-release extra.
- You release one single or one album a year and pay-per-release is cheaper than a plan.
- You want distribution and publishing administration with one company.
For a producer whose income mostly comes from leases, the distributor matters less than the beats. Read our BeatStars vs Airbit comparison first, then distribute only the instrumentals you are not leasing.
FAQ
Is DistroKid or TuneCore cheaper for one artist?
Same price at the entry level: $24.99 a year for both. TuneCore can be cheaper if you release a single only once a year using pay-per-release, and DistroKid is cheaper if you need many artist names, since Ultimate covers up to 100 for $89.99.
Can I upload type beats to Spotify with DistroKid or TuneCore?
Yes, both distribute instrumentals to stores. DistroKid’s help center says royalty-free samples from services like Splice are fine for store distribution. Avoid distributing a beat you are actively leasing to other artists, for the Content ID reasons above.
Can I put my beats in YouTube Content ID?
Only if you made every sound yourself and nobody else uses the beat. Both DistroKid and TuneCore exclude tracks with loops, sample-library audio or beats used in other songs, and TuneCore warns that breaking the rules can block your account from the service.
Can I switch from one to the other?
Yes, but each service bills separately, and TuneCore removes music when a canceled plan expires. Make sure the new upload is live before you cancel the old plan, and don’t register the same song for Content ID with both companies: DistroKid says that causes a conflict.
Bottom line
DistroKid wins for volume and multiple aliases. TuneCore wins for included Content ID, pay-per-release and publishing under one roof. Neither one will make a weak beat earn, so the sounds still come first. If you want melodies that don’t sound like every other upload, Pendora V3 has 275+ presets for trap, drill, phonk and pluggnb for a one-time 149 €, and Pendora Lite lets you test 30 of them for 29 €. For more tools to cook with, see our list of the best VST plugins for type beats.
Best Free Drum Kit for FL Studio: What to Download
Summary: For FL Studio, the best free drum kit is one with sounds that fit your genre, a format your workflow can use, and clear licensing. Tiger-Sounds’ free Temple Drumkit is a starting point for trap, drill, and plug producers; check the download details and usage terms before building it into a commercial beat.
A free kit earns its place in a session when its kicks, snares, hats, and percussion suit the beat, not just because the download contains hundreds of files. For producers comparing the best free drum kit for FL Studio, start with genre fit and clear usage terms. If you also want a broader production library, browse our sound kits for FL Studio alongside standalone drum samples.
A practical free starting point is our Temple Drumkit, available through newsletter signup and made for trap, drill, and plug. Treat it as a genre-focused option, then check the kit’s file format and license before adding it to a project you plan to sell or release.
What should a free drum kit include?
Start with the sounds you actually use in a pattern: a few distinct kicks, snares or claps, closed and open hi-hats, and useful percussion. For trap and drill, listen for kicks that leave room for the 808, snares that cut through the melodic layer, and hats that stay clean when you program fast rolls. A large sample count matters less than having several usable options without sorting through near-identical files.
Our free Temple Drumkit is a newsletter incentive with more than 80 hand-crafted drums for trap, drill, and plug. Its listed description does not specify the file format, so check the download details before assuming it fits a particular FL Studio setup.
Does the sound fit your genre and beatmaking workflow?
Audition a few sounds in context rather than judging them only in isolation. Put a kick under your usual 808, try a snare against the melody, and test whether the hats sit naturally at the tempo you use. A kit aimed at one style may not suit another: a sparse boom bap pattern and a busy drill rhythm place different demands on percussion.
If trap is your main lane, compare the sounds with the focused options on our trap drumkit page. For other styles, keep your selection criteria tied to the beat: sound character, variety, and how quickly you can find a part that works.
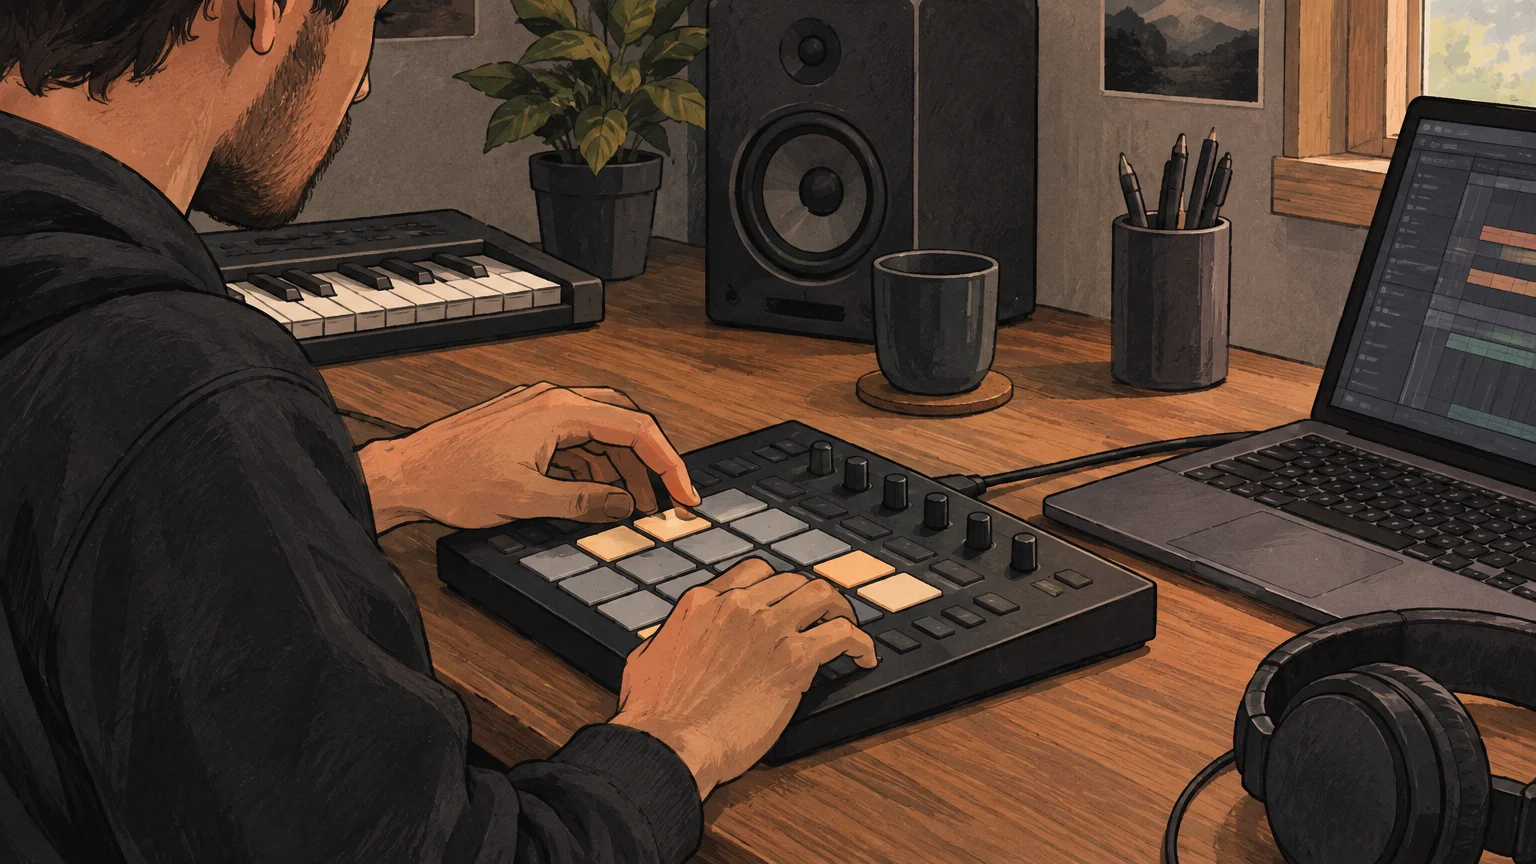
Will the files work in FL Studio?
Check the actual file types before downloading. Audio samples can be used in FL Studio’s sampler and playlist workflows; Image-Line’s support guidance describes importing WAV and other audio files by dragging them into a project. A kit supplied as audio files is different from a VST instrument or a bank of presets for Serum, Omnisphere, Kontakt, or Vital.
For a smoother setup, choose clearly named audio files and keep the extracted kit in a folder you can locate again. You can add that folder to the FL Studio Browser or drag individual samples into a project. If you want a genre-specific starting point beyond the free option, see our drumkit for FL Studio.
Are the samples licensed for commercial beats?
Free to download does not automatically mean cleared for every use. Read the kit’s license for permission to use the sounds in commercial releases, whether attribution is required, and whether redistribution of the original files is prohibited. Keep a copy of the terms with the kit so you can check them when releasing or licensing a beat.
Creative Commons licenses have different conditions: some restrict commercial use or adaptations. Review the Creative Commons license guidance and the kit’s own terms rather than assuming every free download grants the same rights.
What should you check before downloading?
Use this short checklist before importing a kit into your template. It helps you avoid downloads that do not match your sound, do not load as expected, or lack terms you can confidently follow.
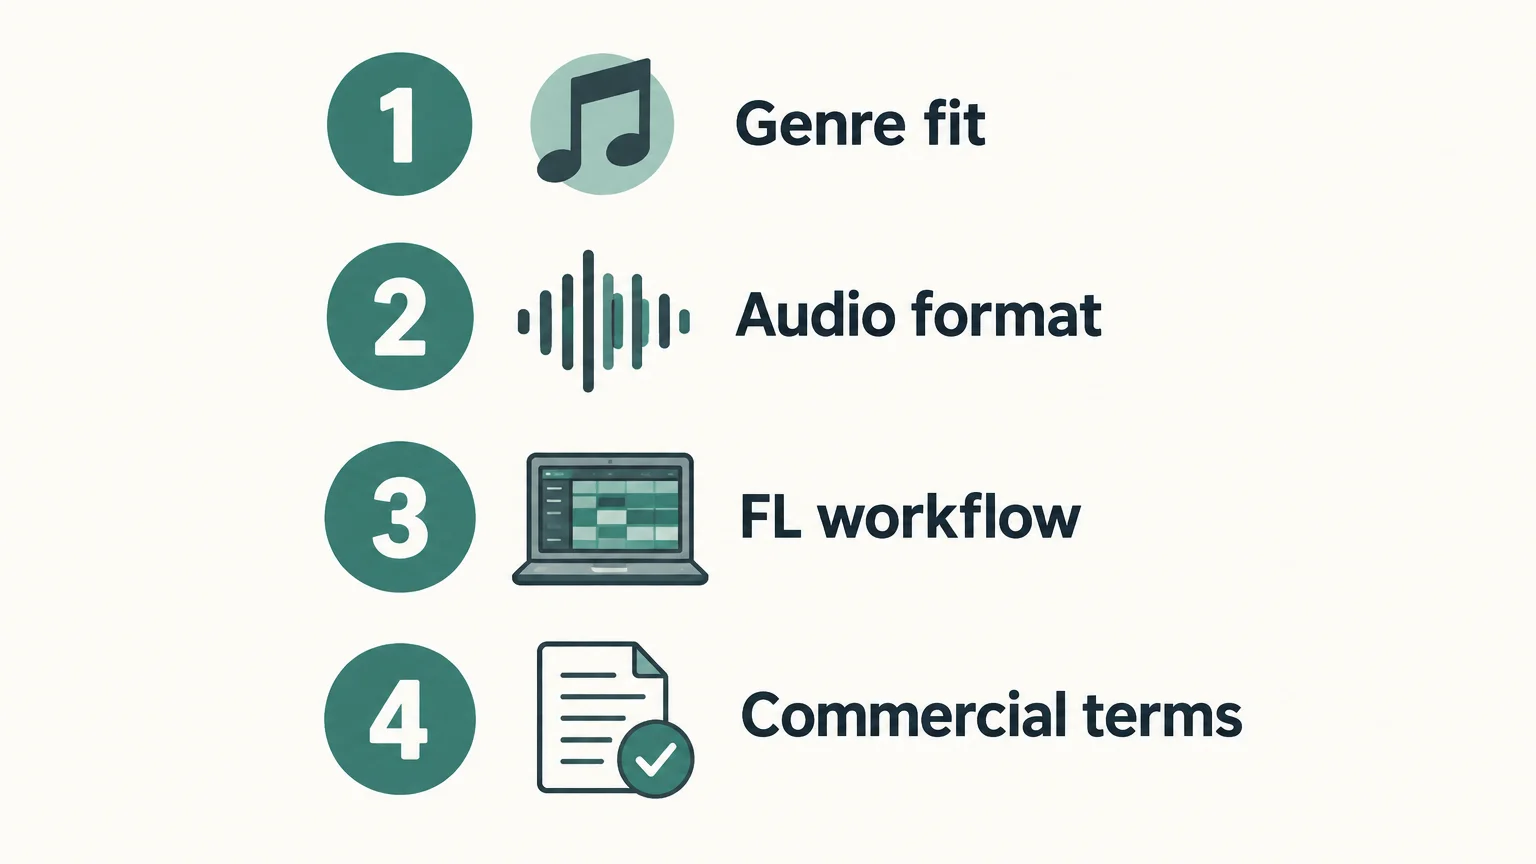
If a kit contains samples taken from existing commercial recordings, do not assume that a short excerpt is automatically cleared. The U.S. Copyright Office explains that fair use depends on the facts of a particular case and that there is no fixed minimum amount that is always safe to sample; its musician copyright guidance is a useful starting point for understanding the issue.
Choose sounds you can use with confidence
The best free drum kit for FL Studio is the one that fits your genre, loads smoothly into your project, and comes with terms that match how you intend to use the beat. Audition a small selection against your own 808 and melodic parts, check the format and license, and save the kit’s usage terms with your project files.
Find drumkits for your next FL Studio session
Once you know which sounds and workflow you need, compare drumkits by genre and the parts you want to build into your patterns. Tiger-Sounds makes downloadable drumkits and related production assets for beatmakers, including a free Temple Drumkit available through newsletter signup.
Browse drumkits for FL Studio and choose a set that fits your production style. Tiger-Sounds products are royalty-free for commercial use under the stated licensing terms, which exclude account sharing and redistribution of the original products.
Frequently Asked Questions
Are free drum kits compatible with FL Studio?
Audio sample kits can work in FL Studio when their file formats are supported. Check the included file types and import a few samples into a test project before organizing the full kit.
Does free mean I can use a kit in commercial beats?
Not necessarily. Check the specific license for commercial use, attribution, and redistribution conditions before releasing or selling a beat.
What sounds should a beginner look for?
Start with a small, usable selection of kicks, snares or claps, closed and open hi-hats, and percussion. Choose sounds that sit well with your usual 808 and melodic parts.
Is the Temple Drumkit available for free?
Yes, the Temple Drumkit is offered as a free newsletter incentive for trap, drill, and plug producers. Check the download details for its file format before importing it into your FL Studio workflow.
Do drum samples require Serum or another VST?
No, audio one-shots can be loaded into FL Studio’s sampler or placed in the playlist without a separate synth plugin. VST instruments such as Serum or Vital are for different sound-design workflows.